How to use Speak to Quote
Five short lessons. Each one shows the real app, a step at a time, with a video you can watch first. Start with lesson 1; the others can wait until you need them.
- 1Your first quoteSet up, say the job, send the quote, get it accepted.
- 2Prices that fill themselves inYour price book, saved customers and job templates.
- 3Estimates and invoicesEstimate first, invoice when the job is done, mark it paid.
- 4Deposits, extras and remindersAsk for a deposit, offer extras, let the app chase for you.
- 5Plans and floor plans ProCount fittings from a drawing, or measure the rooms yourself.
The business and the customers in the pictures are made up.
Lesson 1
Your first quote
From a new account to a quote your customer has accepted. Allow five minutes the first time; after that a quote takes about one.
Twelve steps, with pictures
-
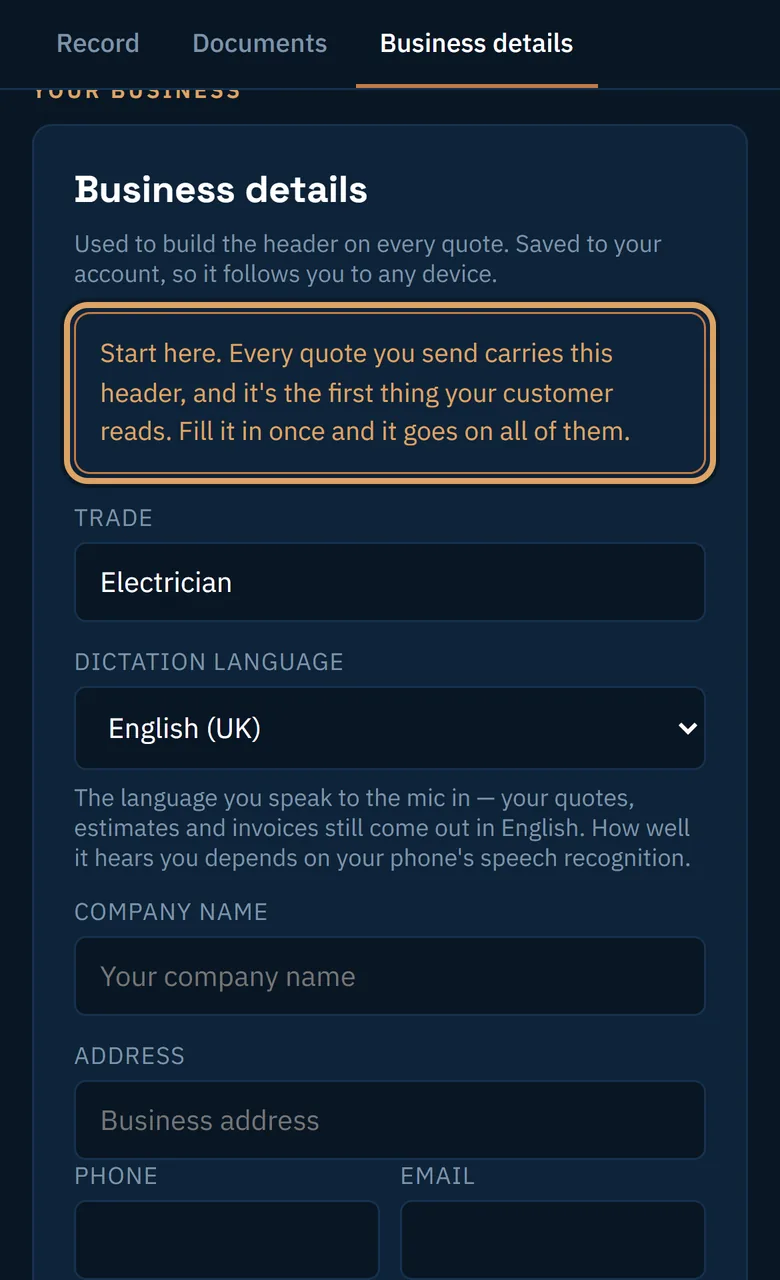
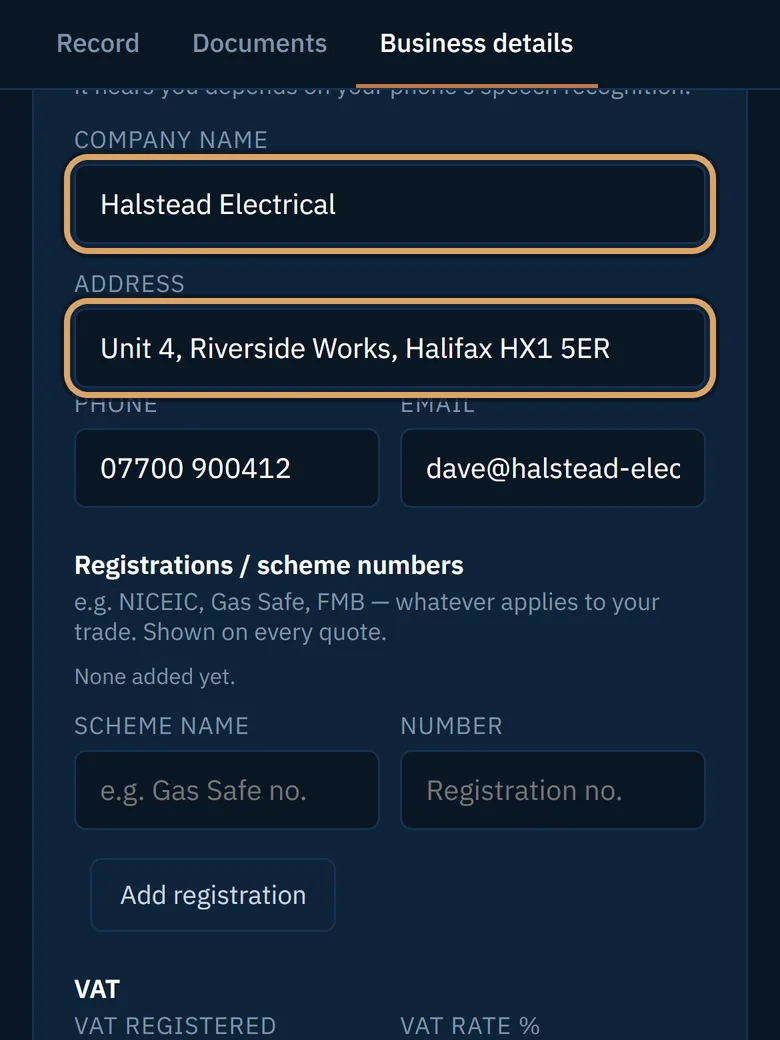
Fill in your business details
The first time you sign in, the app opens on Business details. Type your company name, address, phone and email. They make the header of every quote you send.
-
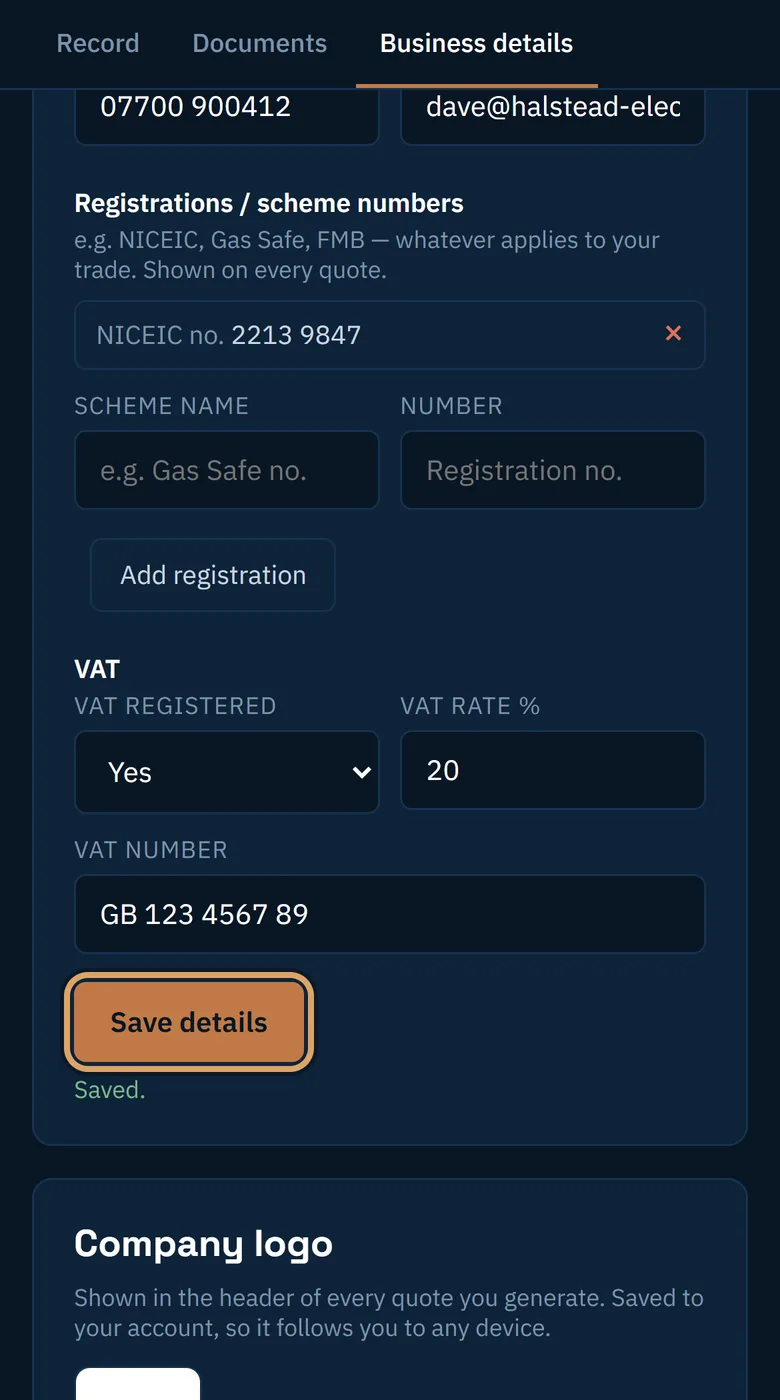
Add your registrations and VAT, then save
Add any scheme numbers you hold, such as NICEIC or Gas Safe, and say whether you are VAT registered. Then tap Save details. You only do this once.
-
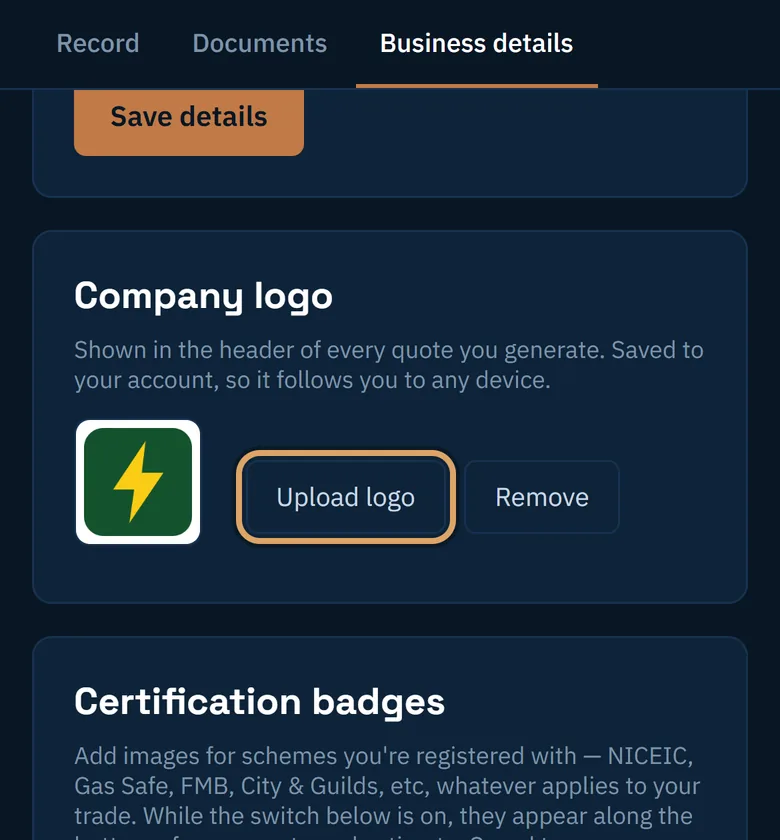
Add your logo
A little further down, tap Upload logo and choose a picture. It goes at the top of every document.
-
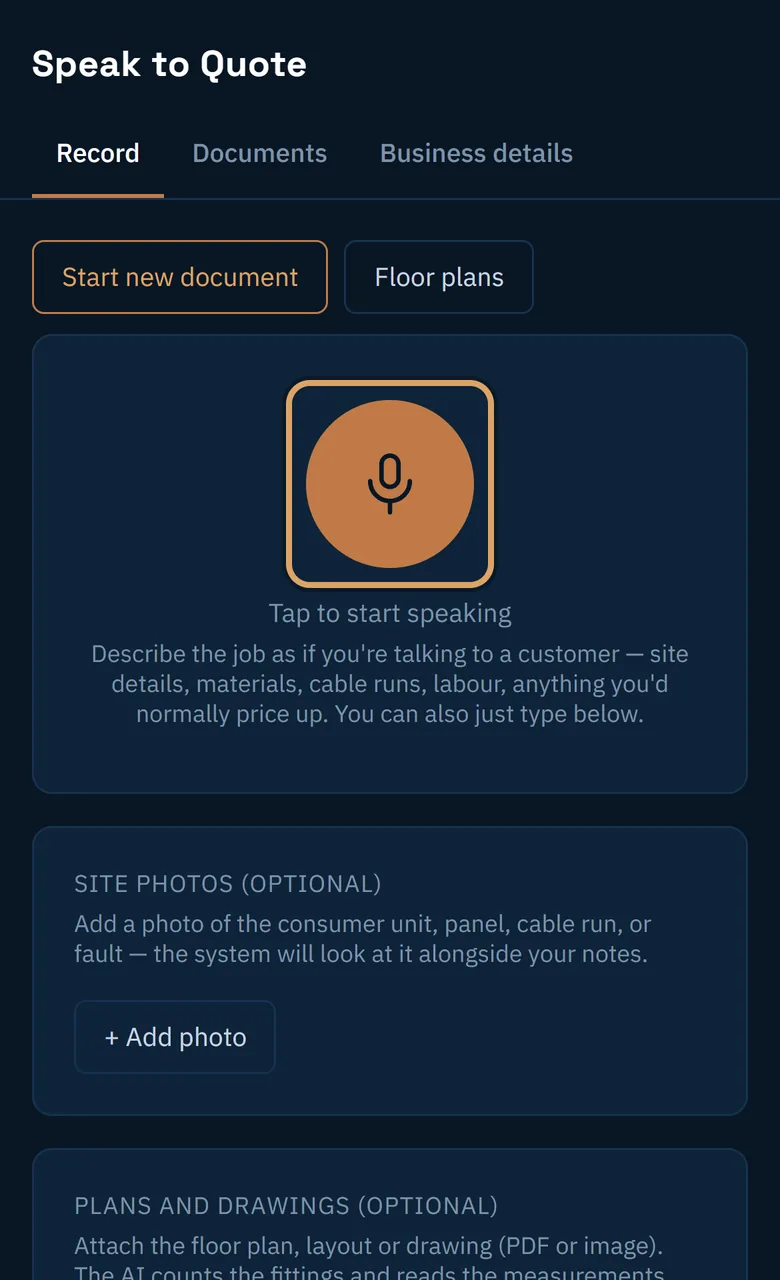
Tap the mic
Go to the Record tab and tap the round mic button. The first time, your phone asks if the app may use the microphone: allow it.
-
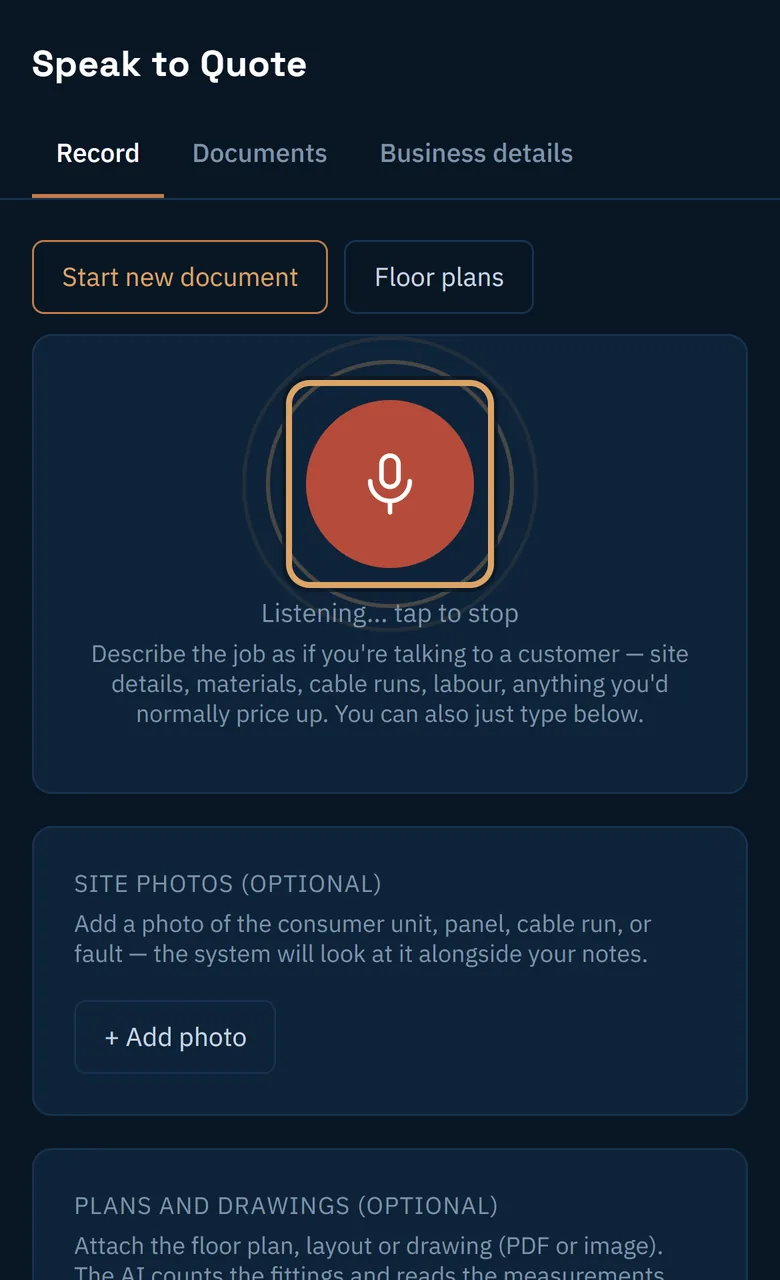
Say the job
Talk as you would to the customer: who it is for, where, what you will do, and your prices if you know them. Tap the mic again to stop. Somewhere noisy? Type it into the box instead.
-
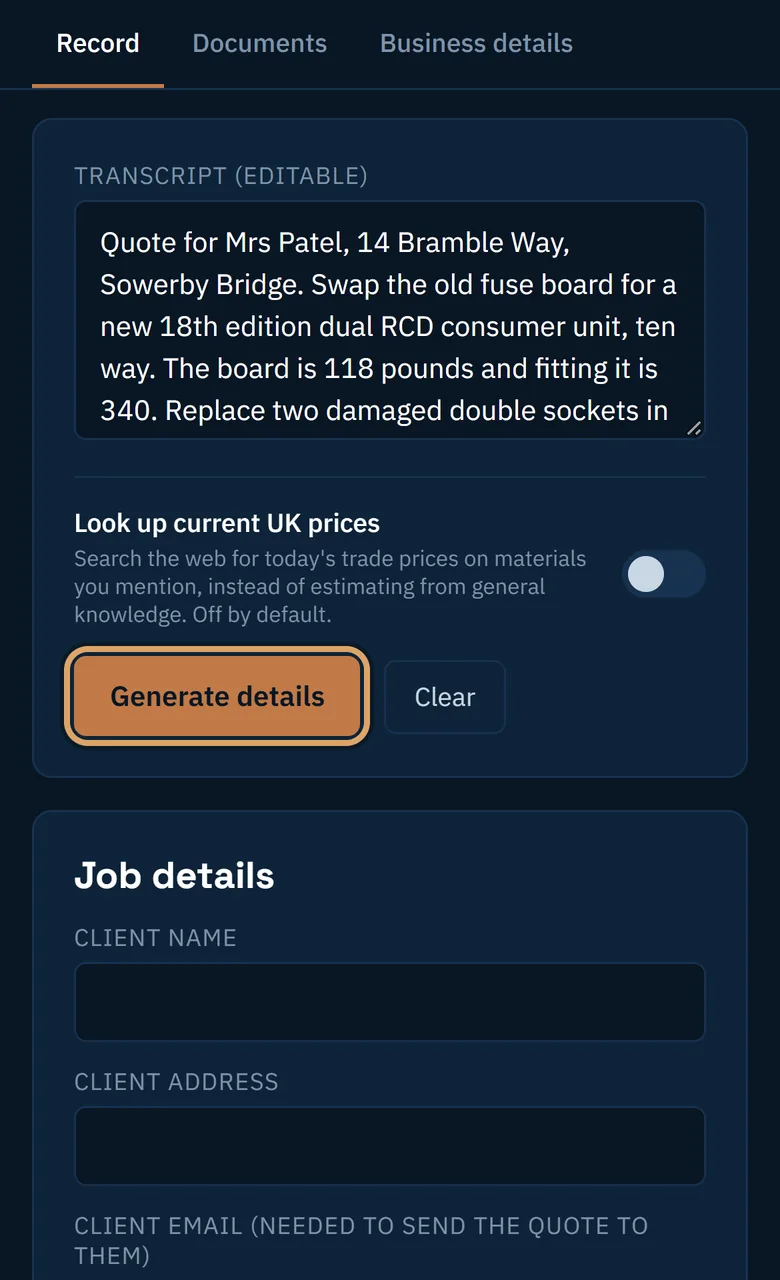
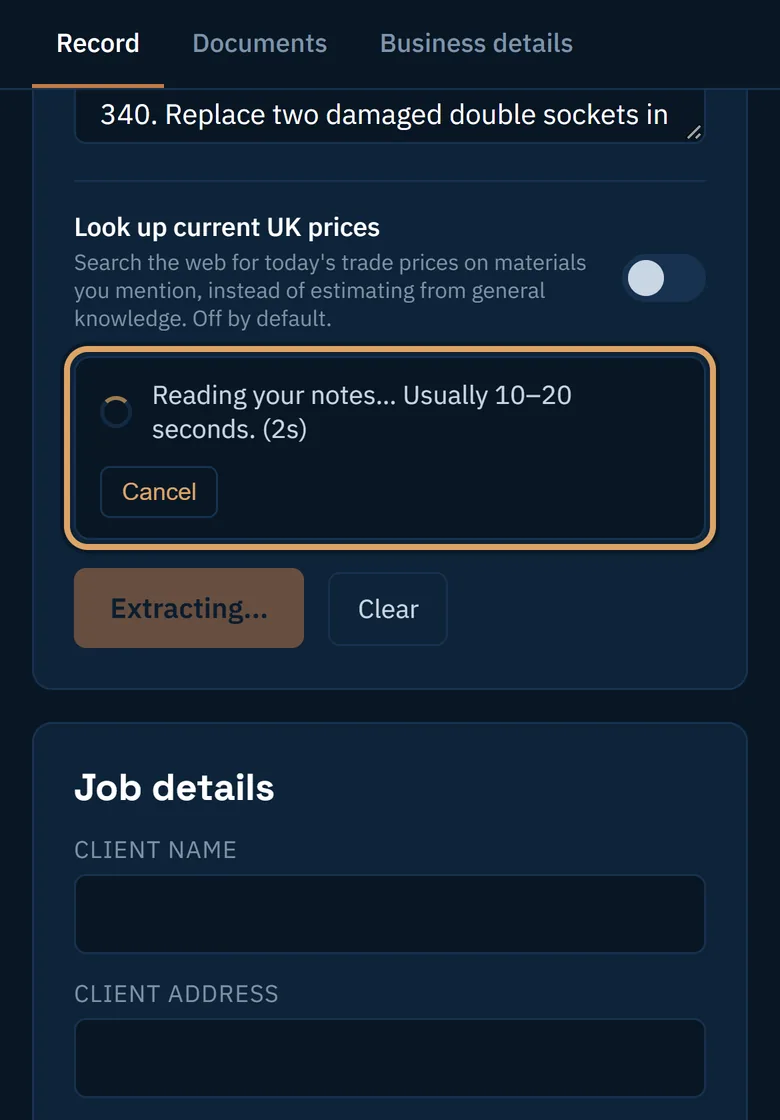
Tap Generate details
Your words appear in the Transcript box, where you can correct them. Then tap Generate details. The AI usually takes 10 to 20 seconds.
-
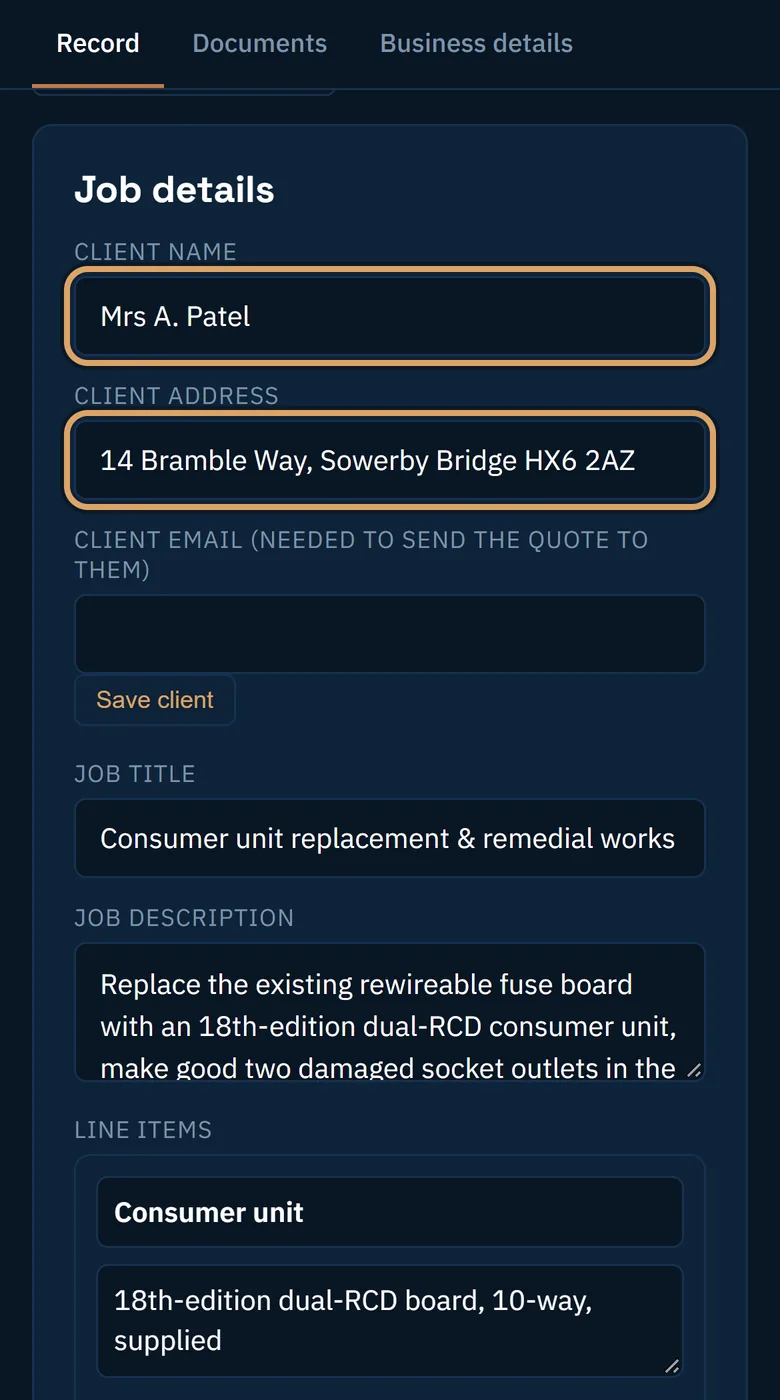
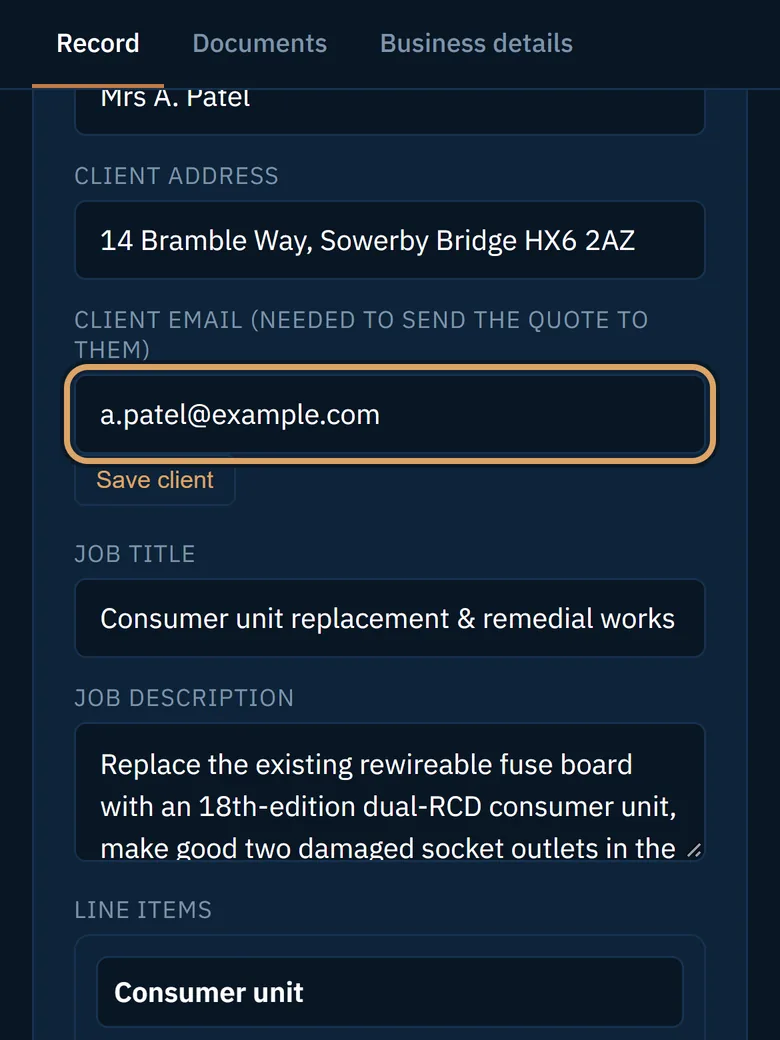
Check the job details
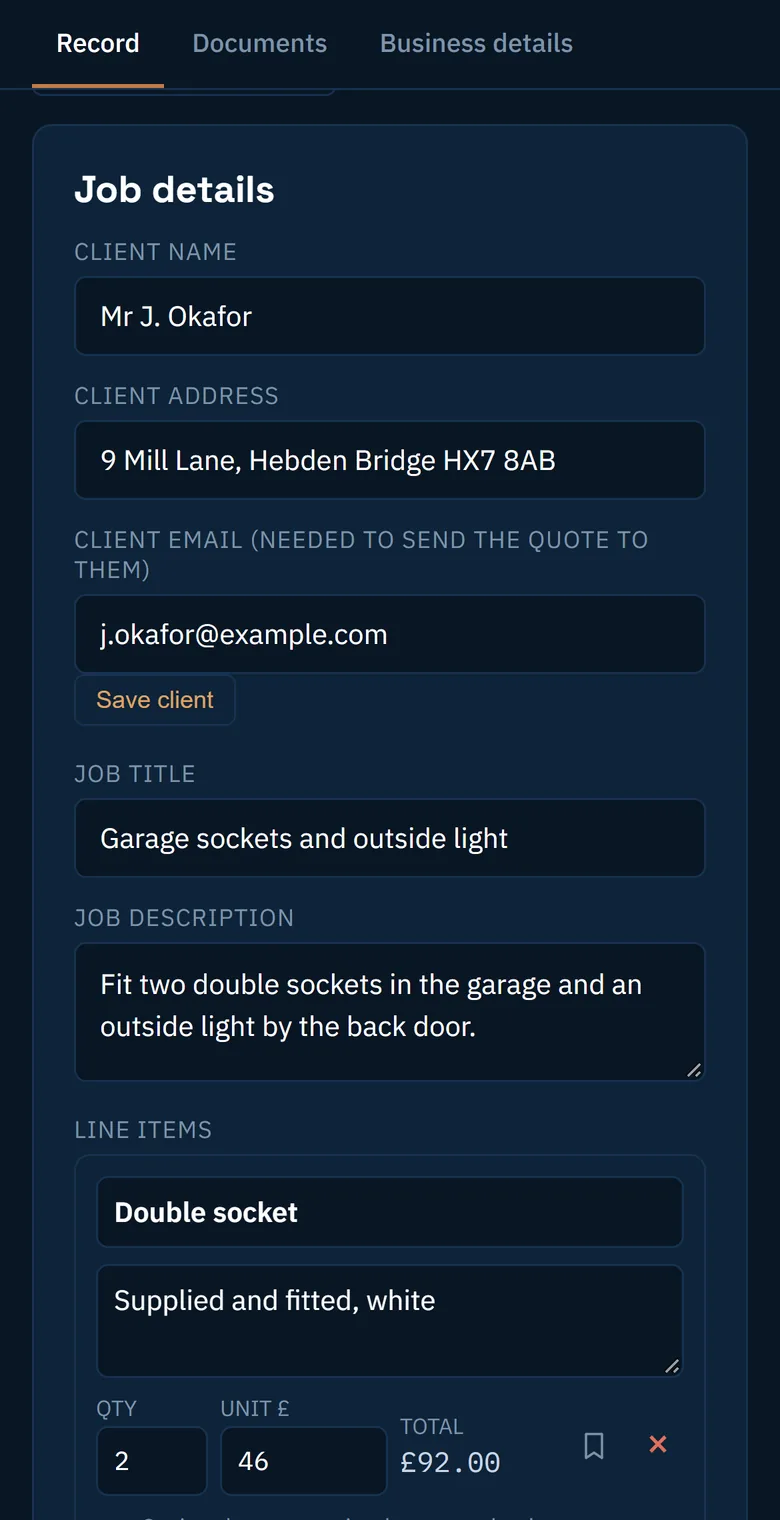
The AI fills in the client, the job and a priced line for each item. Everything can be changed. Add the client’s email address so the quote can be sent to them.
-
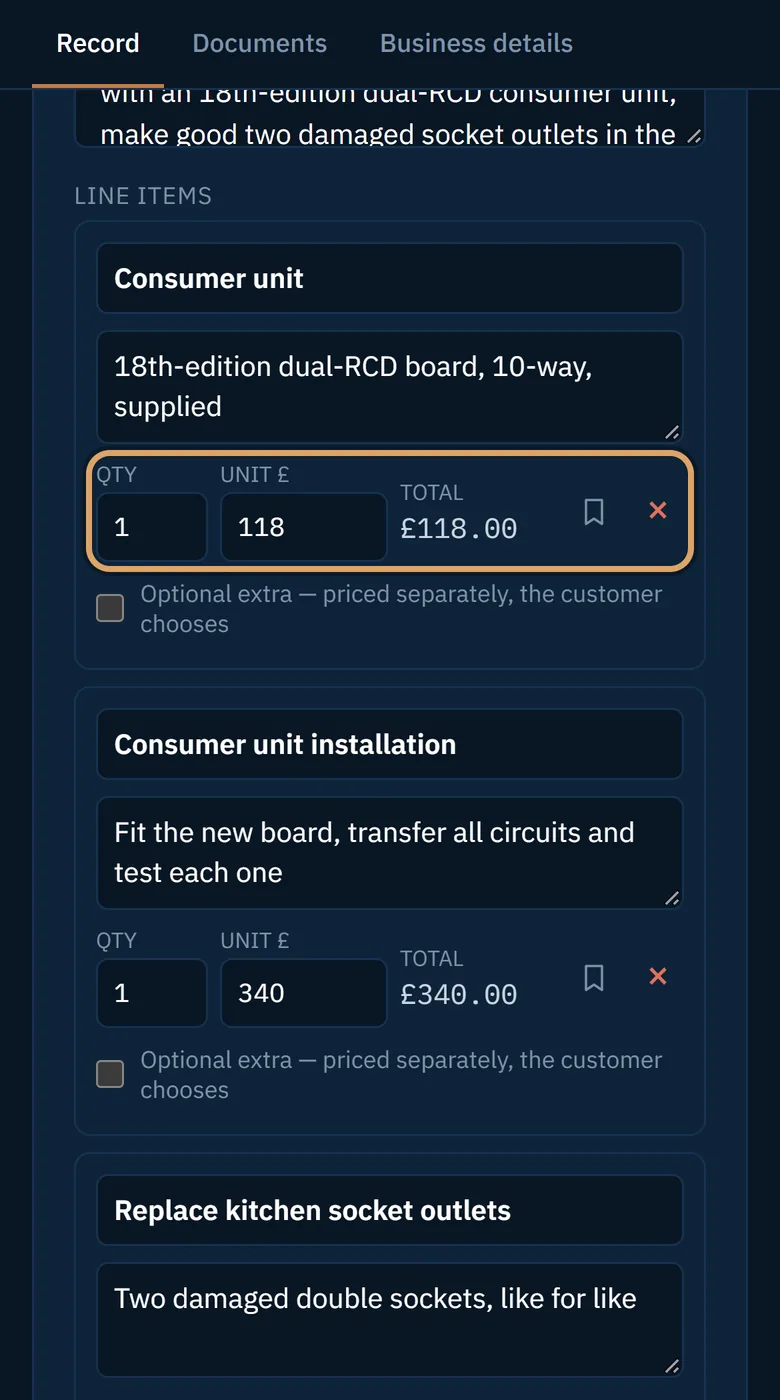
Check each line
Each line has a quantity and a unit price. Tap a number to change it and the total follows. Use + Add line for anything missed, and the cross to remove a line.
-
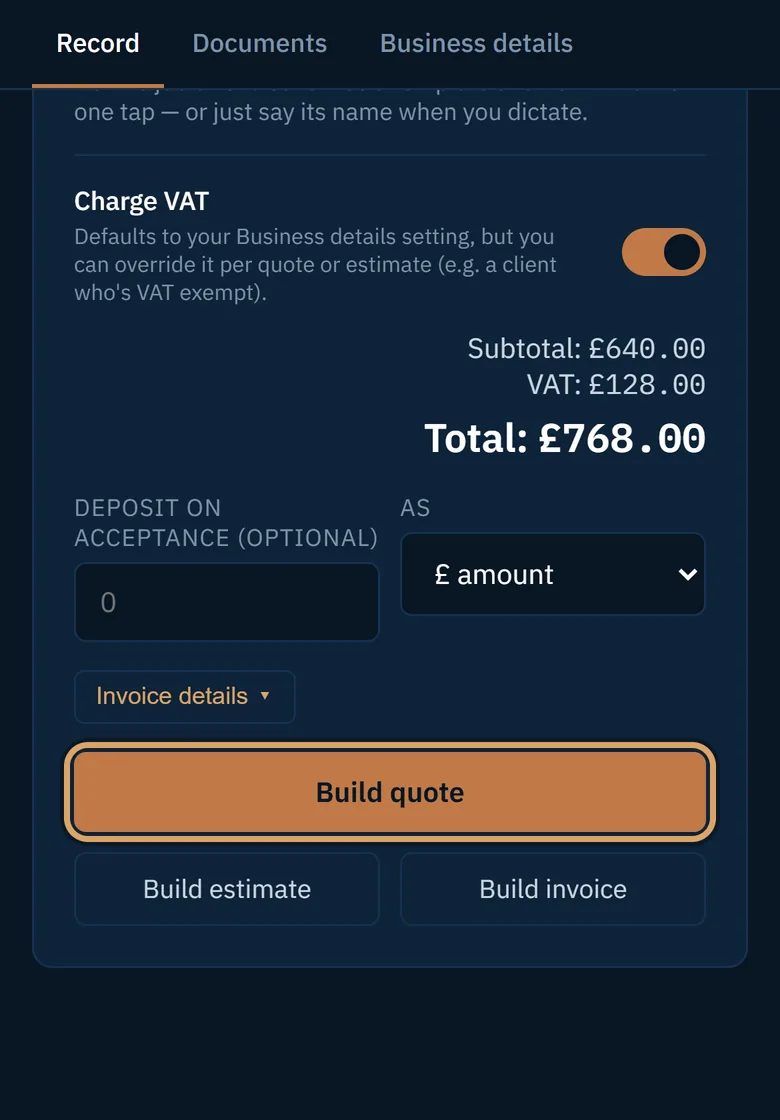
Tap Build quote
The totals are at the bottom of the card, with VAT if you charge it. Tap Build quote. This is the document your customer gets. It has its own number and is saved for you.
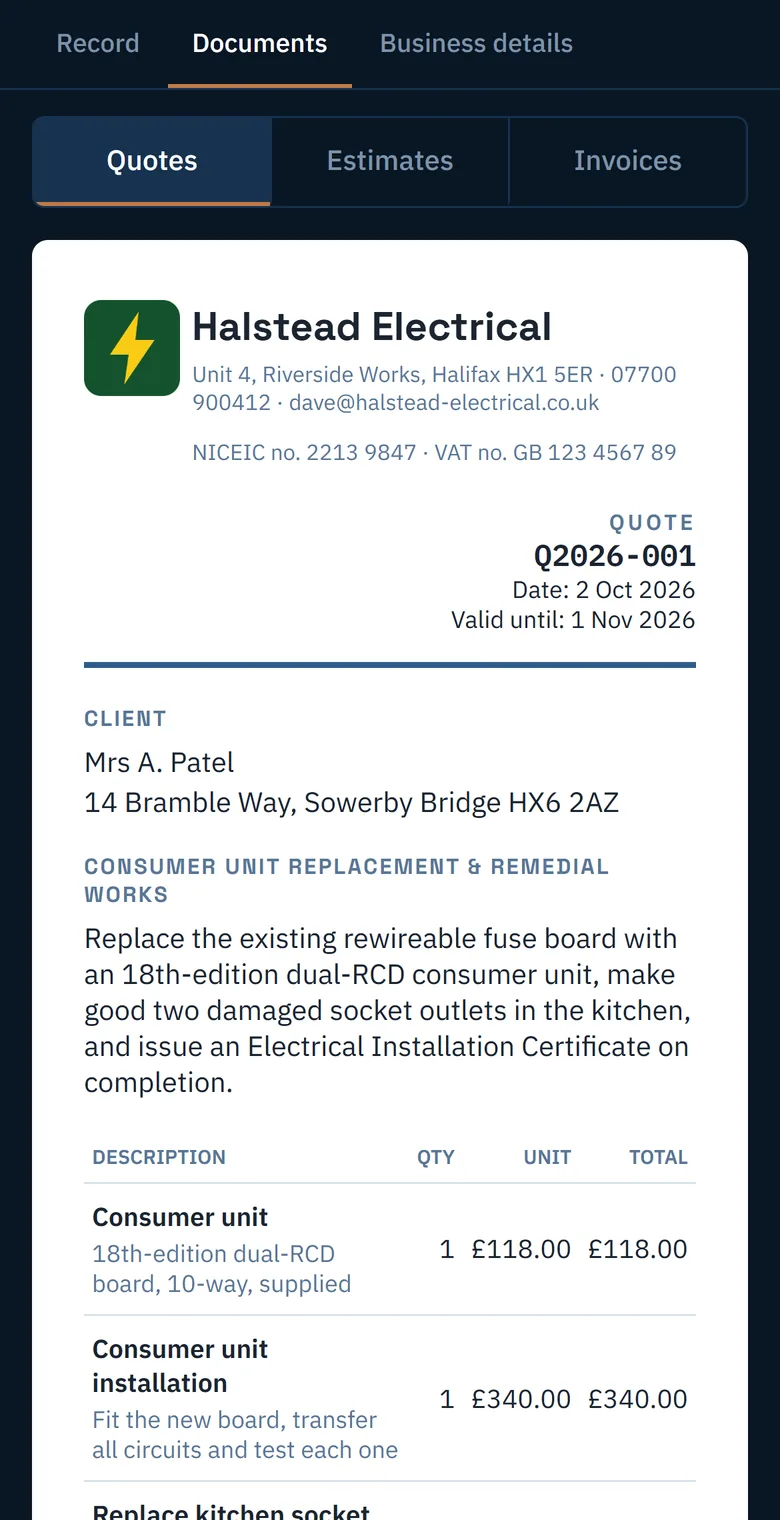
-
Send it to your customer
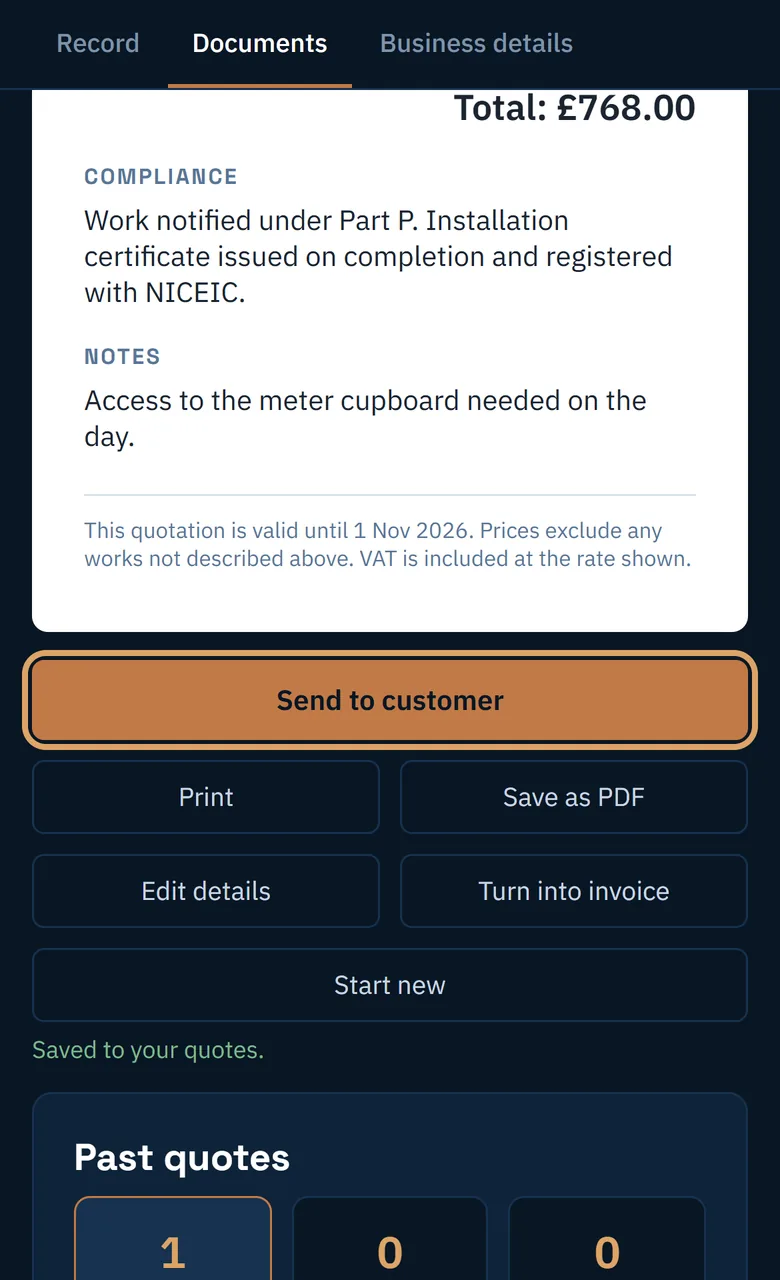
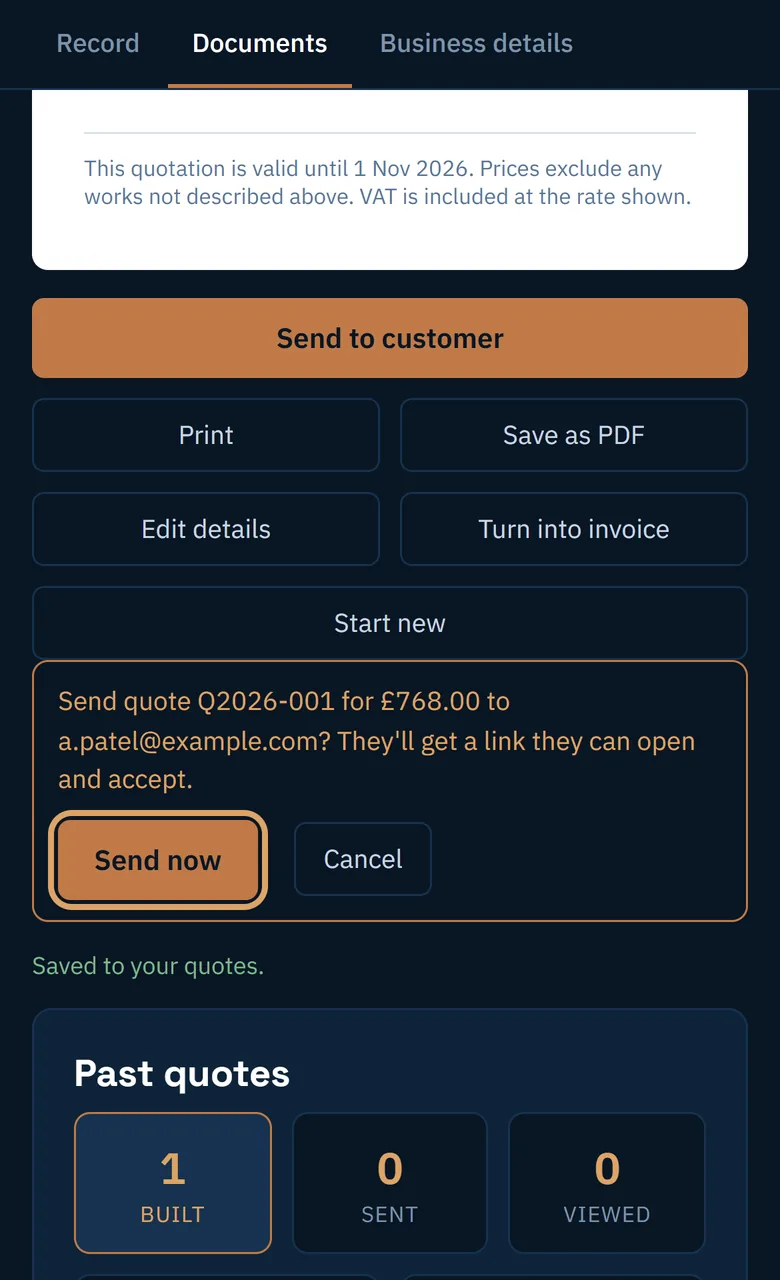
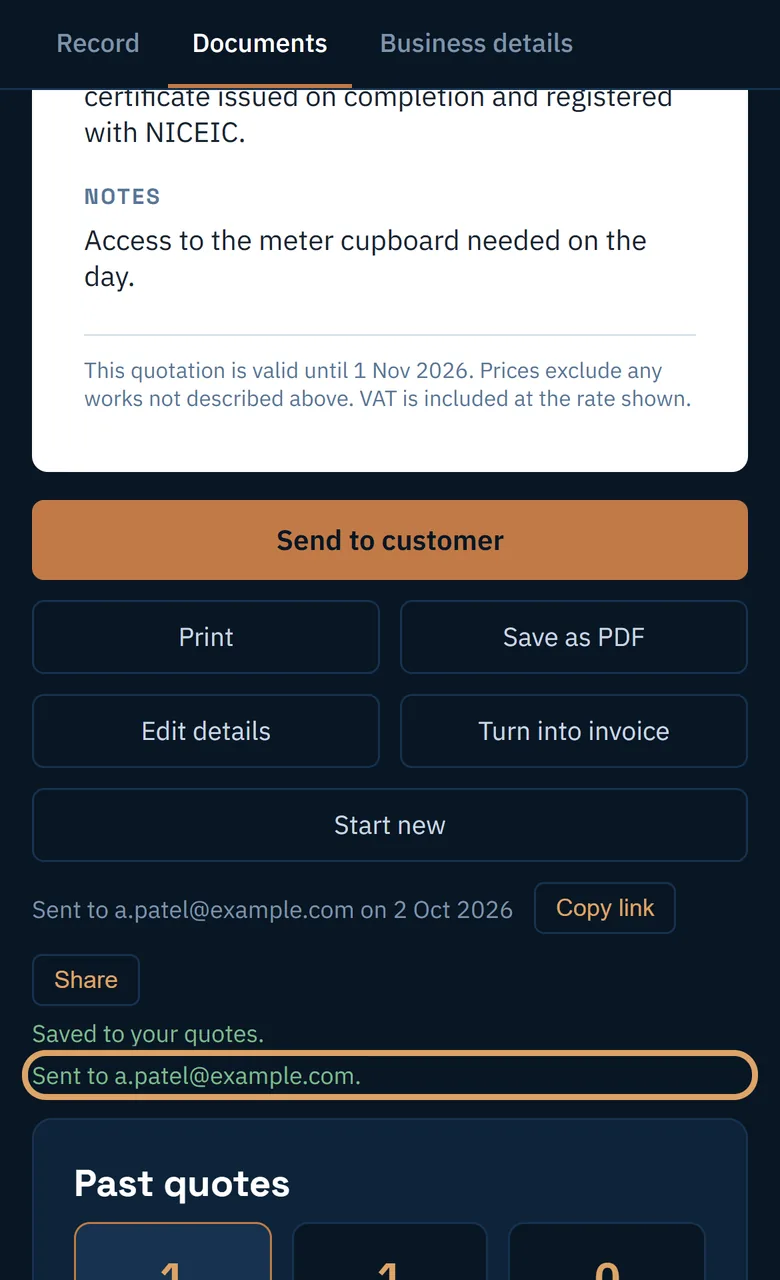
Tap Send to customer, check the amount and the address, then tap Send now. Your customer gets an email with a link. Their replies come to you.
-
Your customer accepts on their phone
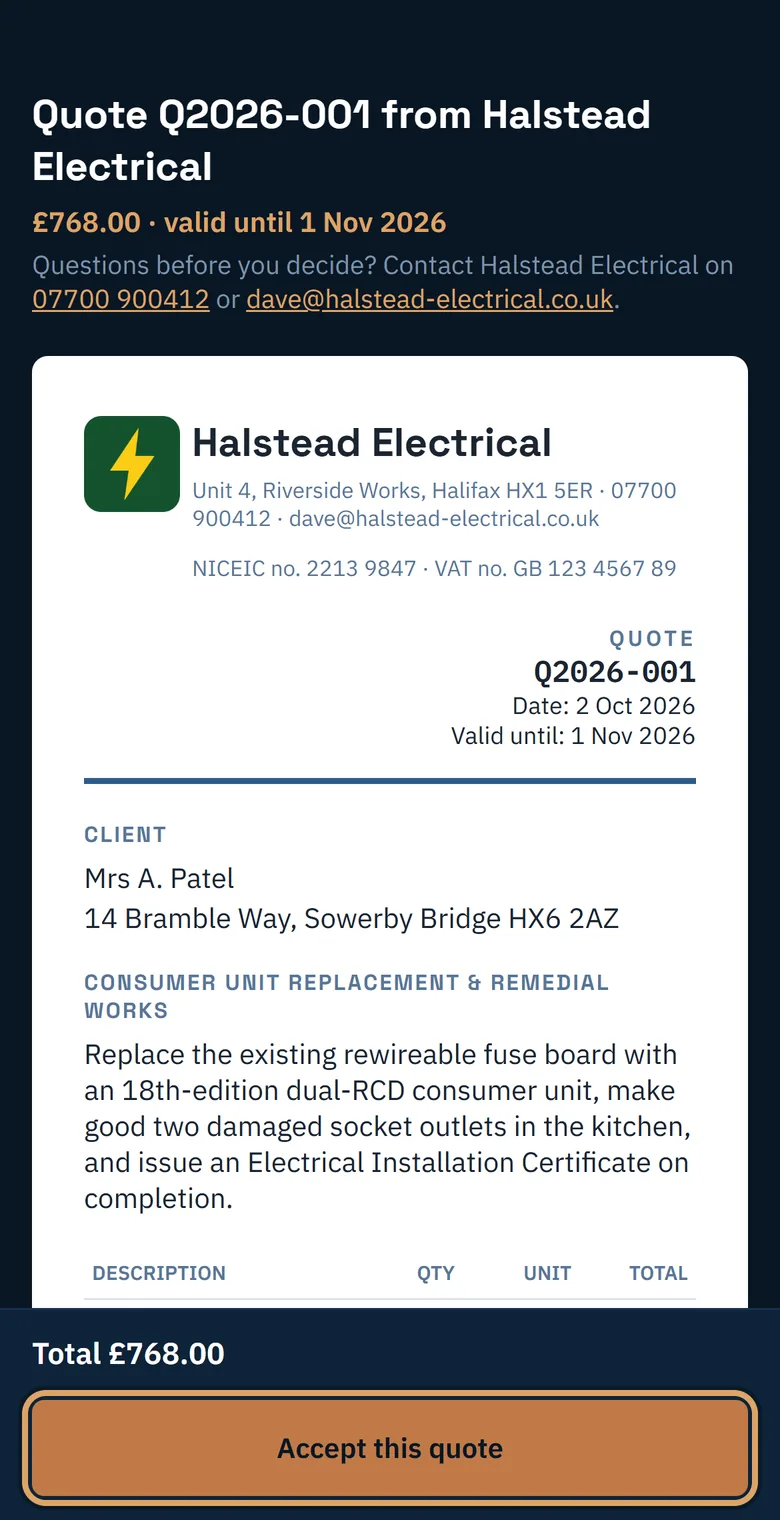
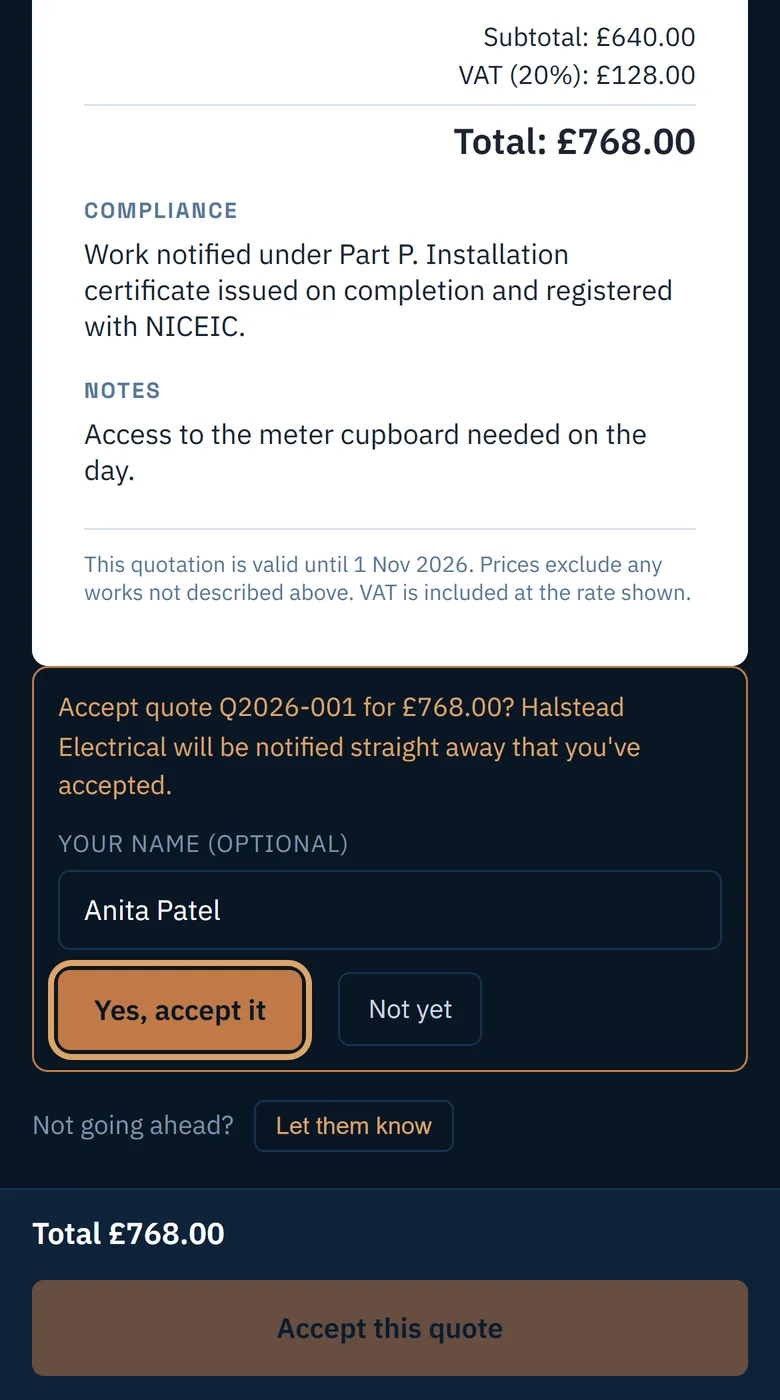
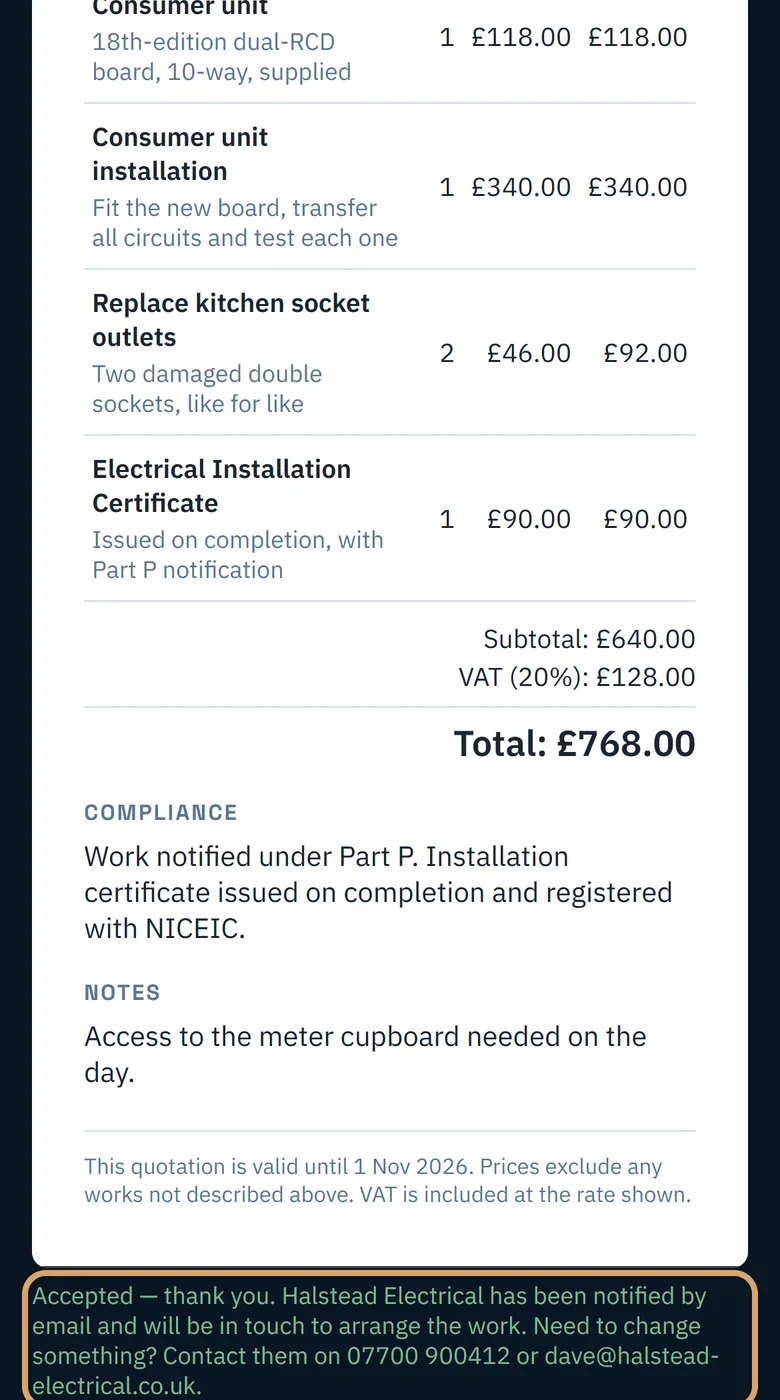
They open the link, read the quote and tap Accept this quote. They need no account and nothing to download.
-
See the yes
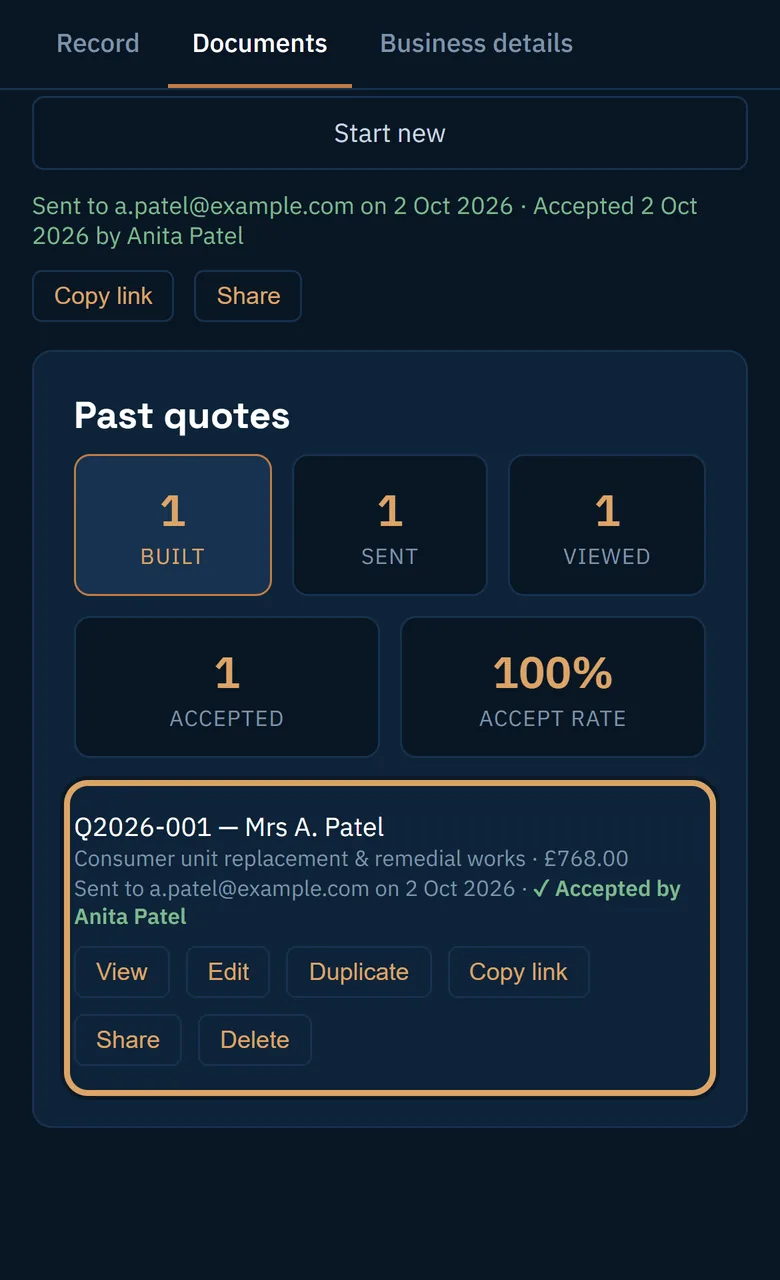
You get an email the moment they accept. The quote is under Documents, in Past quotes, marked Accepted.
Lesson 2
Prices that fill themselves in
Set your prices once in the price book and a dictated job comes back priced. Save the jobs and customers you see again.
Ten steps, with pictures
-
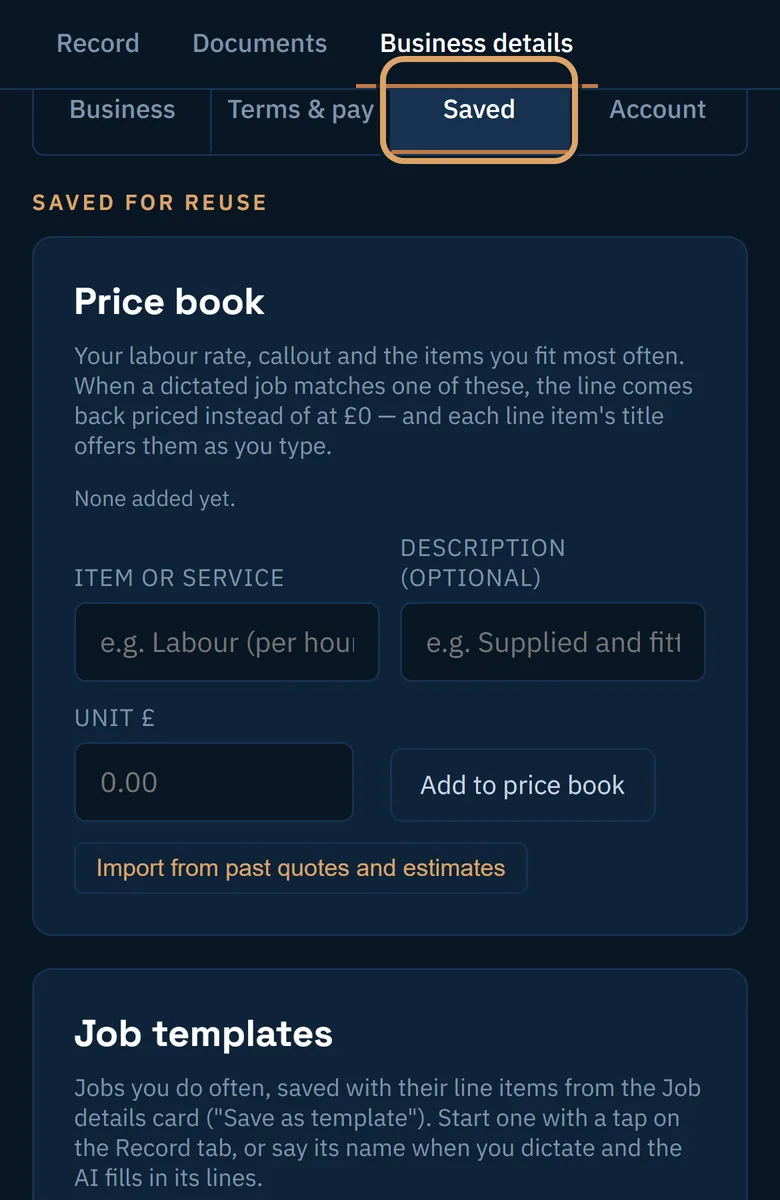
Open your price book
Go to Business details, then Saved. The price book holds your labour rate and the items you fit most often.
-
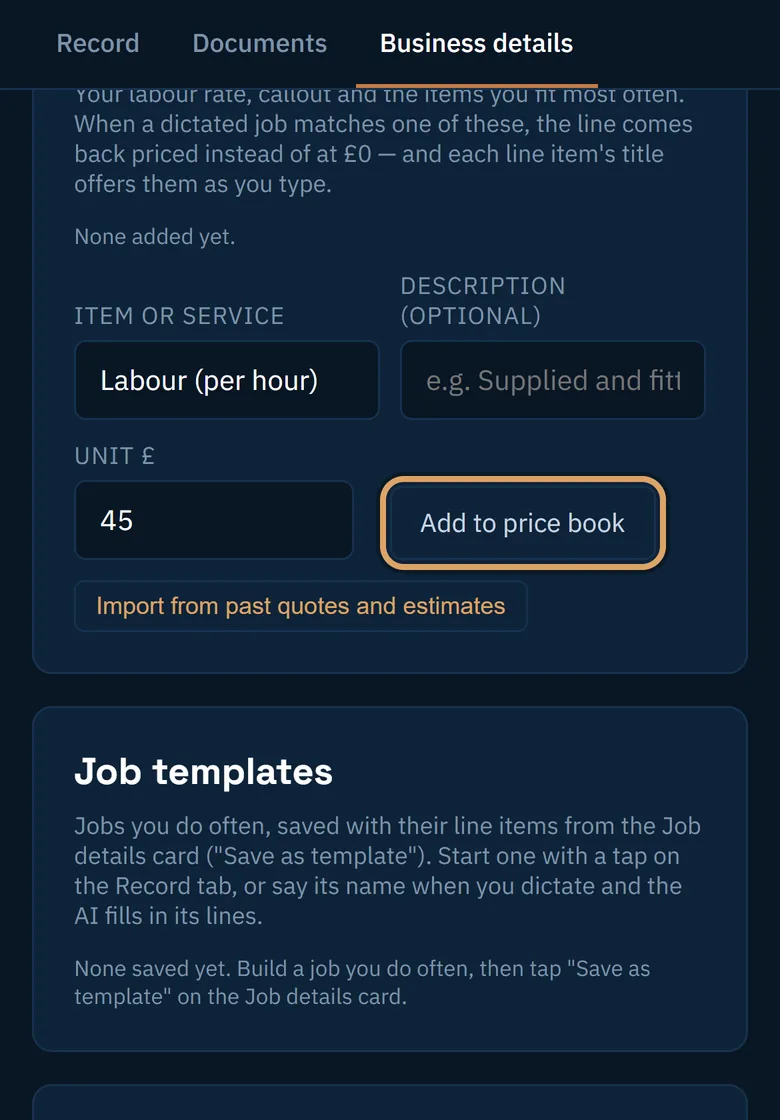
Add your prices
Type the item and its price, then tap Add to price book. Labour is just another item: call it Labour (per hour).
-
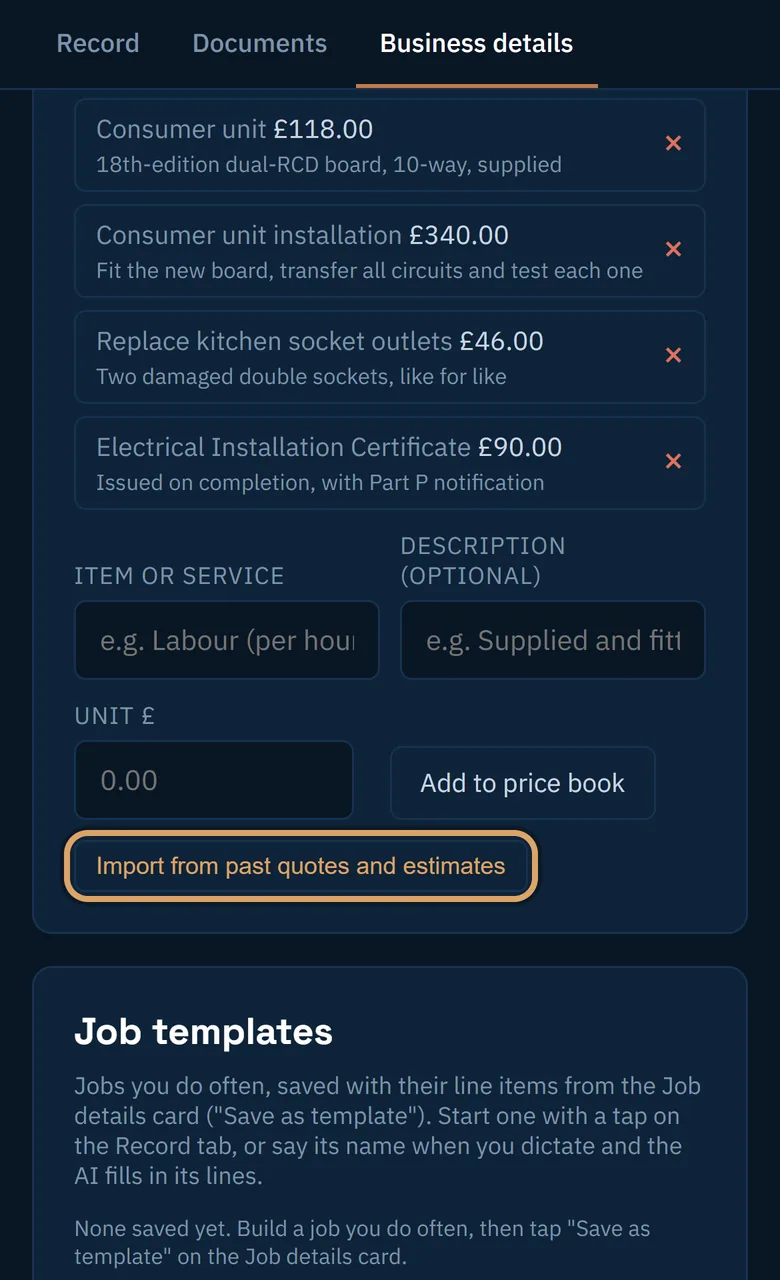
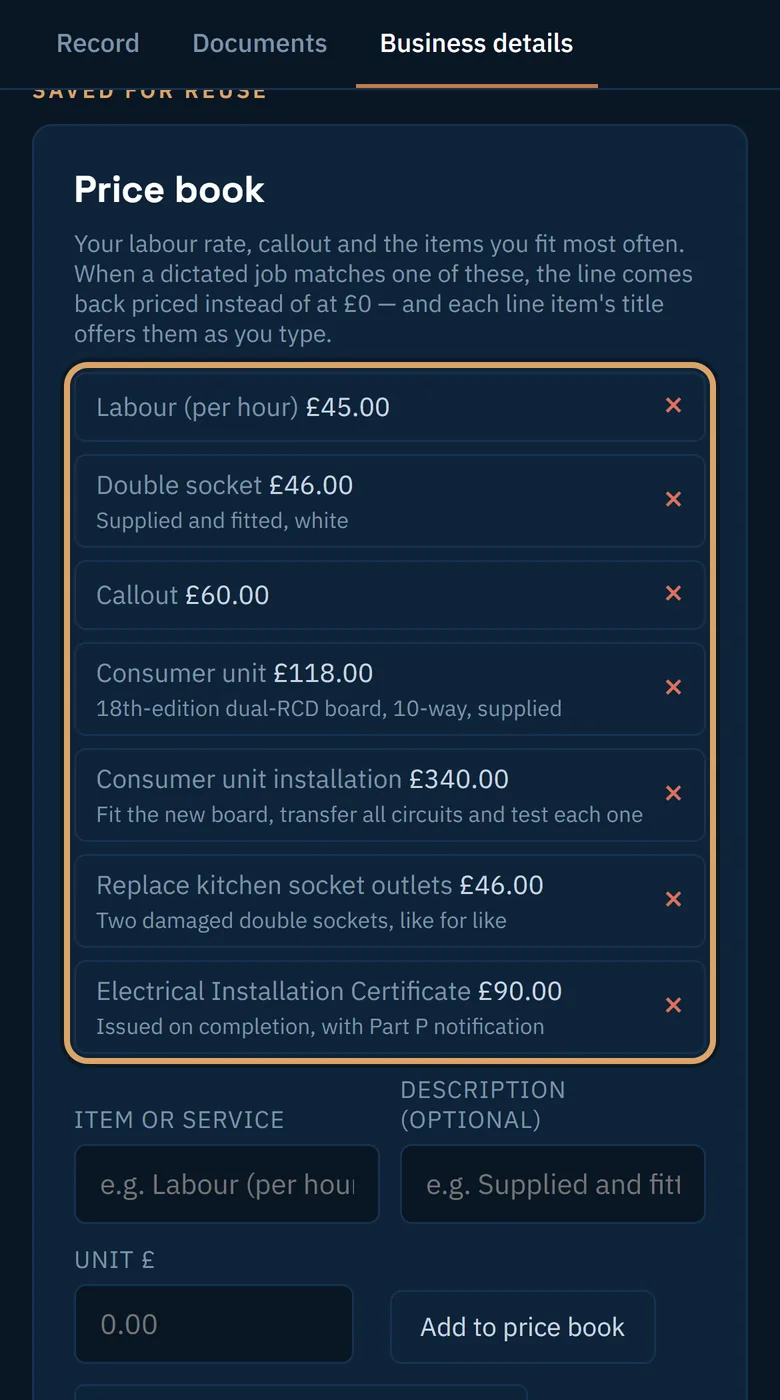
Or bring them in from quotes you have sent
Tap Import from past quotes and estimates. Every priced line you have used is added once, at its latest price.
-
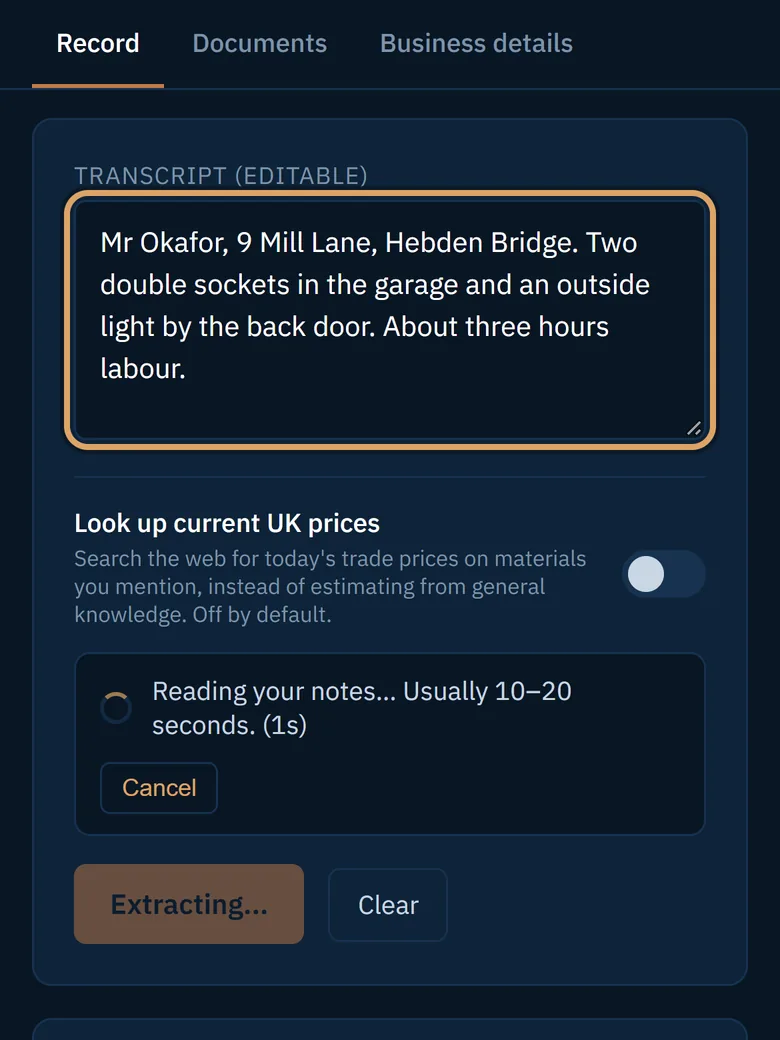
Say the next job without the prices
Dictate as usual. You no longer need to say what things cost.
-
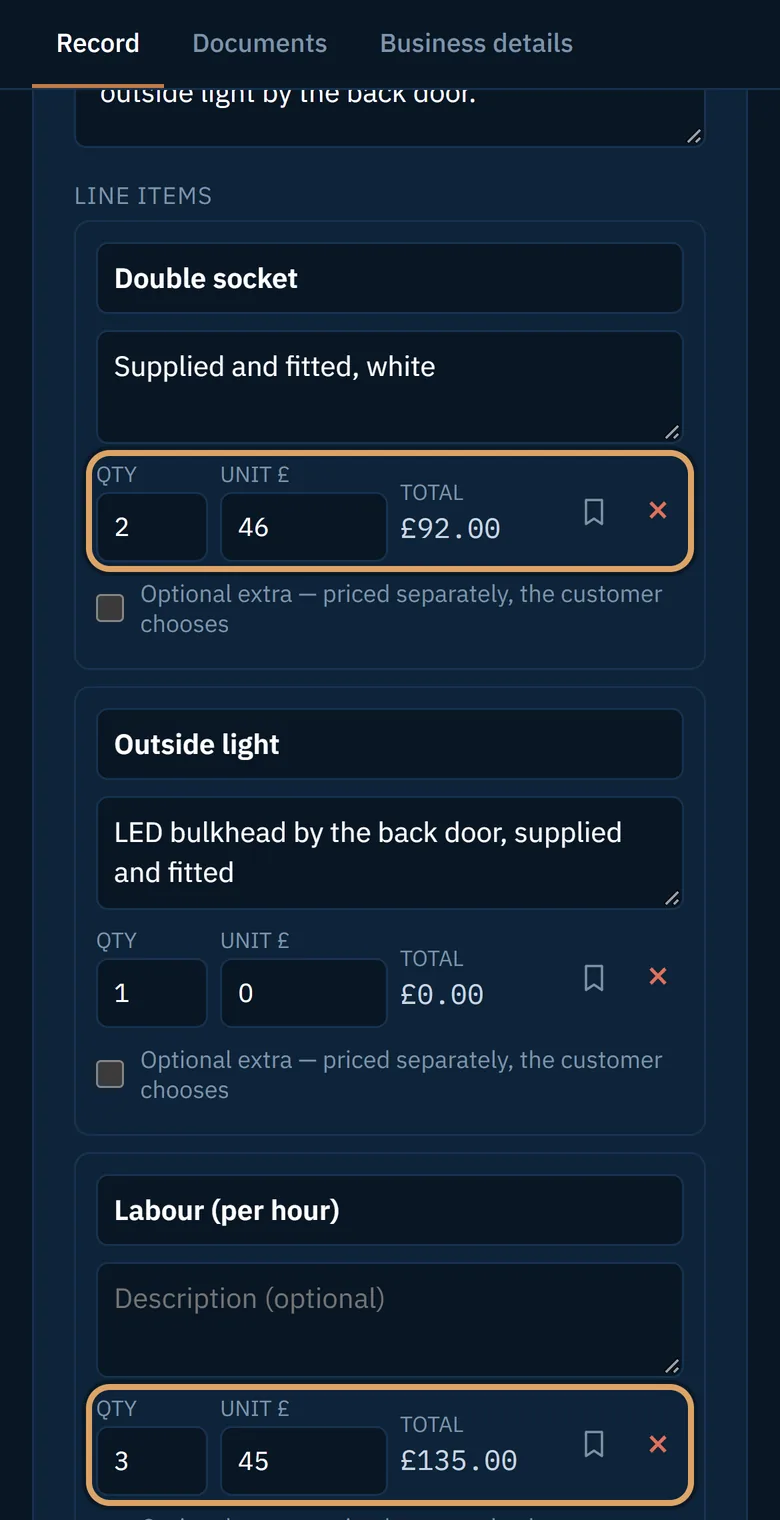
Known items come back priced
Lines that match your price book carry your price. Anything new comes back at nought for you to price.
-
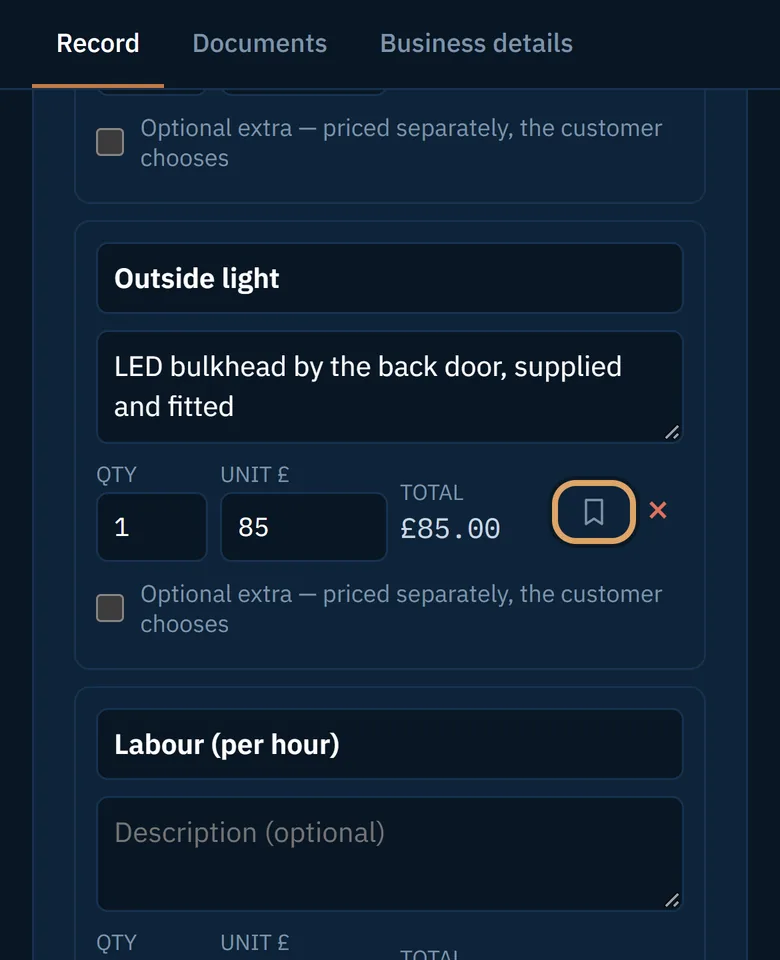
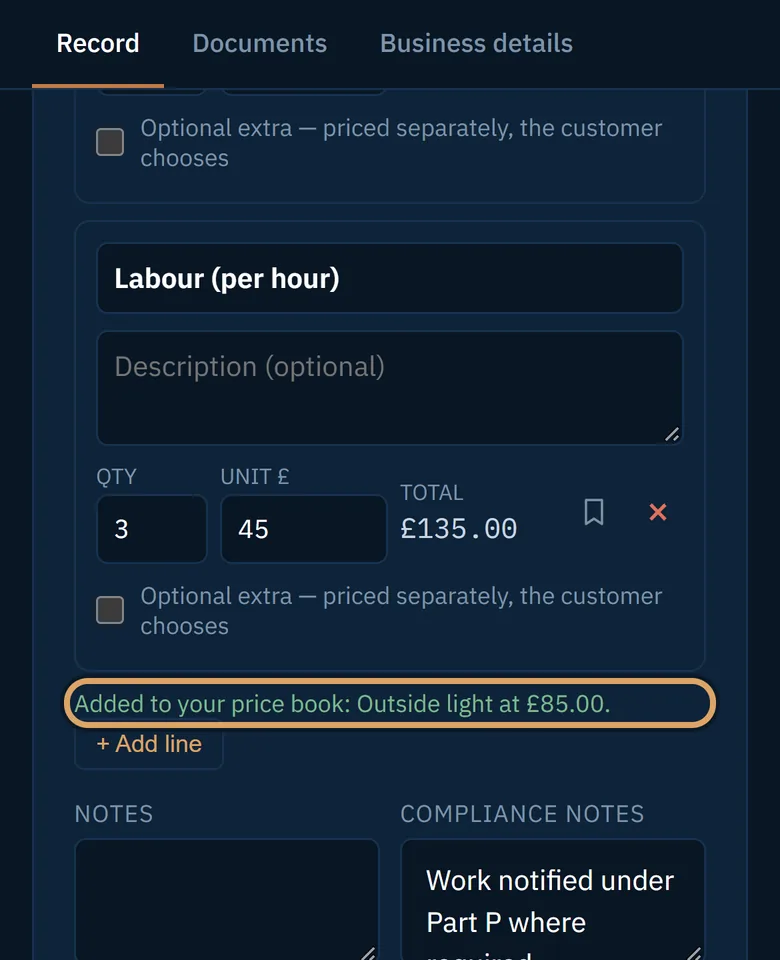
Keep a new price with the bookmark
Type the price, then tap the bookmark on the line. It is in your price book from then on.
-
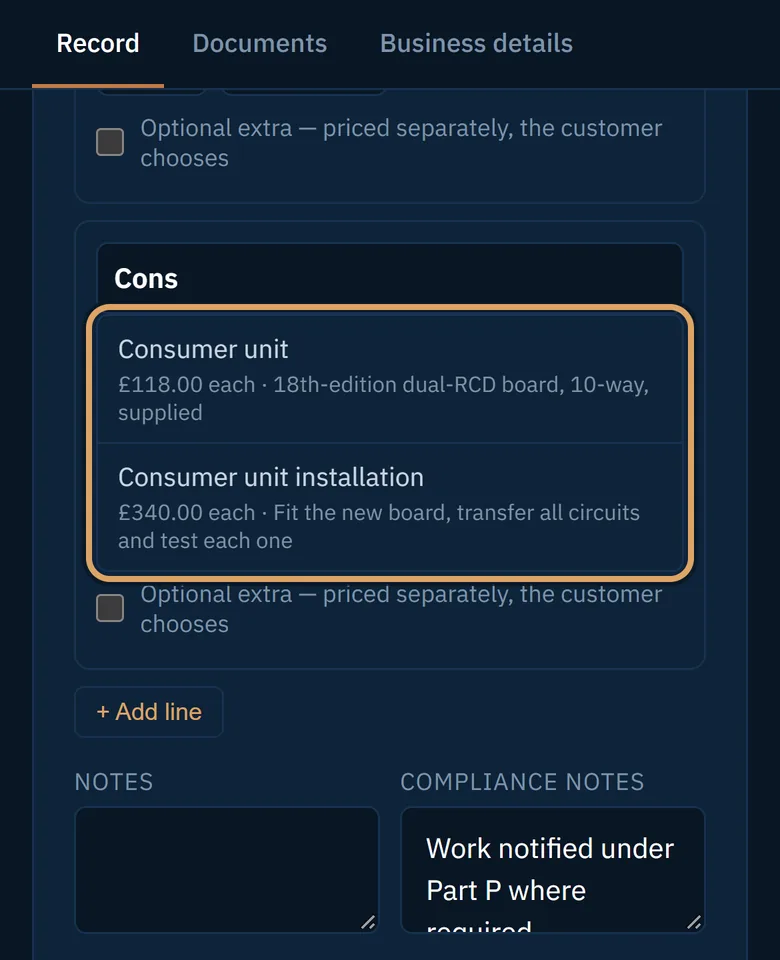
Typing a line? Pick from the book
Tap + Add line and start typing. Matching items appear under the box. Tap one and its price is filled in.
-
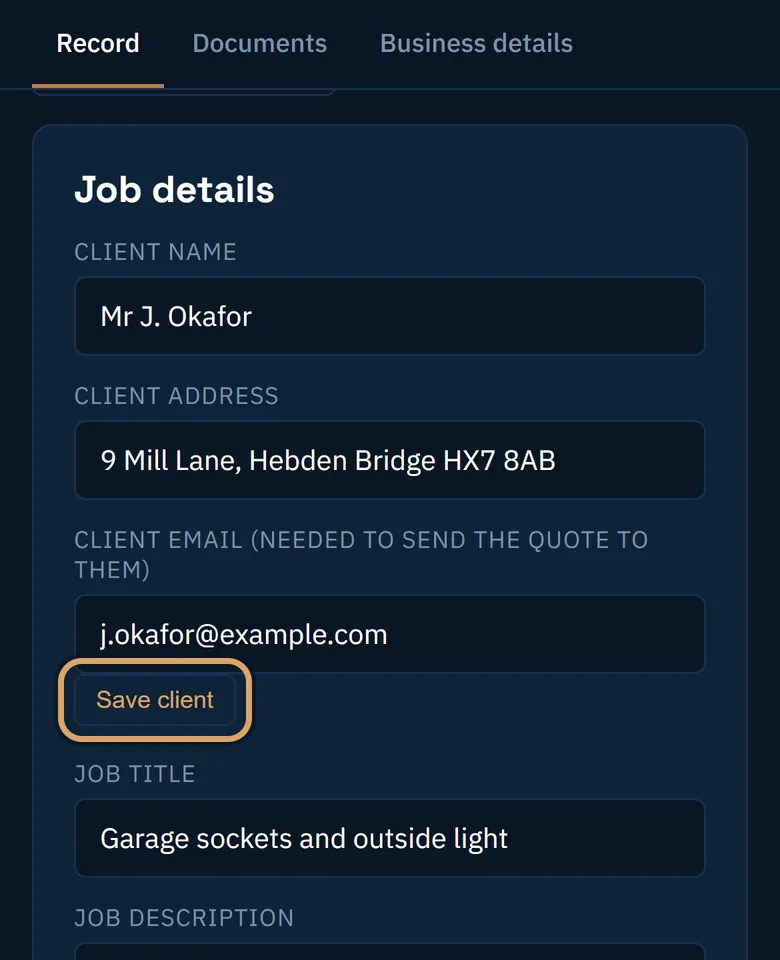
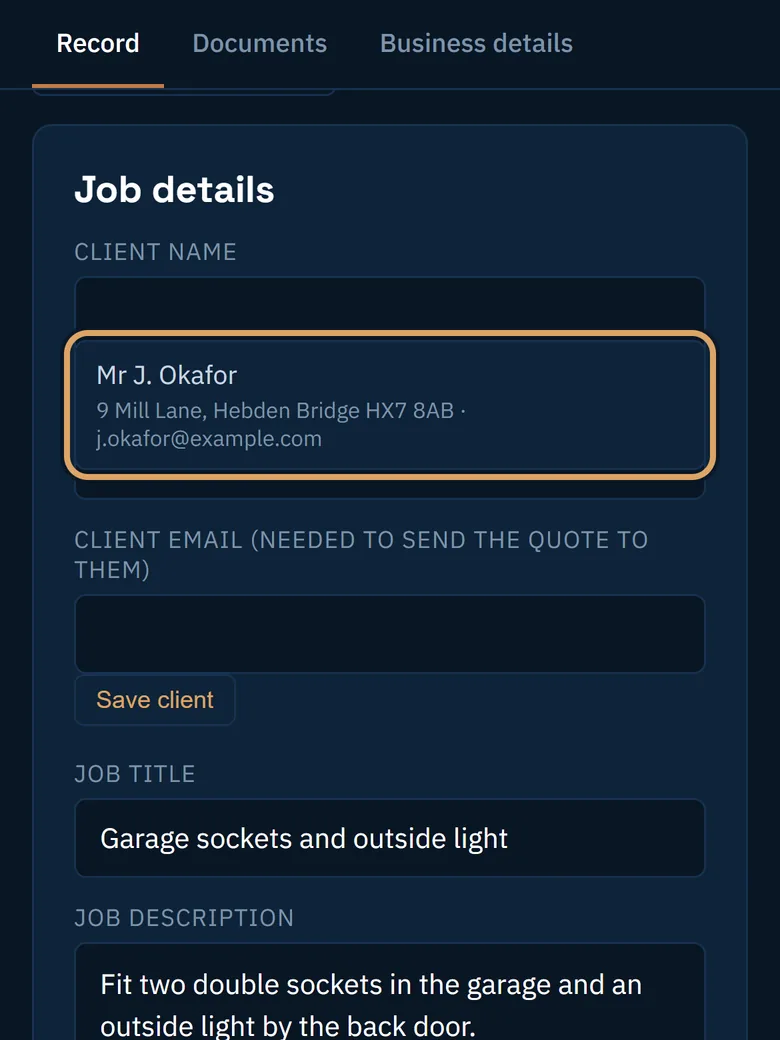
Save a customer you will see again
Tap Save client under the client’s details. Next time, tap Client name and pick them from the list.
-
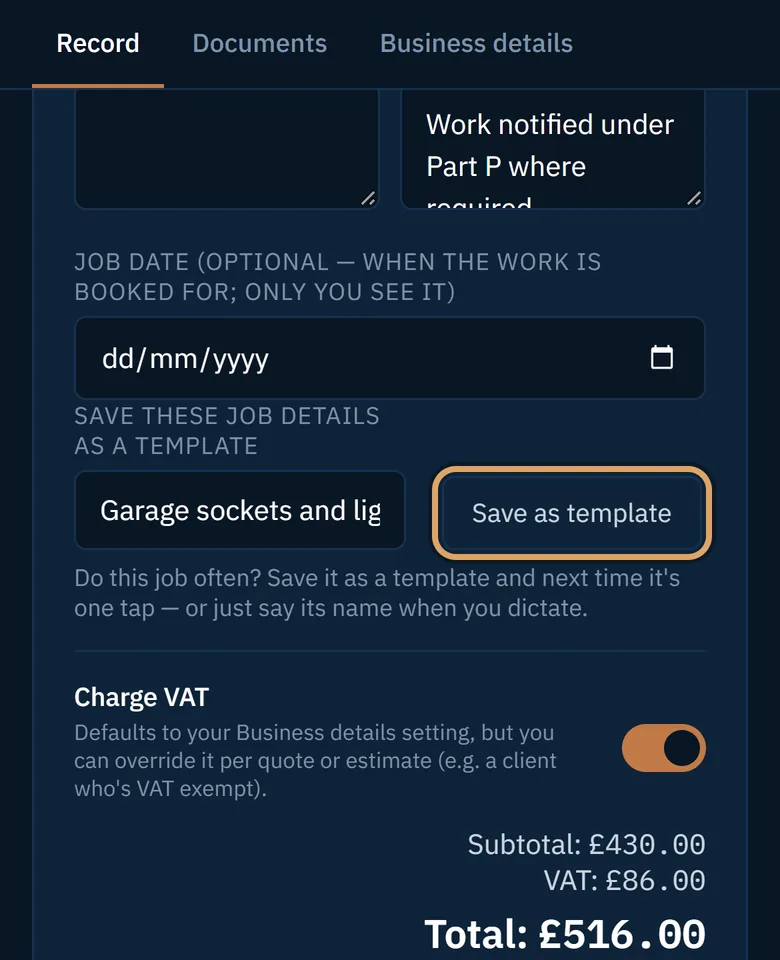
Save a job you do often as a template
Near the bottom of Job details, give the job a name and tap Save as template.
-
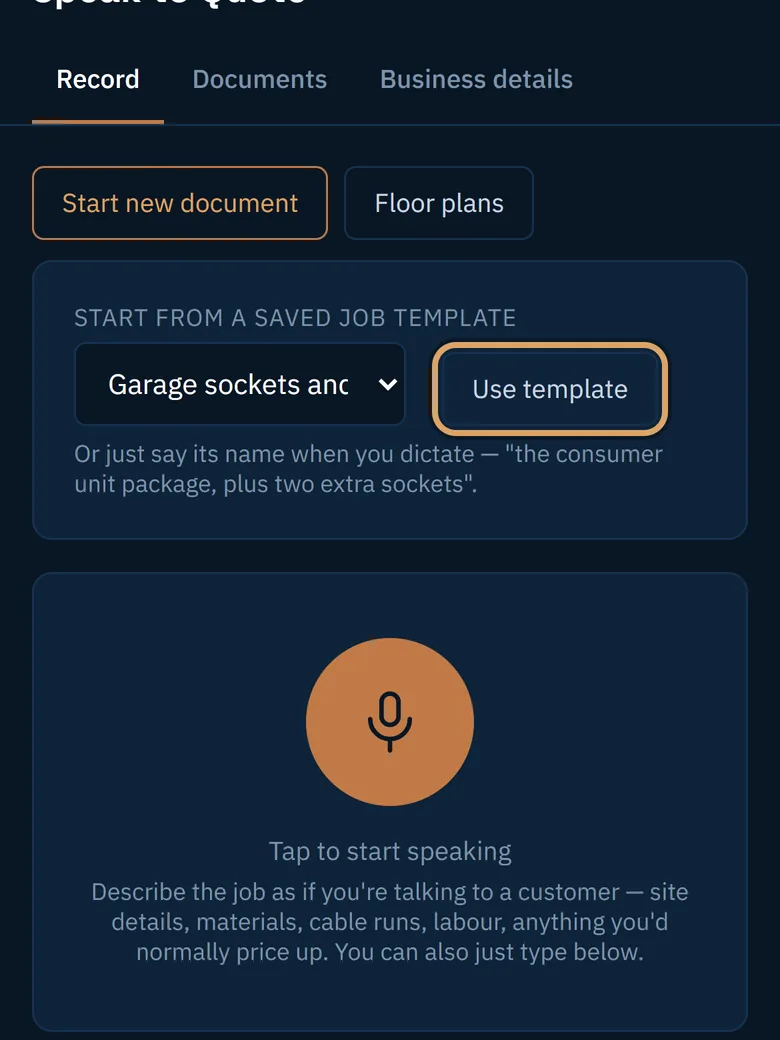
Start from a template
On the Record tab, pick the template and tap Use template. The lines are filled in for you. Or just say its name when you dictate.
Lesson 3
Estimates and invoices
A quote is a fixed price. An estimate may change. An invoice is the bill. All three are built from the same job details.
Ten steps, with pictures
-
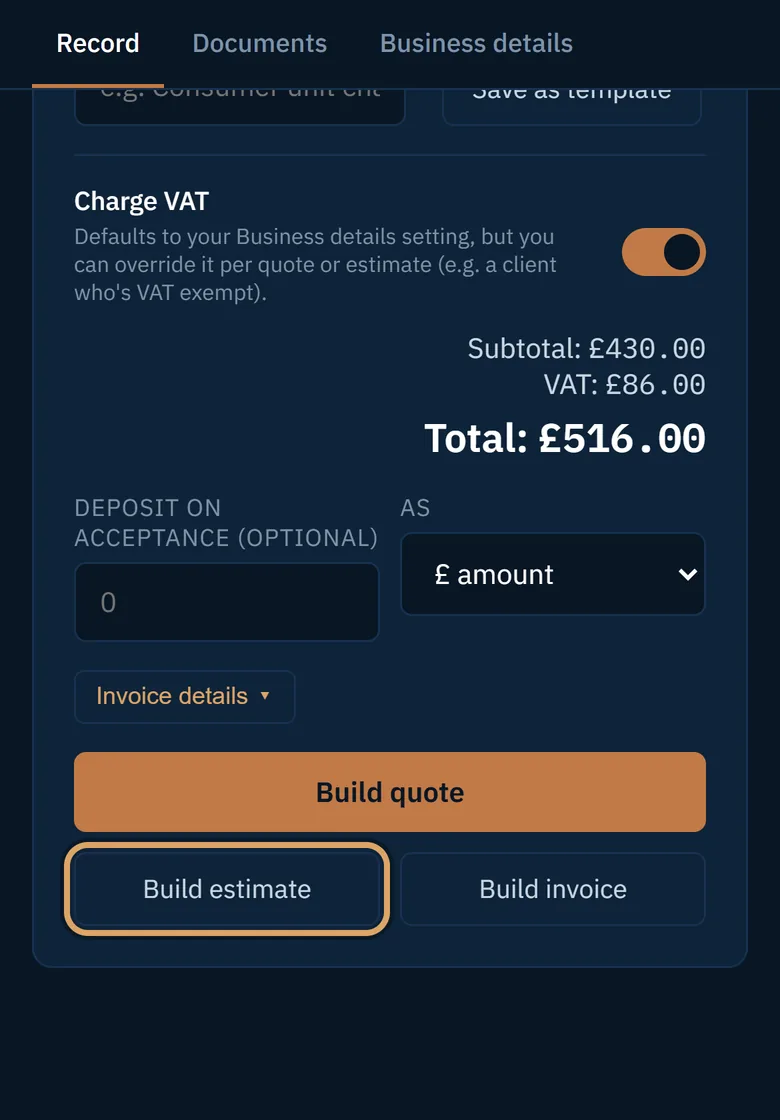
Build an estimate when the price may change
On Job details, tap Build estimate instead of Build quote.
-
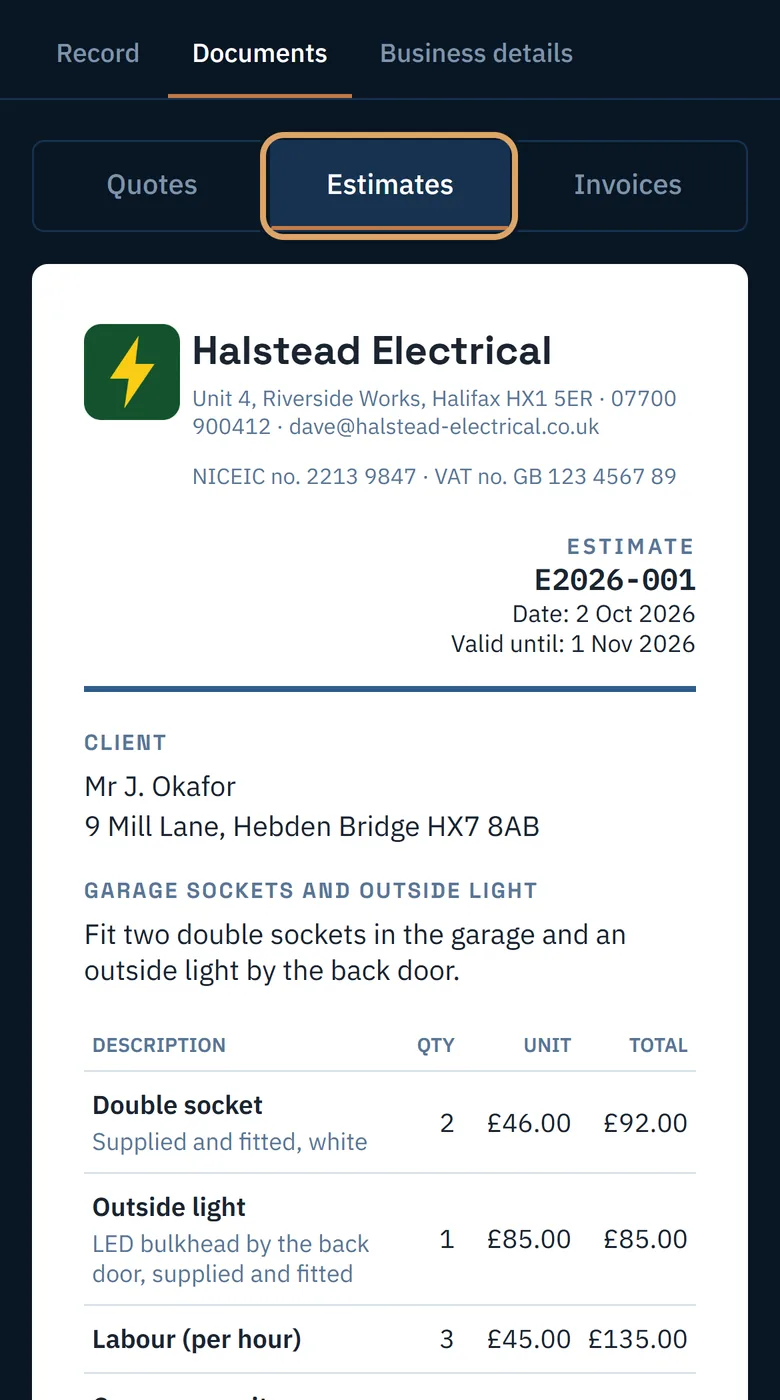
An estimate says it is one
It has its own number starting with E, and tells the customer the final price may vary. Find it under Documents, then Estimates.
-
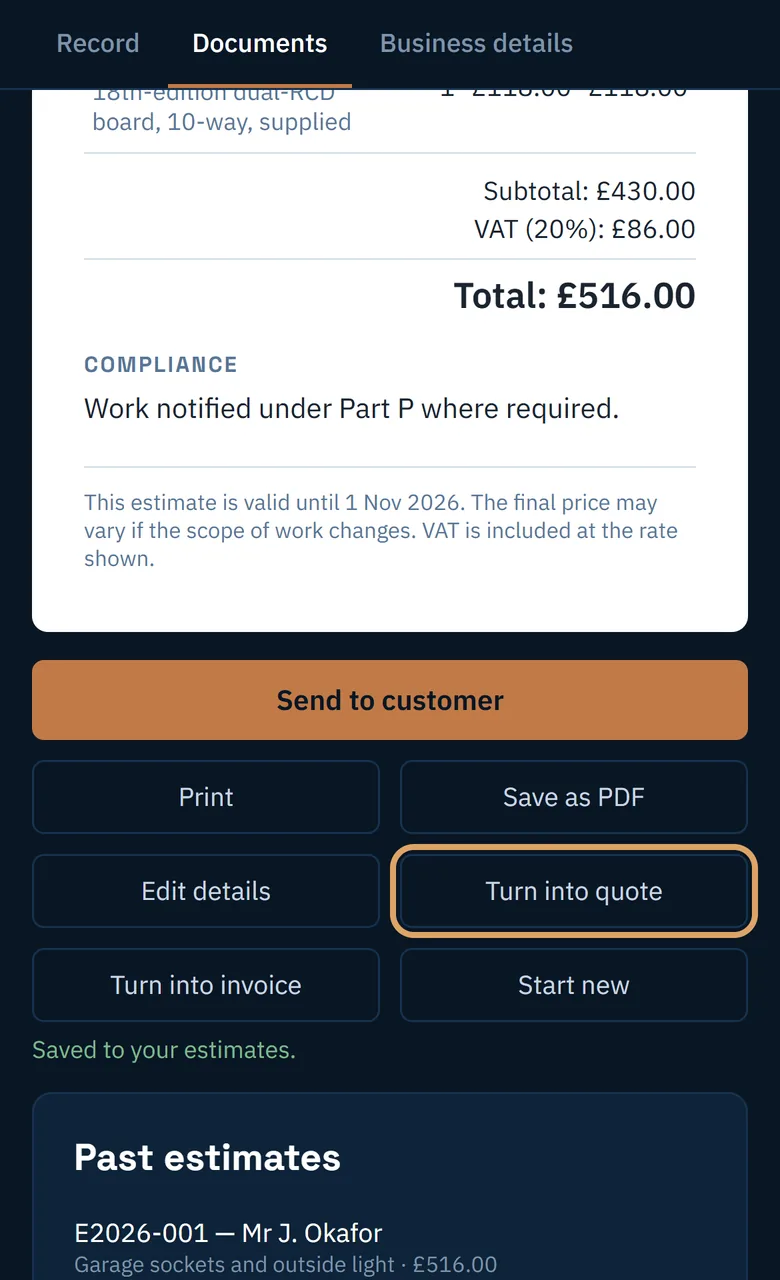
Turn it into a quote when the price is firm
Open the estimate and tap Turn into quote. A new quote is made from the same details.
-
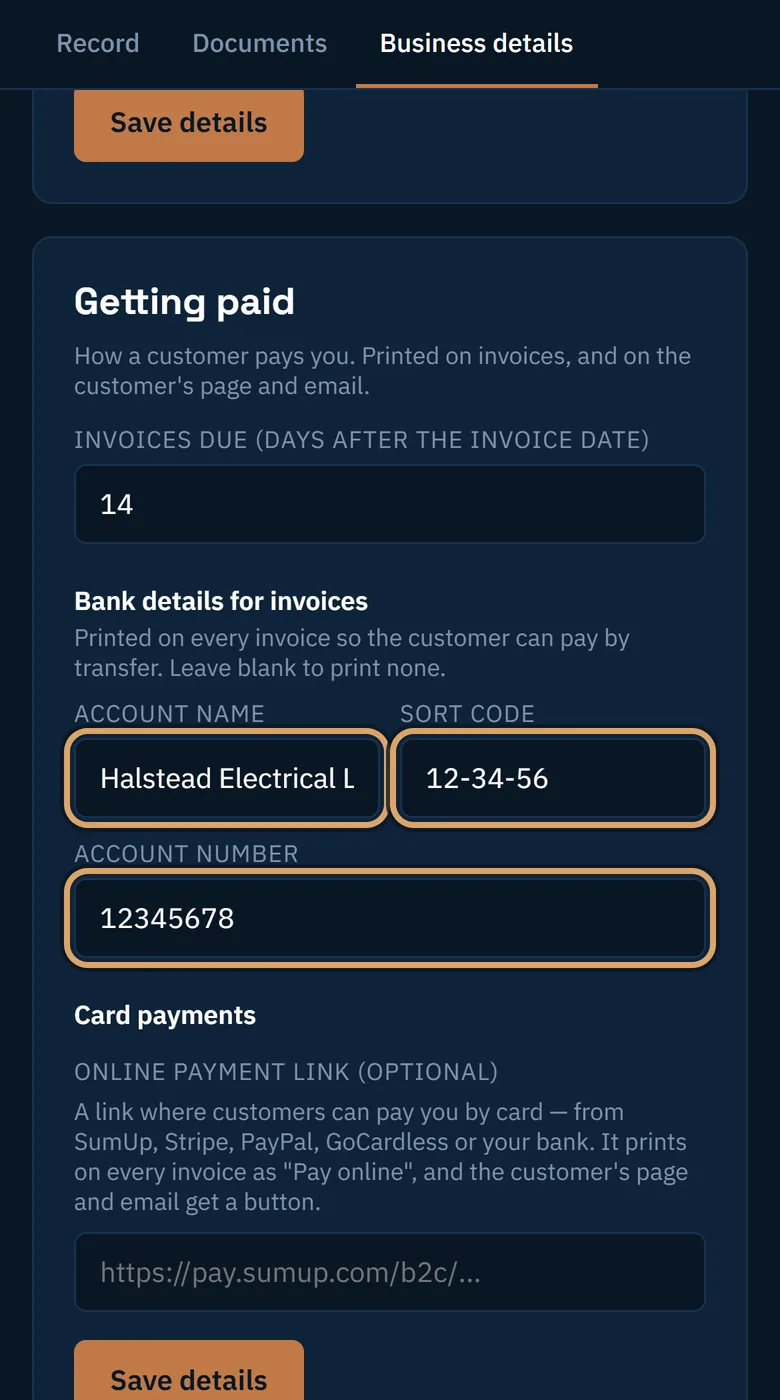
Add your bank details once
Go to Business details, then Terms & pay. Fill in the account name, sort code and account number, and tap Save details. Every invoice then says how to pay you.
-
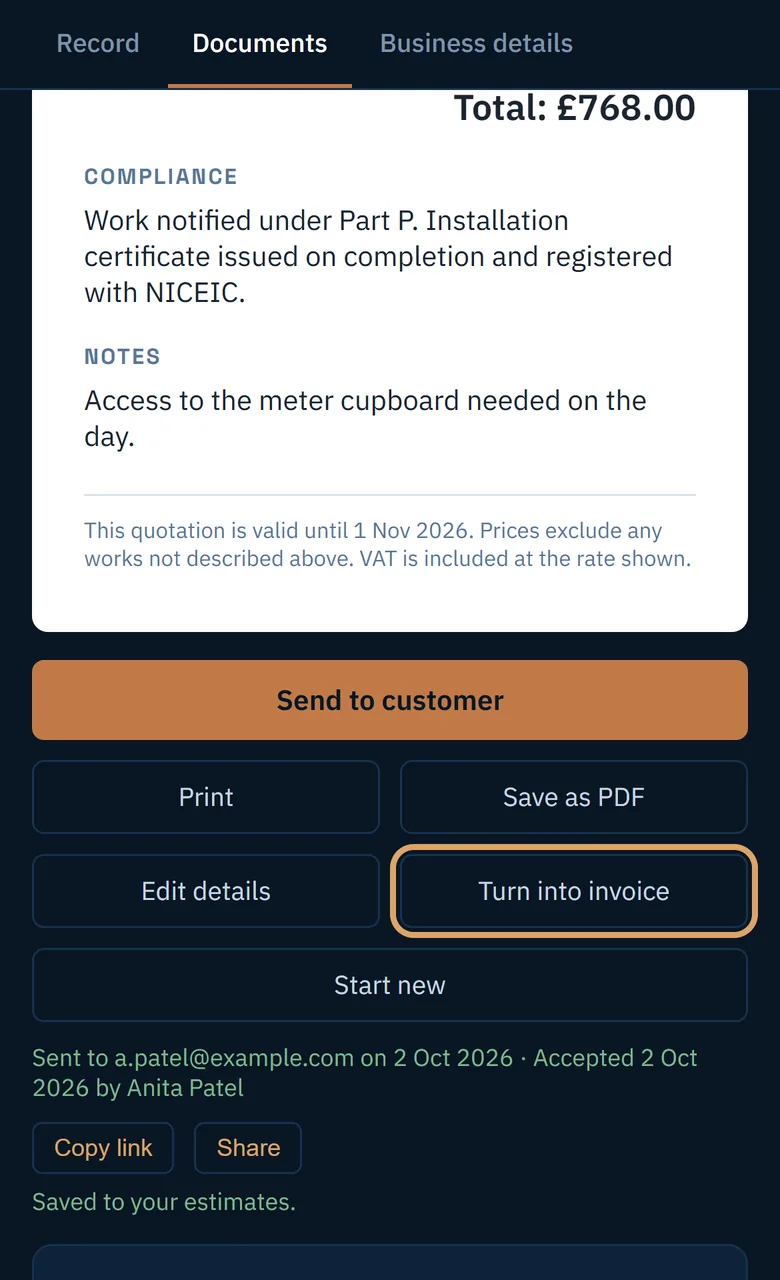
Turn an accepted quote into its invoice
When the job is done, open the quote and tap Turn into invoice. There is nothing to retype.
-
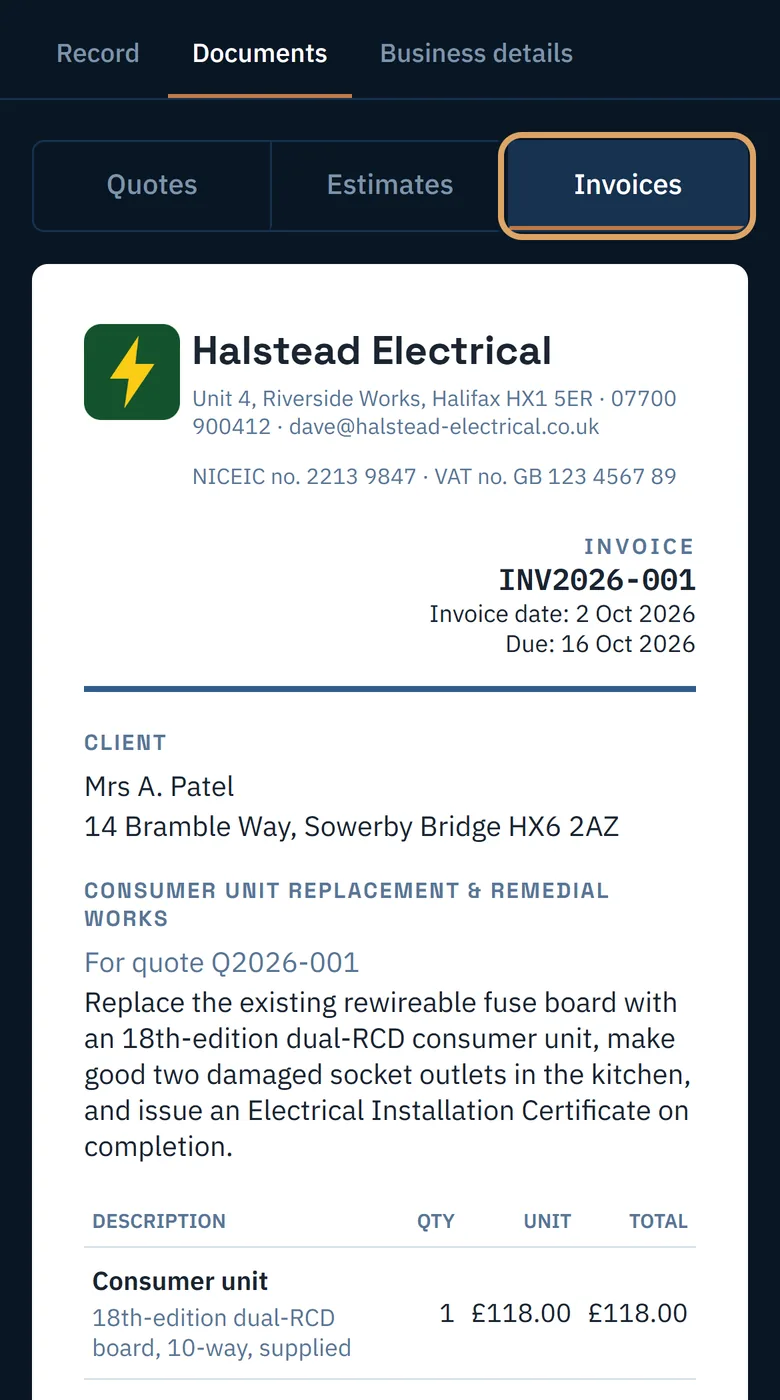
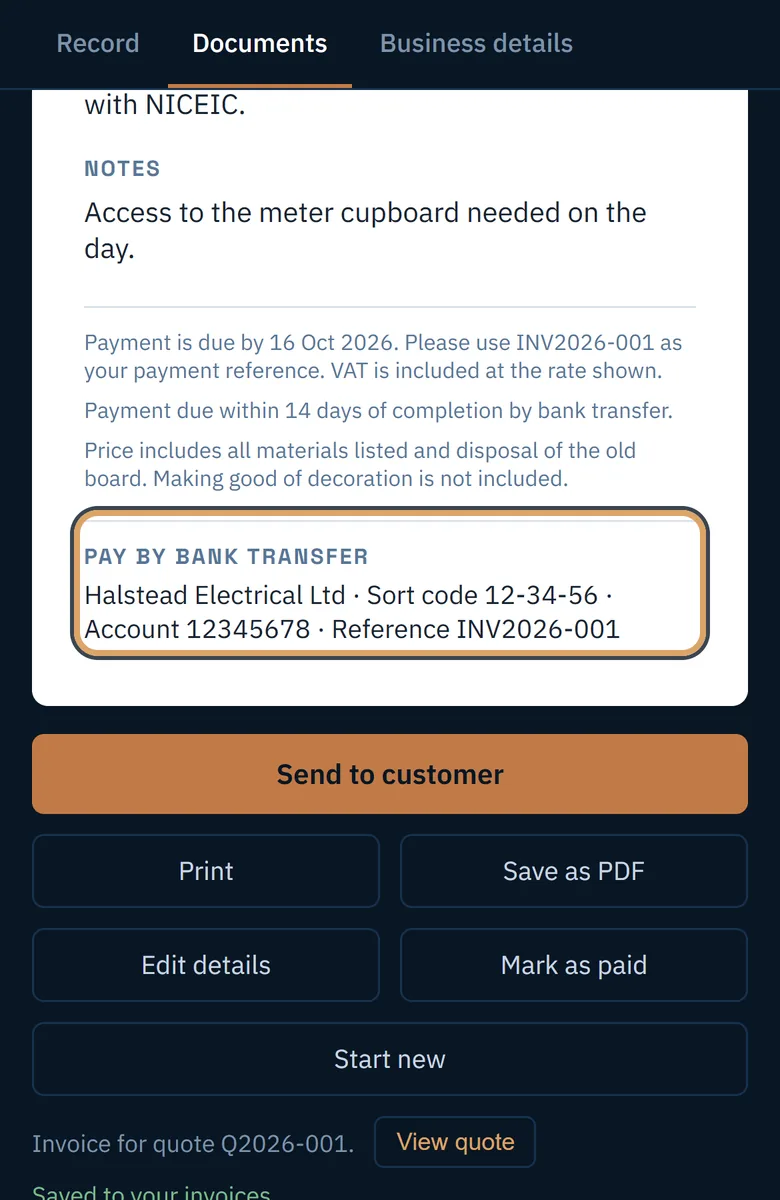
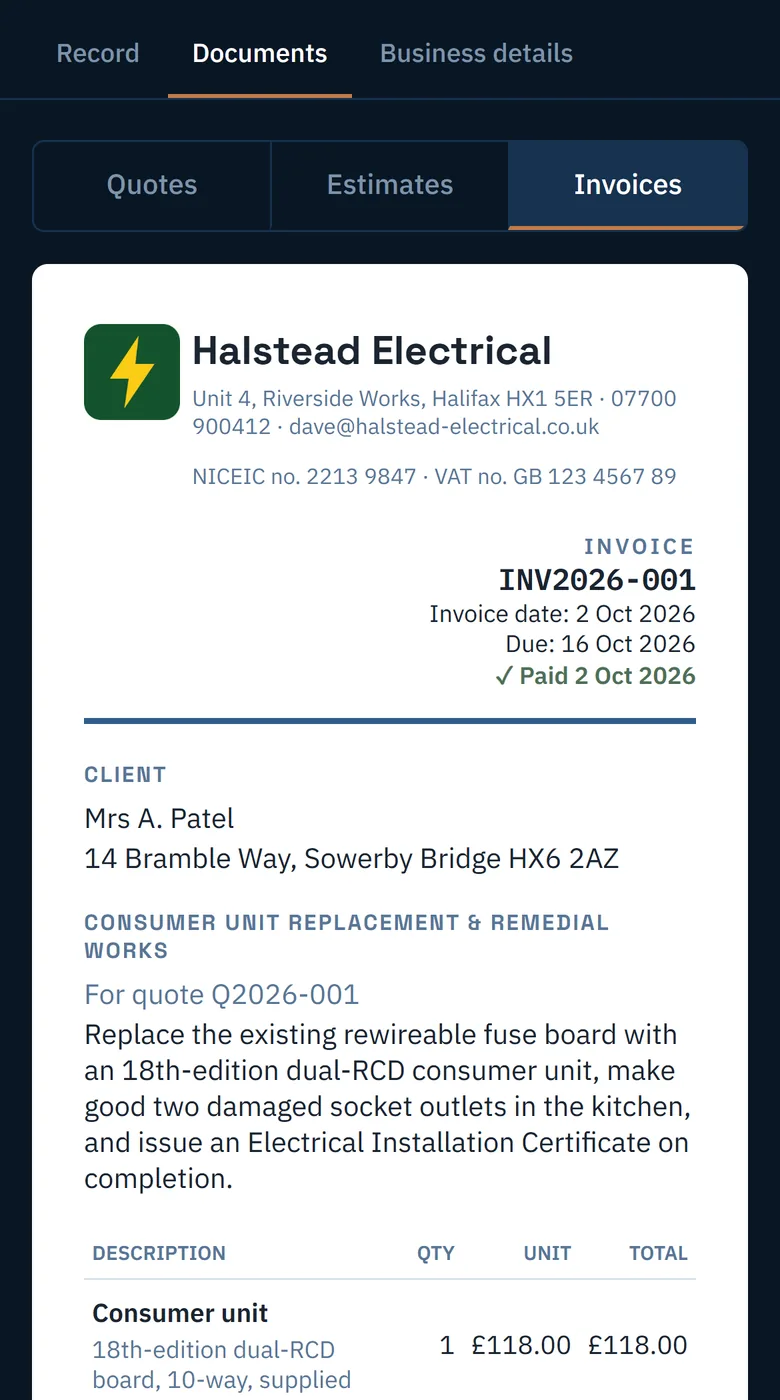
The invoice
It has its own number starting with INV, a due date, and your bank details with the invoice number as the payment reference.
-
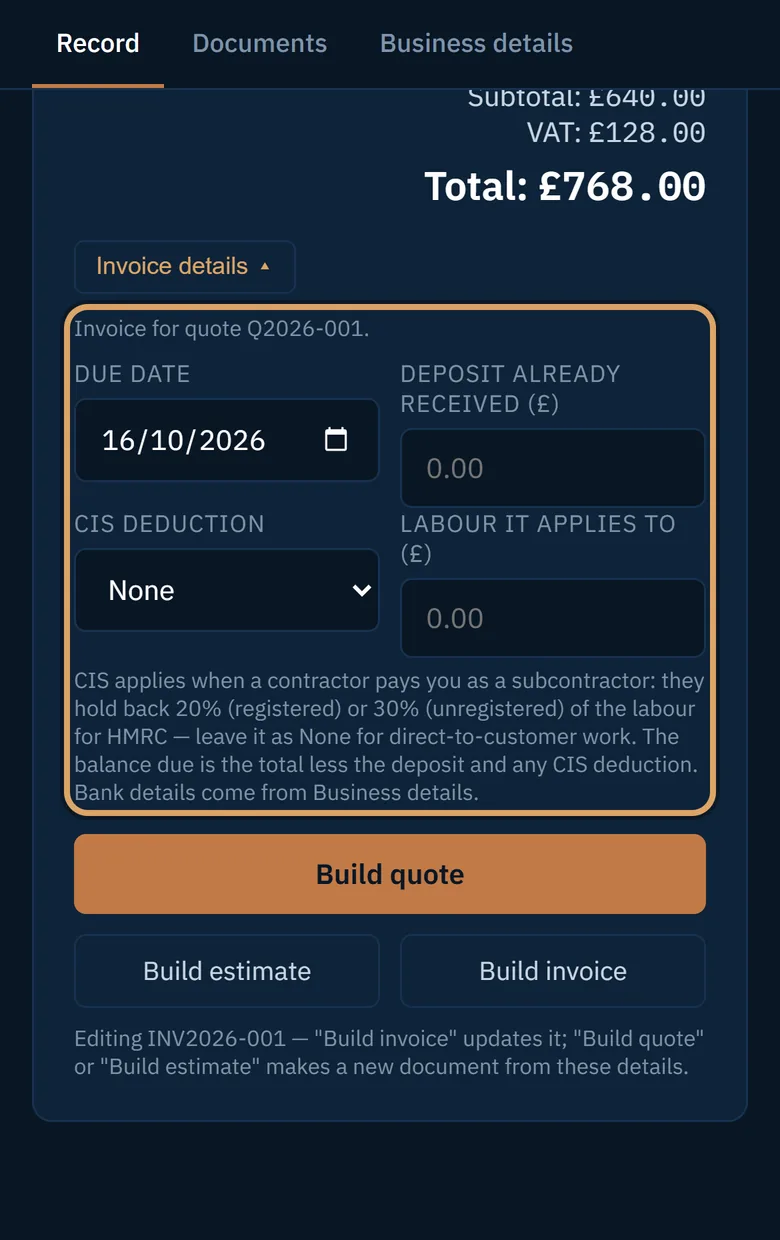
Change the invoice’s details
Tap Edit details to change the due date, take off a deposit you have already been paid, or apply a CIS deduction. Then tap Build invoice again.
-
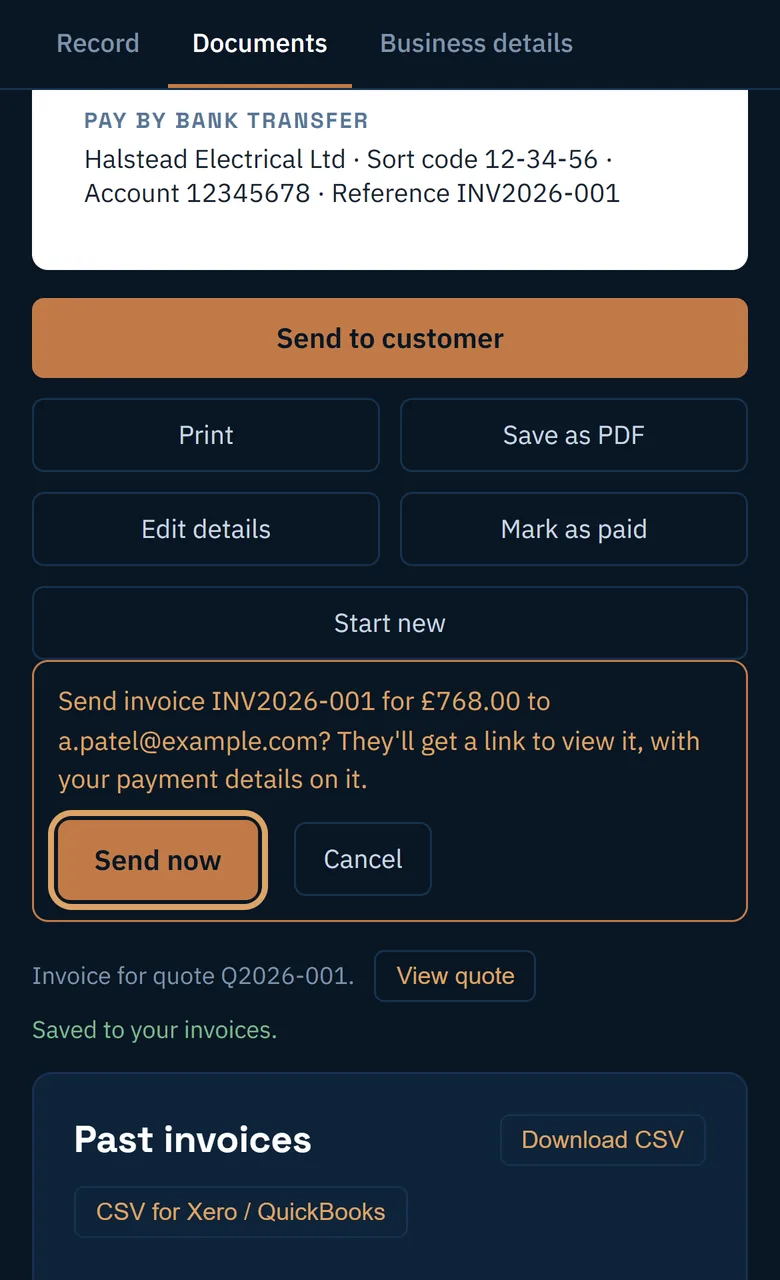
Send the invoice
Tap Send to customer, then Send now. The customer’s link shows the amount due and how to pay.
-
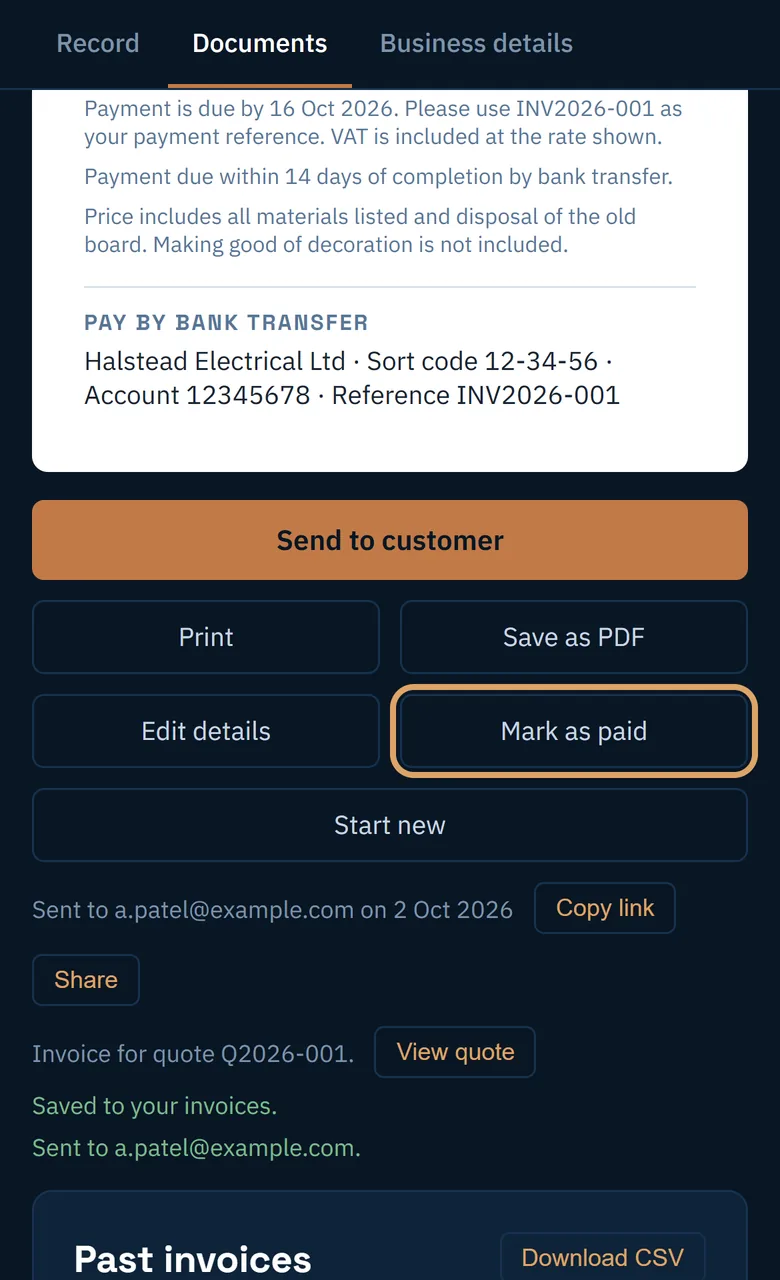
Mark it as paid
When the money arrives, tap Mark as paid. The invoice and your list both show it.
-
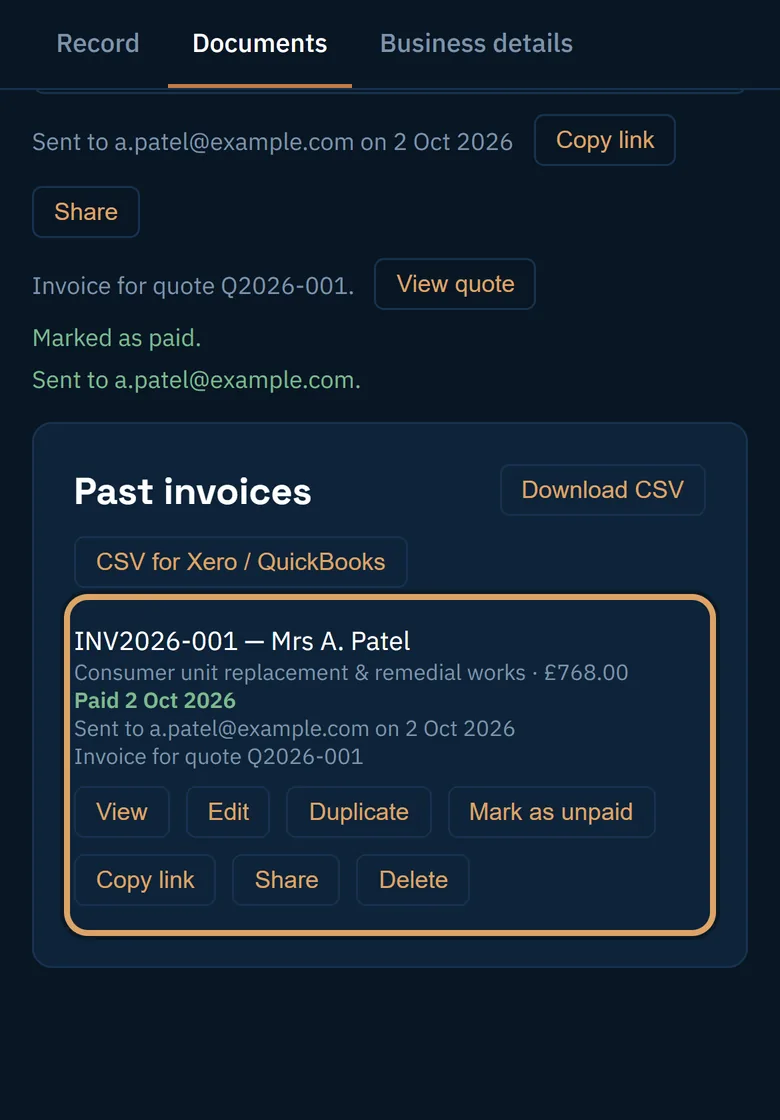
Find any invoice
Documents, then Invoices, lists them all with what is paid and what is still due. Download CSV gives your bookkeeper a spreadsheet of them.
Lesson 4
Deposits, extras and reminders
Ask for a deposit, offer optional extras, and let the app chase a quote for you.
Ten steps, with pictures
-
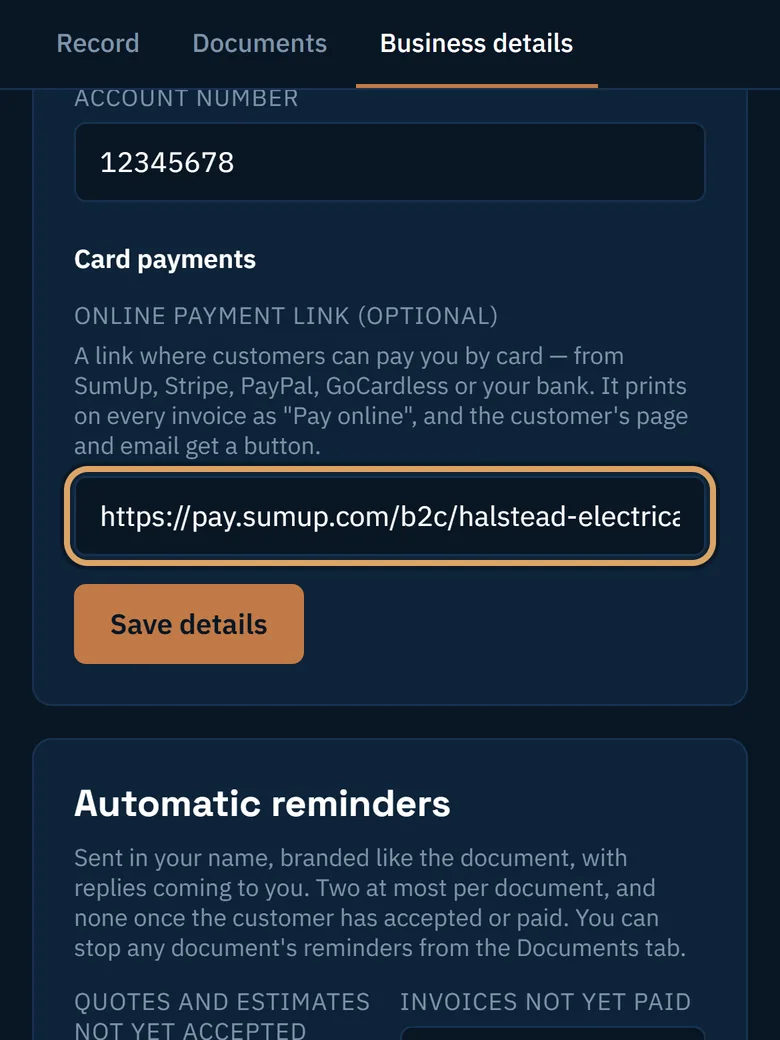
Take card payments with your own link
If you use SumUp, Stripe, PayPal or similar, paste your payment link under Business details, then Terms & pay. Customers get a Pay online button. The money goes straight to you, never through Speak to Quote.
-
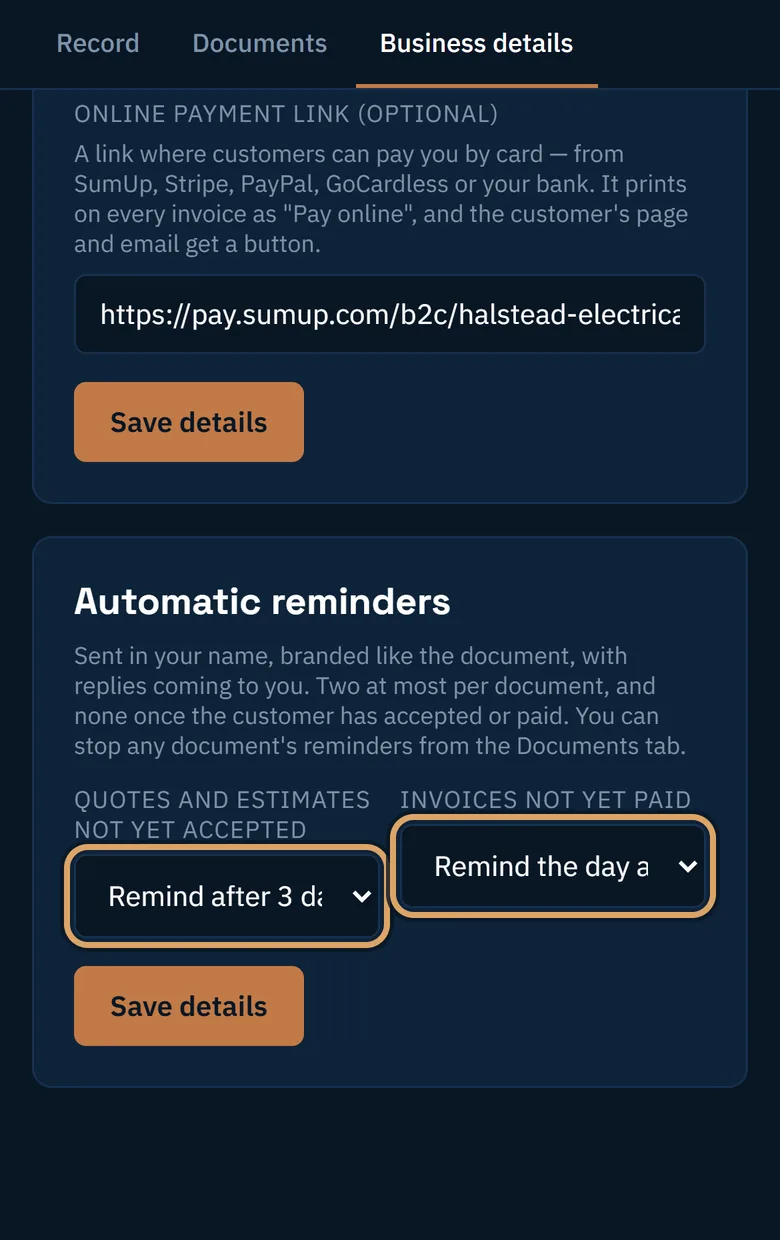
Switch on reminders
On the same page, choose when a reminder goes out for a quote not yet accepted, or an invoice not yet paid. Reminders are off until you switch them on, and no more than two are sent.
-
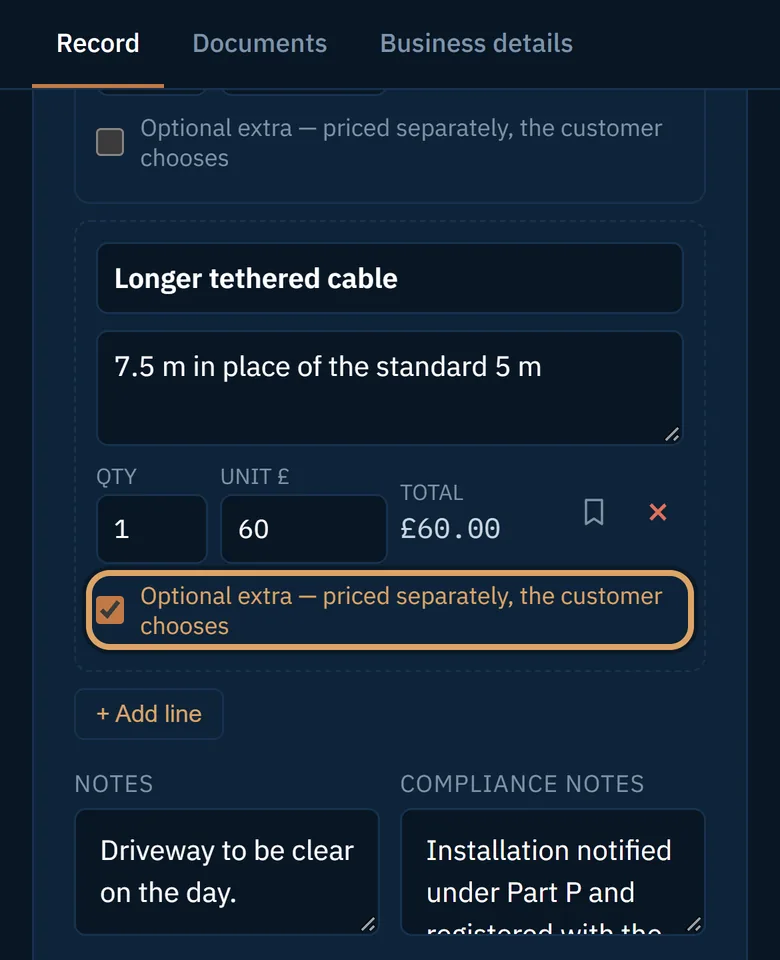
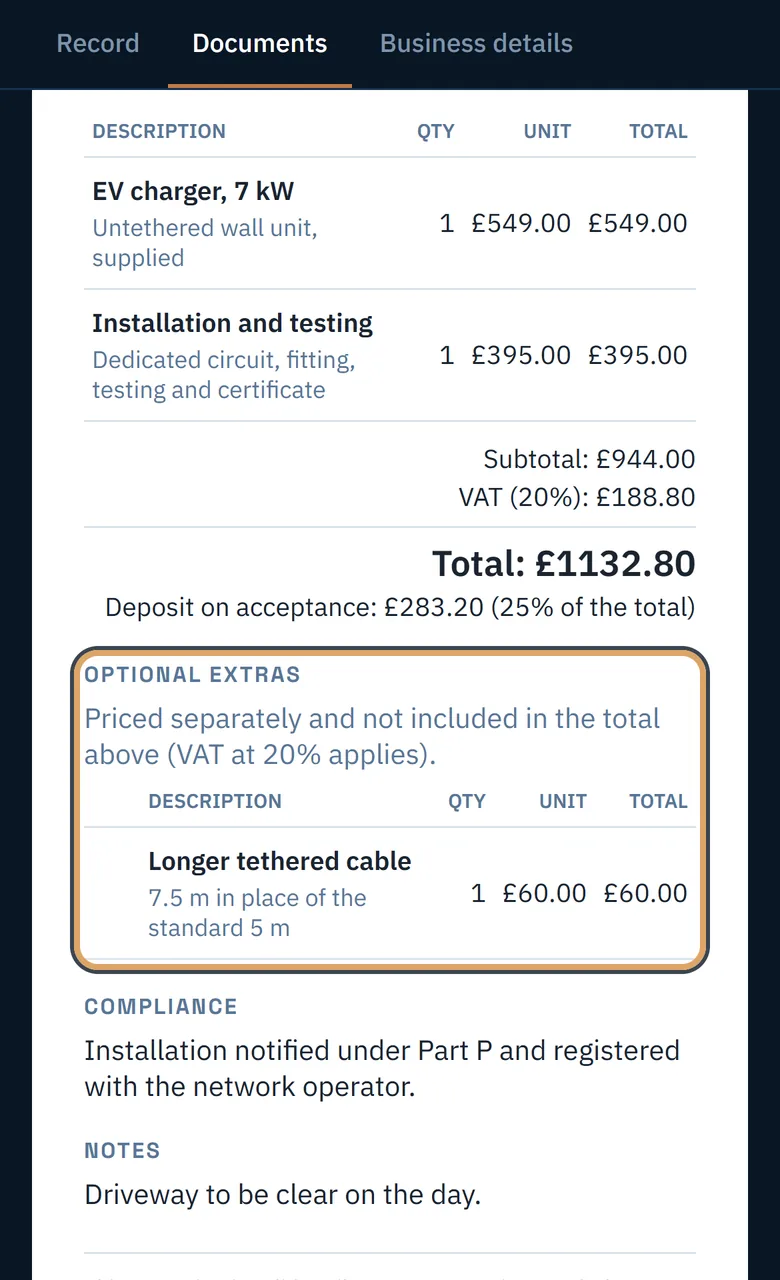
Offer an optional extra
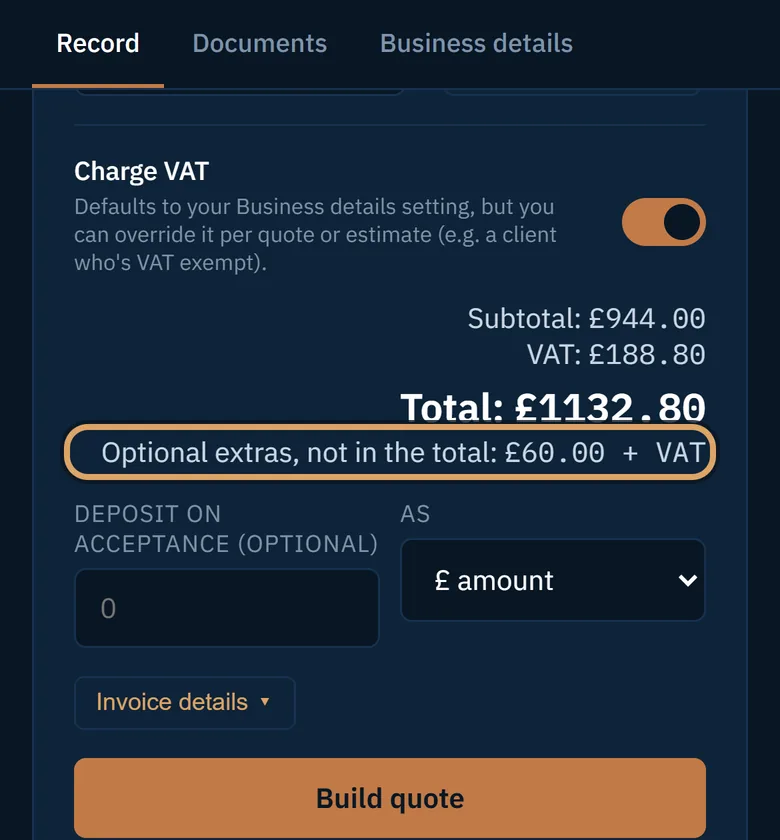
Tick Optional extra on a line. It is priced on the quote but kept out of the total, for the customer to take or leave.
-
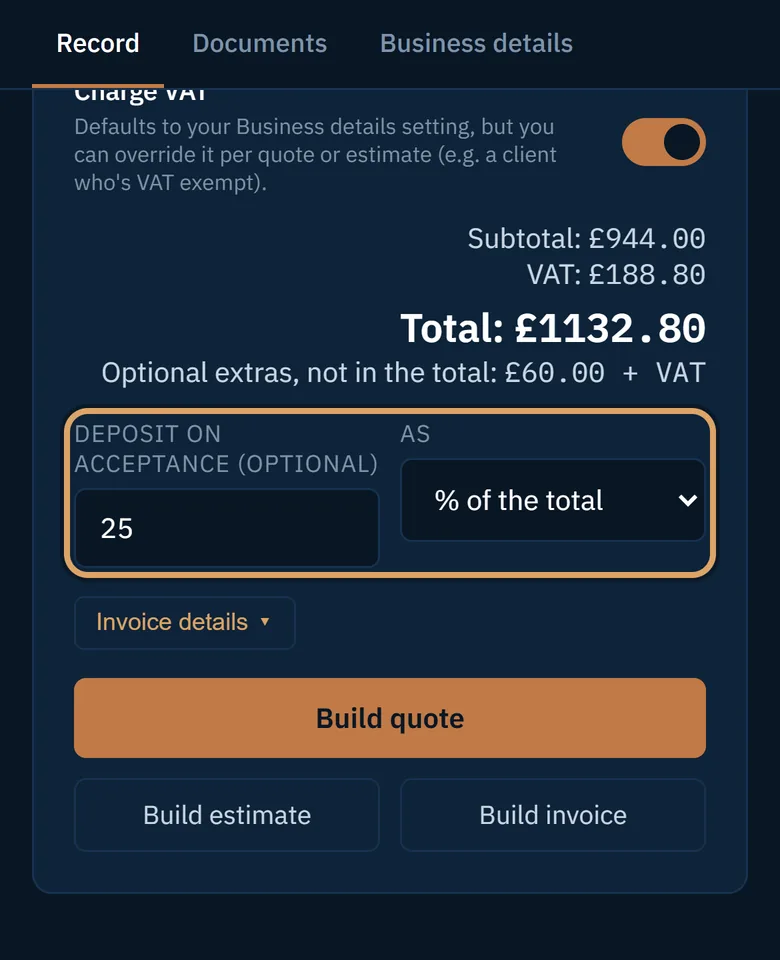
Ask for a deposit
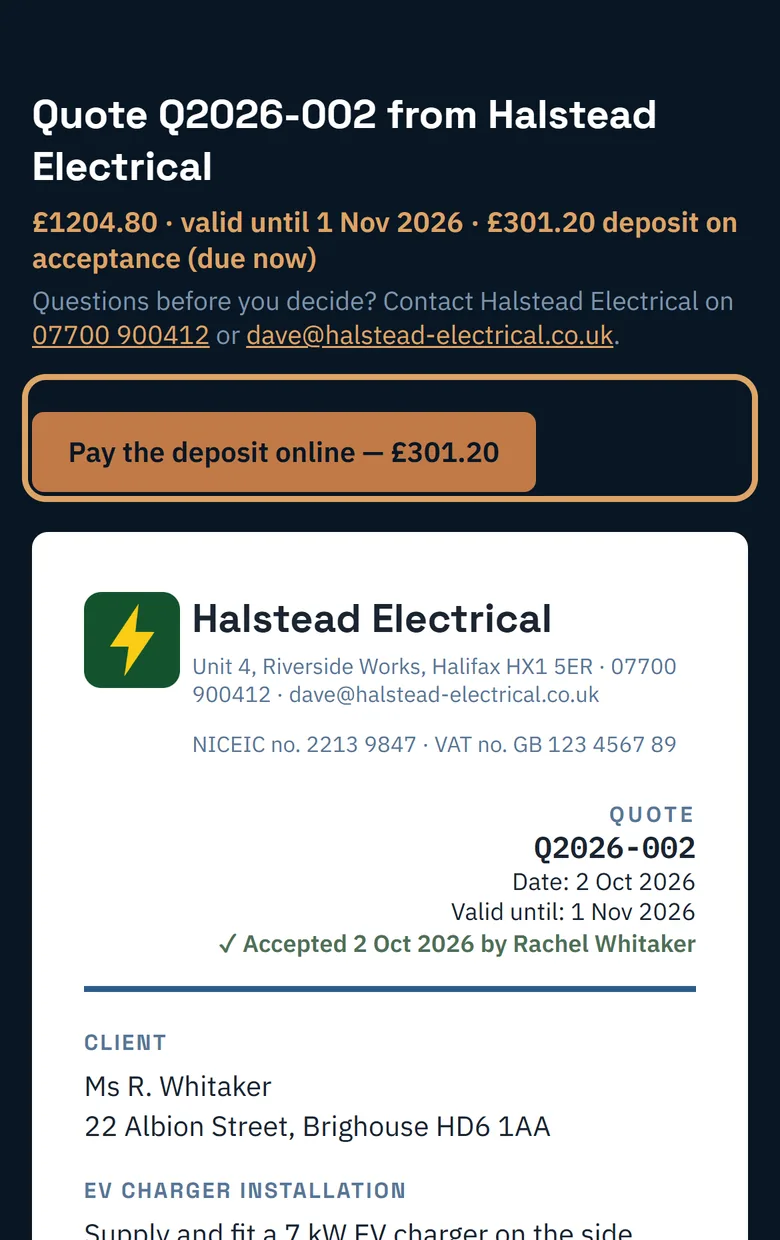
Under the total, enter a deposit as an amount or a percentage. The quote, the email and the customer’s page all show it.
-
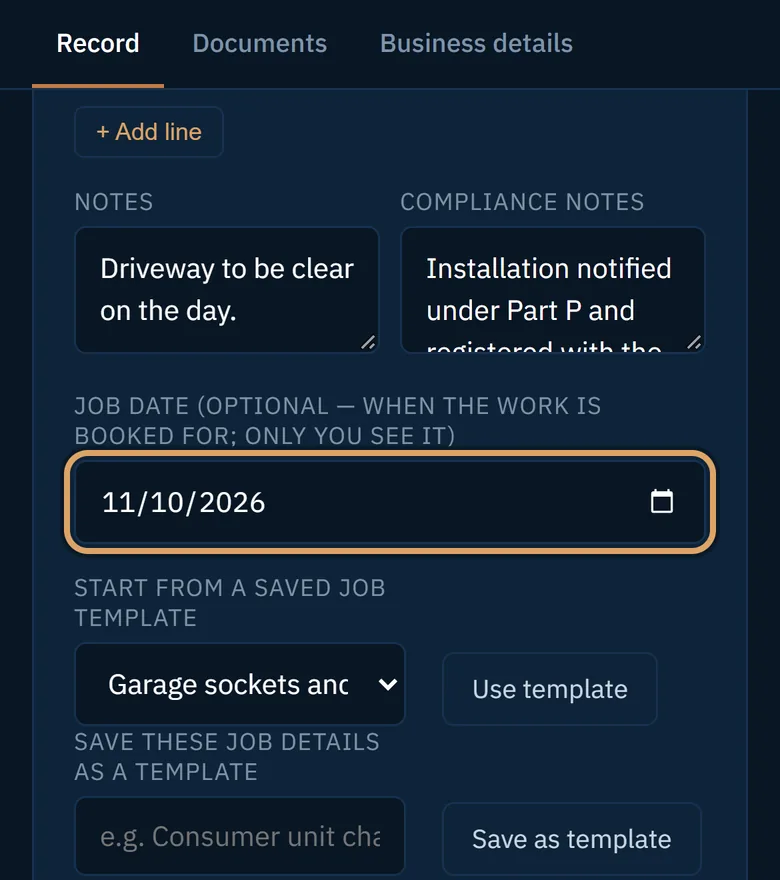
Book the job in
Set a Job date if the work is booked. Only you see it.
-
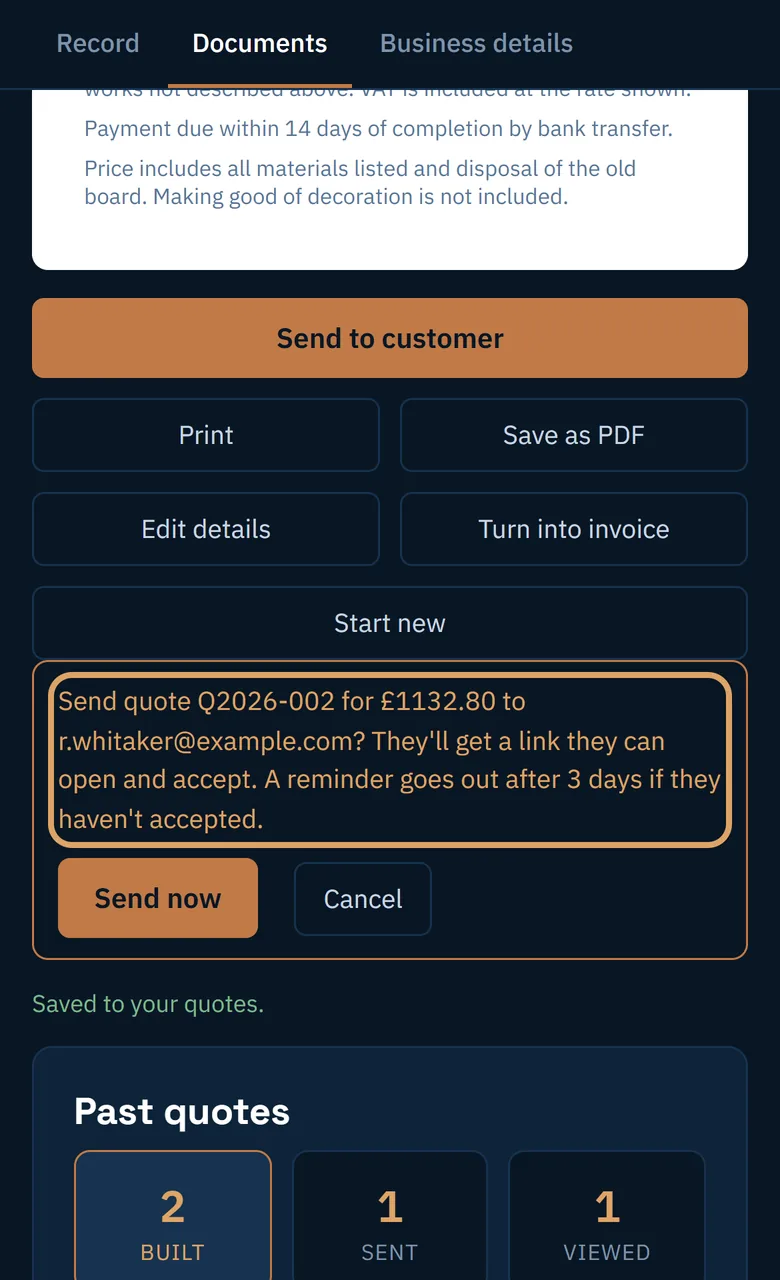
Build and send
The extra sits under the total on the quote. When you send it, the app says that a reminder will follow.
-
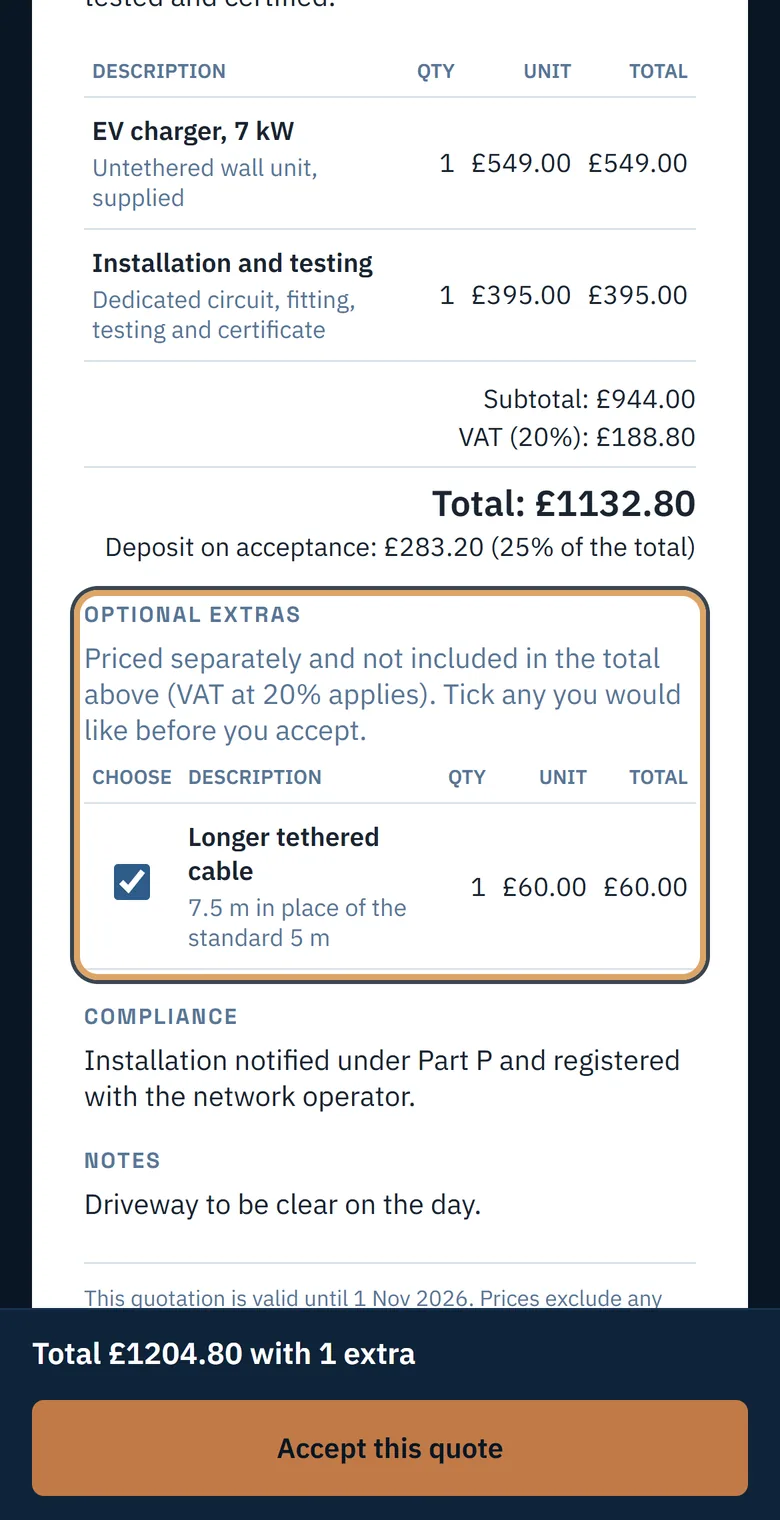
Your customer chooses
On their phone they tick the extras they want, see the new total, and accept. They are then shown the deposit and, if you have a payment link, a button to pay it.
-
Stop a reminder, or share the link yourself
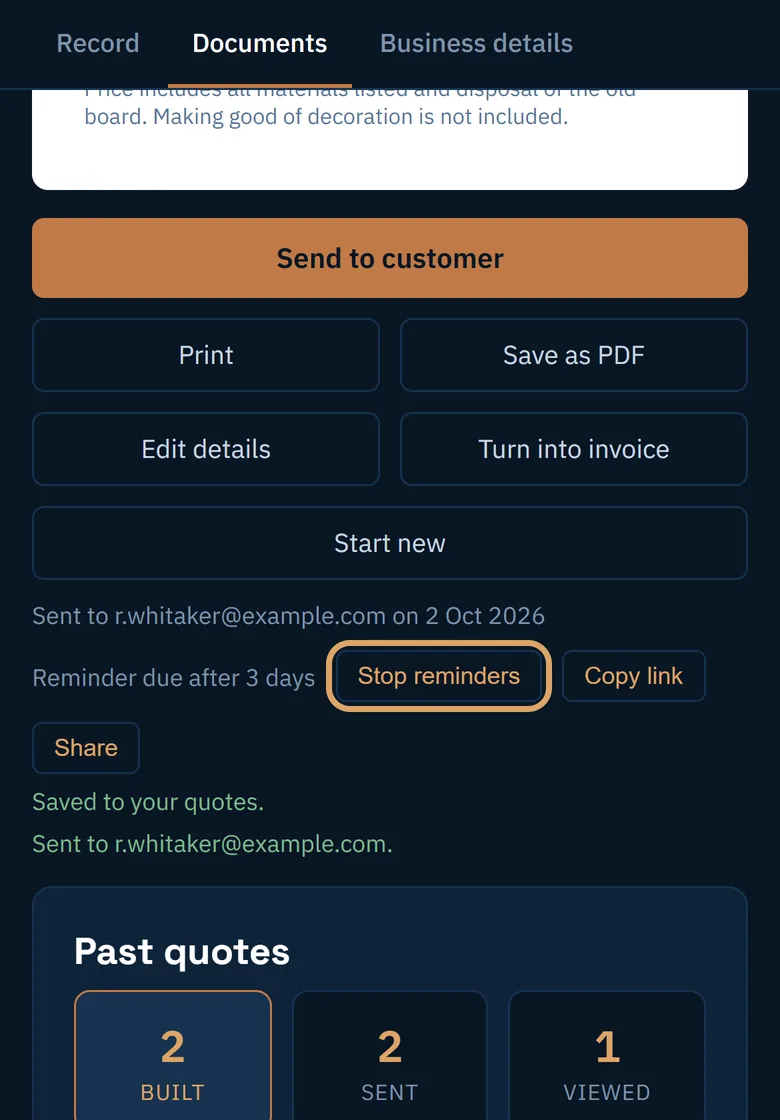
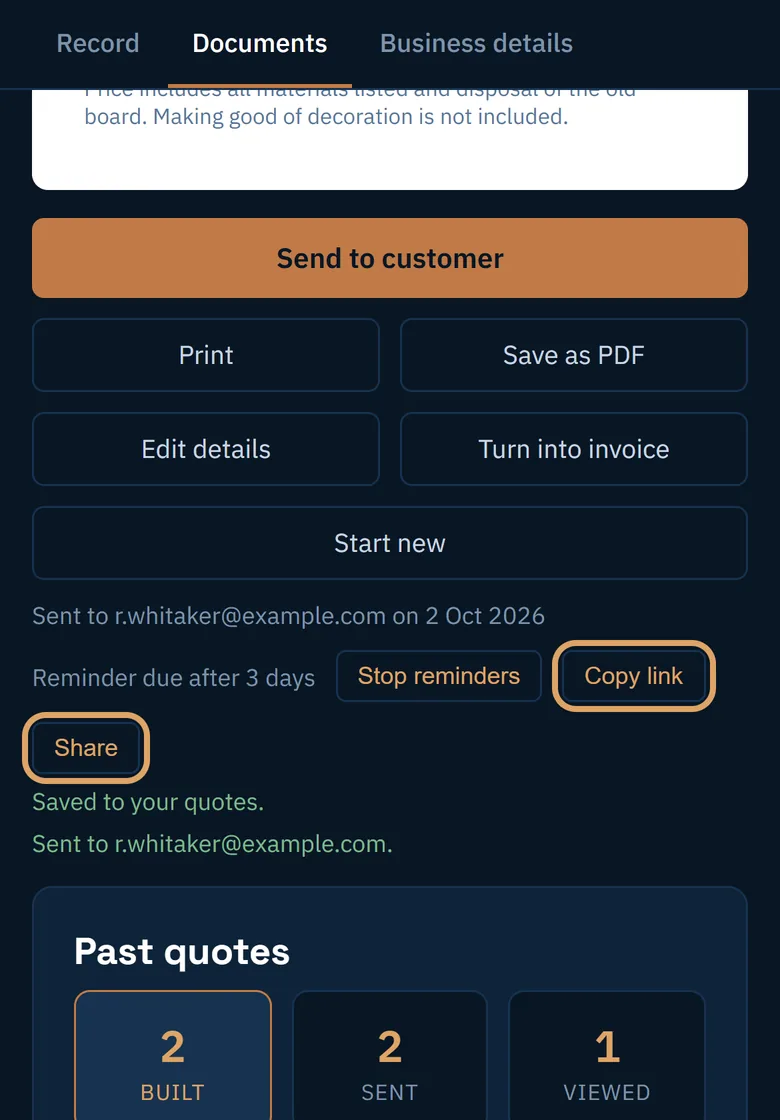
Open the quote under Documents. Stop reminders ends the chasing for that quote. Copy link and Share send the same link by WhatsApp or text.
-
See where every quote stands
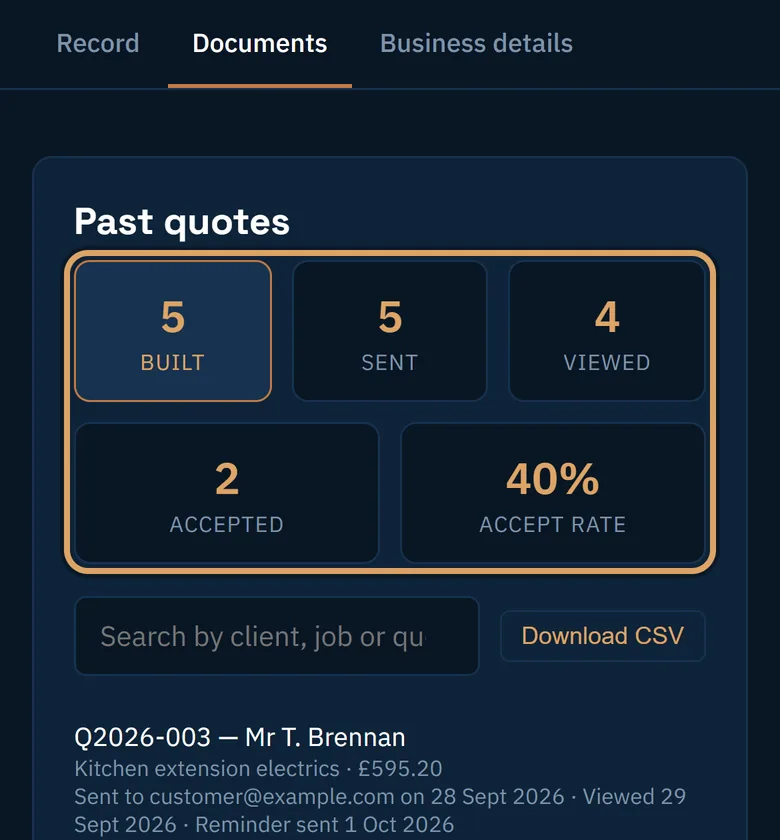
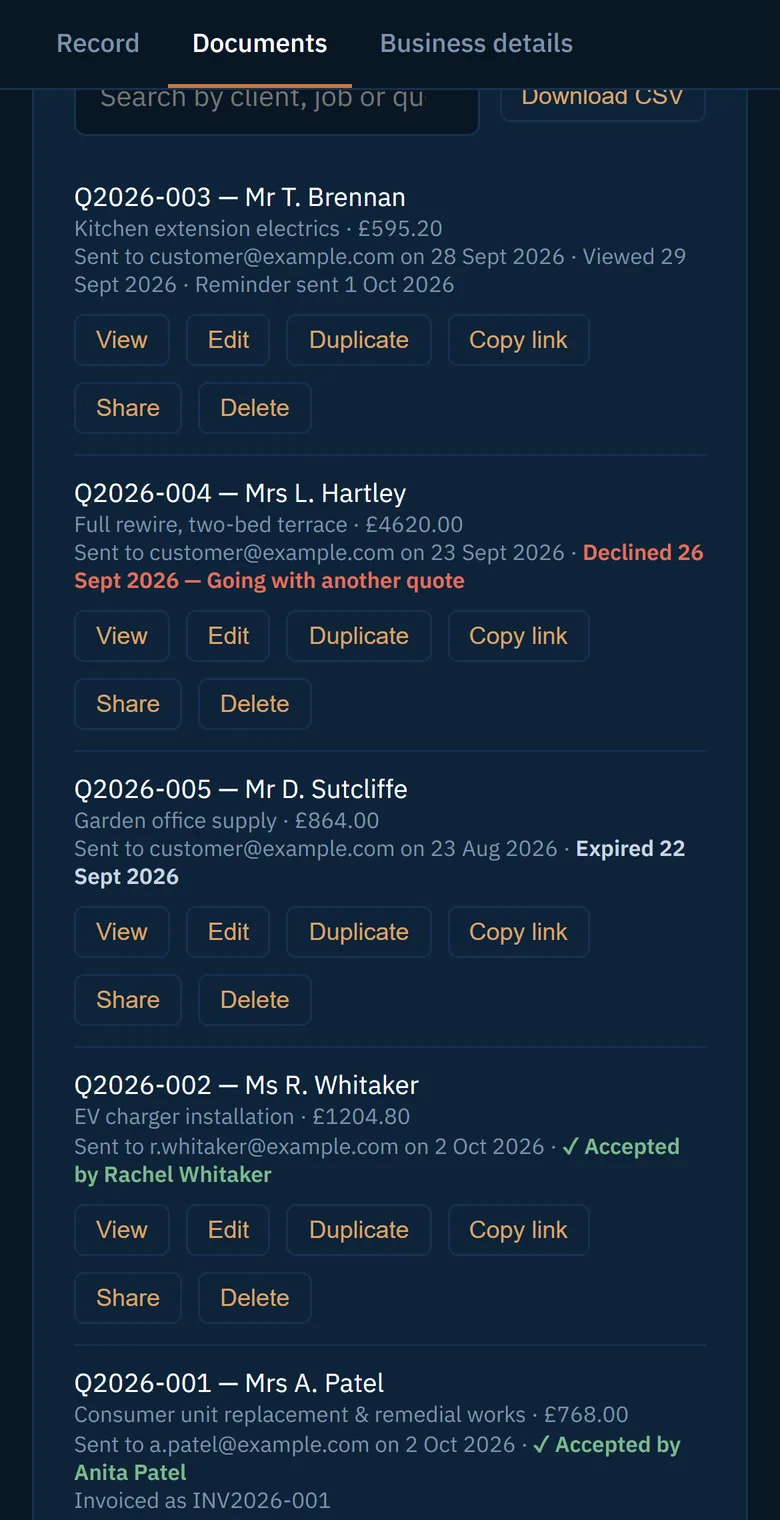
Past quotes counts how many were sent, viewed and accepted, and each quote says whether it was viewed, accepted, declined or has expired.
-
See what is booked
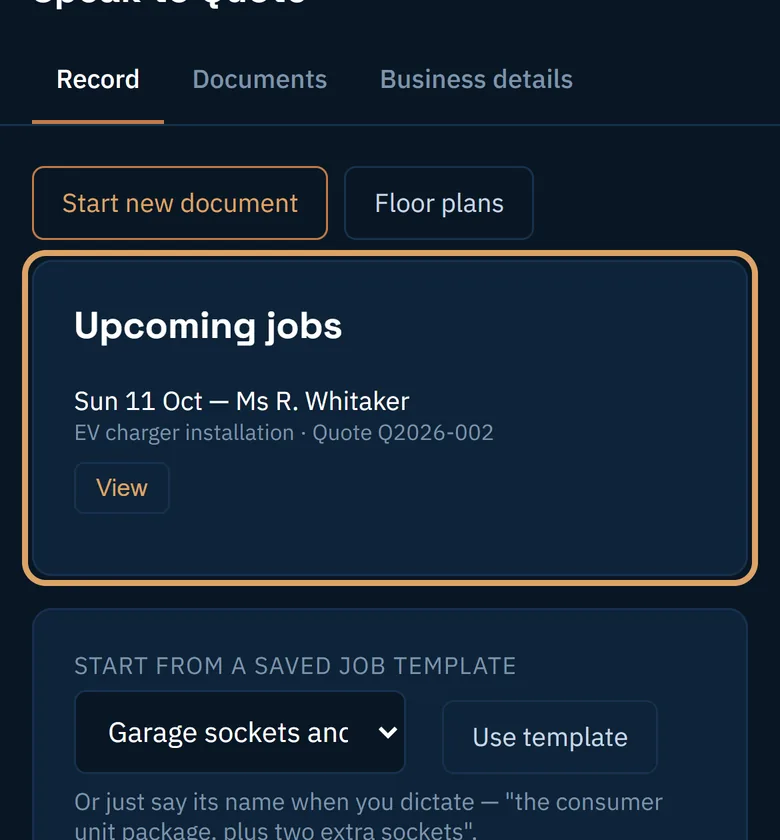
Jobs with a date appear on the Record tab under Upcoming jobs, soonest first.
Lesson 5 · Pro plan
Plans and floor plans
On the Pro plan the AI counts fittings from a drawing, looks up current prices, and works from rooms you measure.
Twelve steps, with pictures
-
Attach the drawing
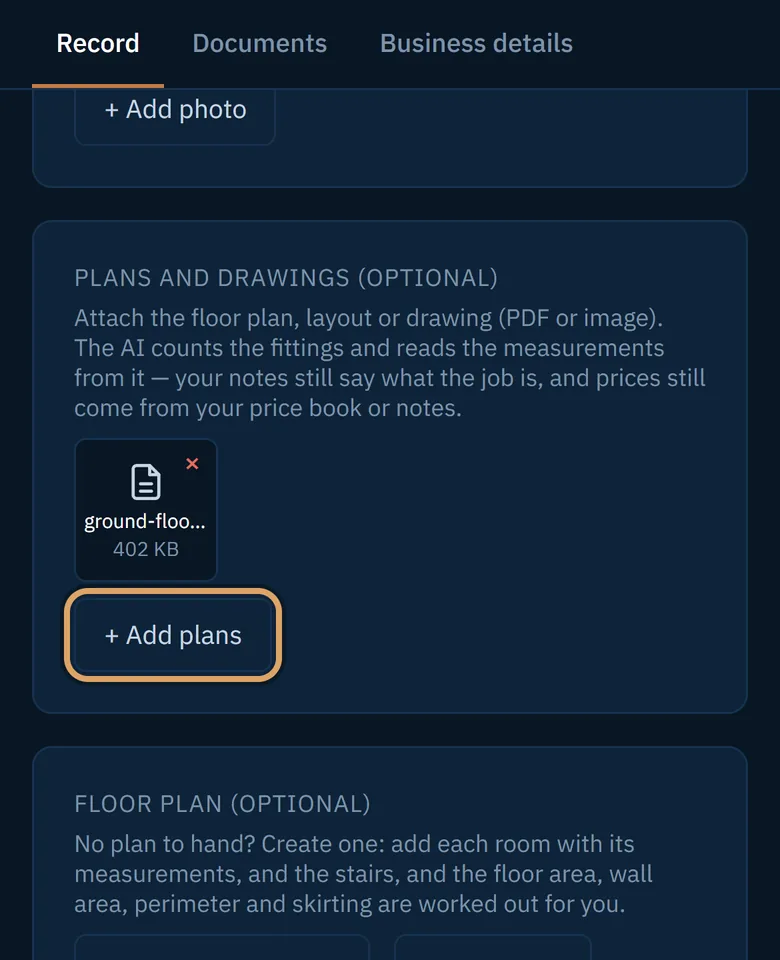
On the Record tab, tap + Add plans and choose the PDF or picture. Then say what the job is.
-
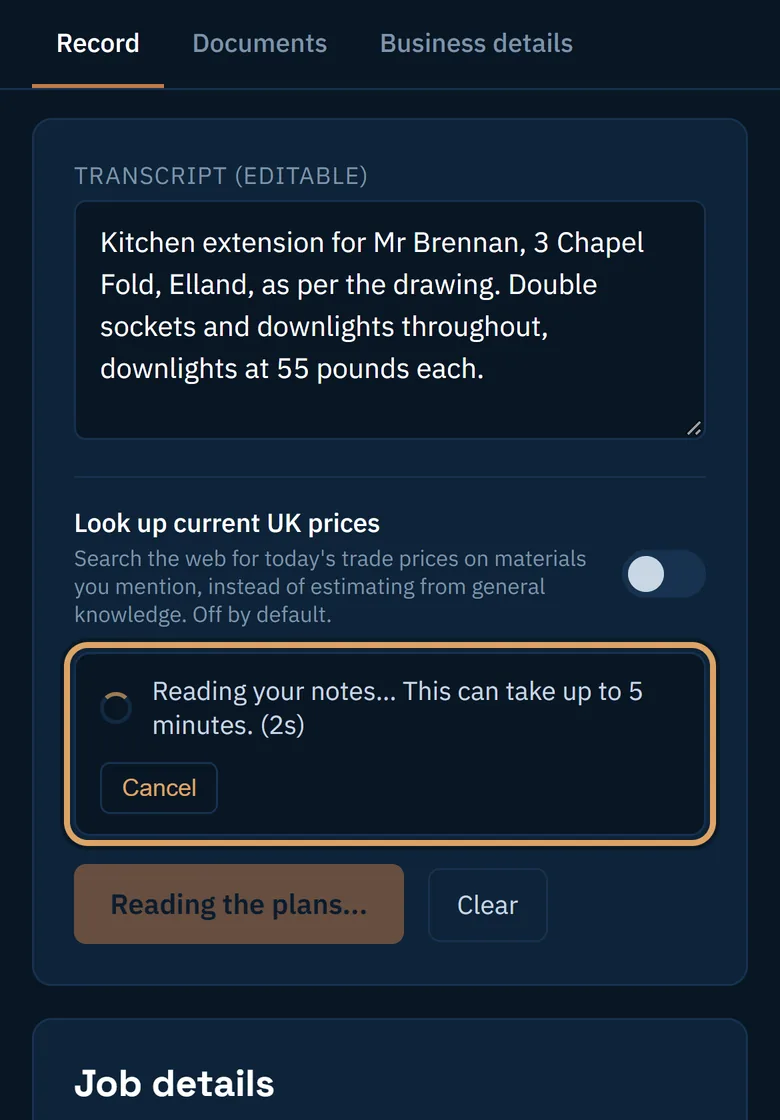
Tap Generate details
Reading a drawing takes longer than notes alone: up to a few minutes.
-
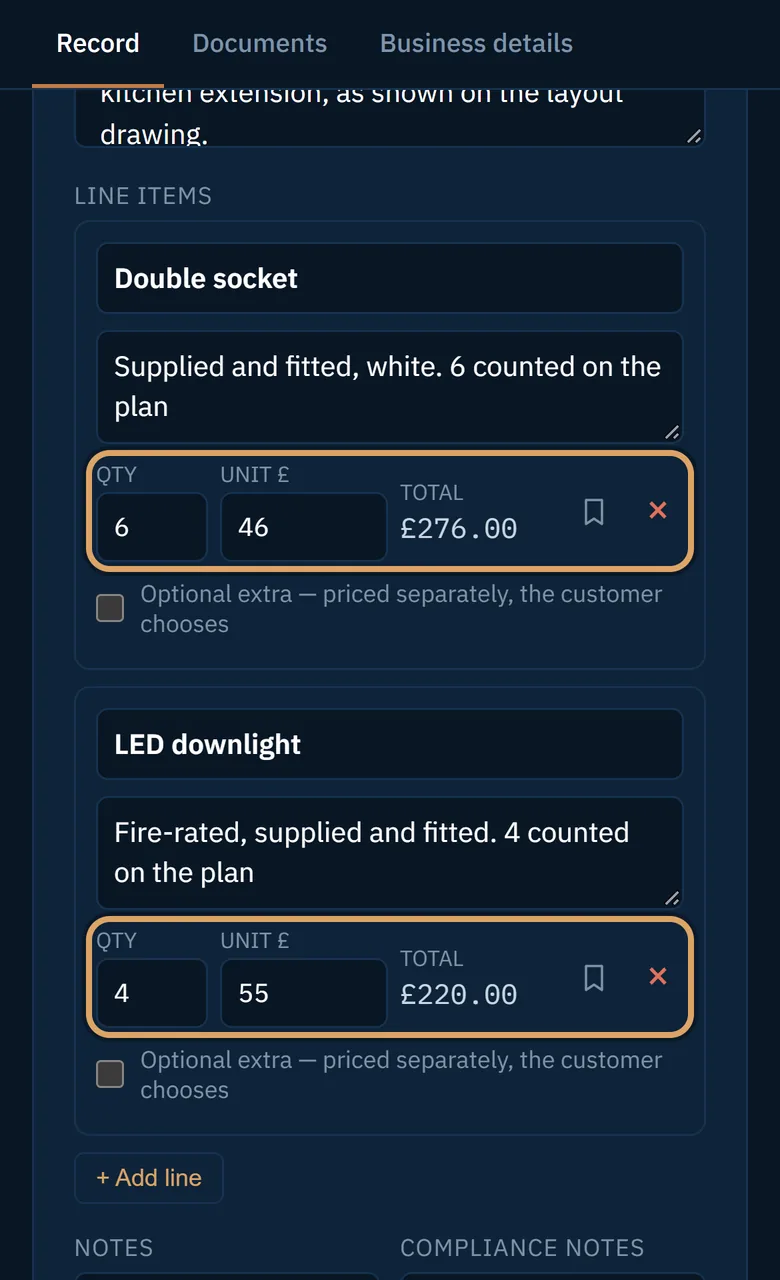
The fittings are counted for you
Quantities come from the drawing. Prices come from your price book or from what you said. Check the counts as you would any line.
-
Look up current prices
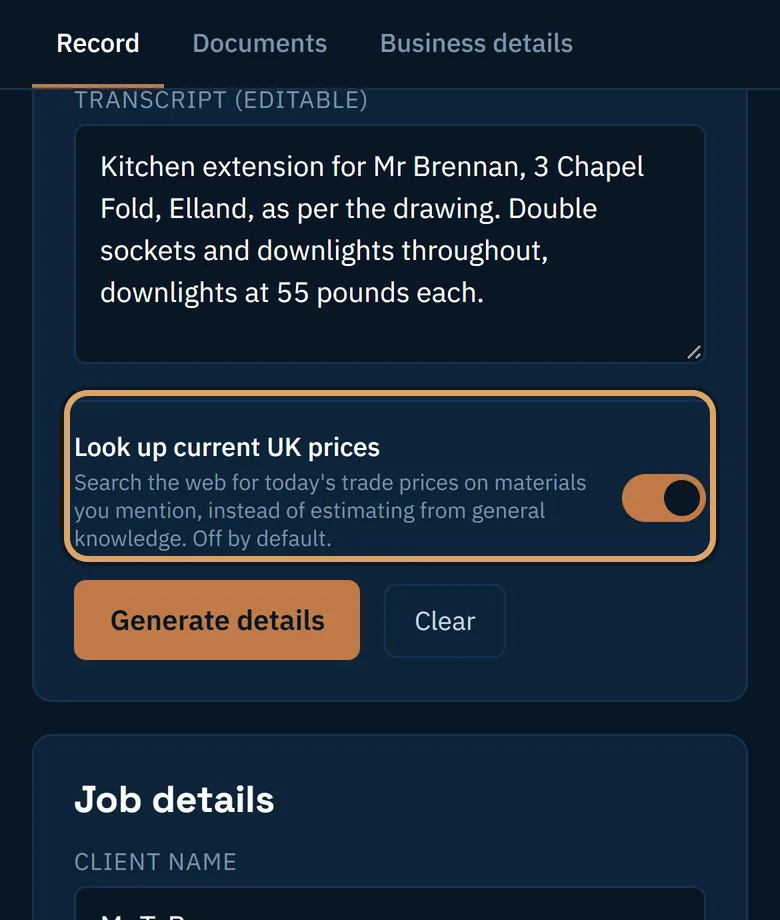
Switch on Look up current UK prices before you generate, and the AI searches today’s trade prices for the materials you mention.
-
No drawing? Measure the room
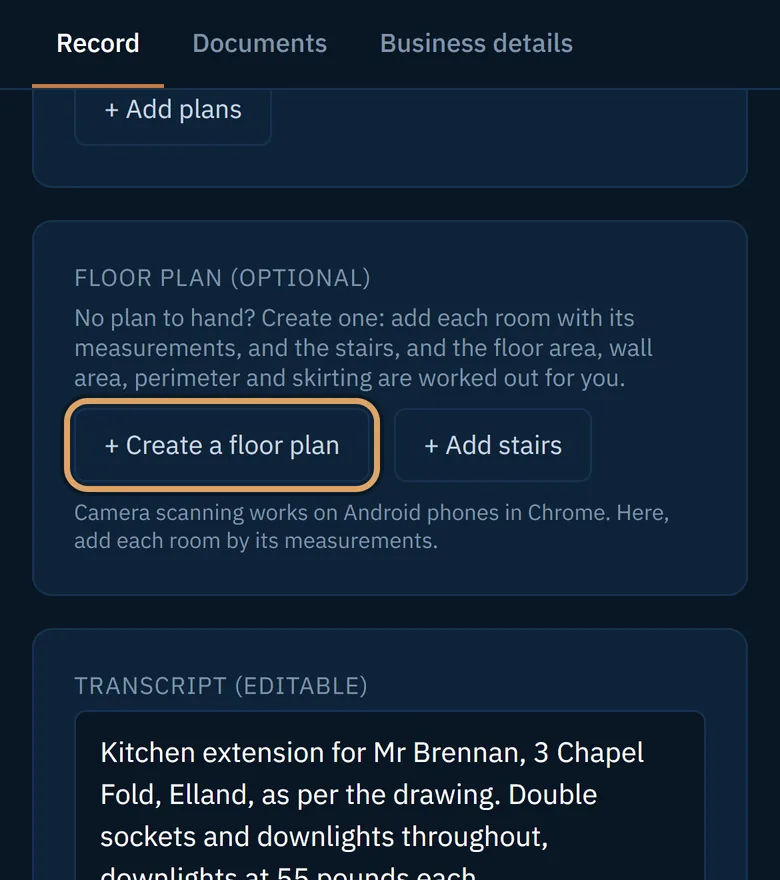
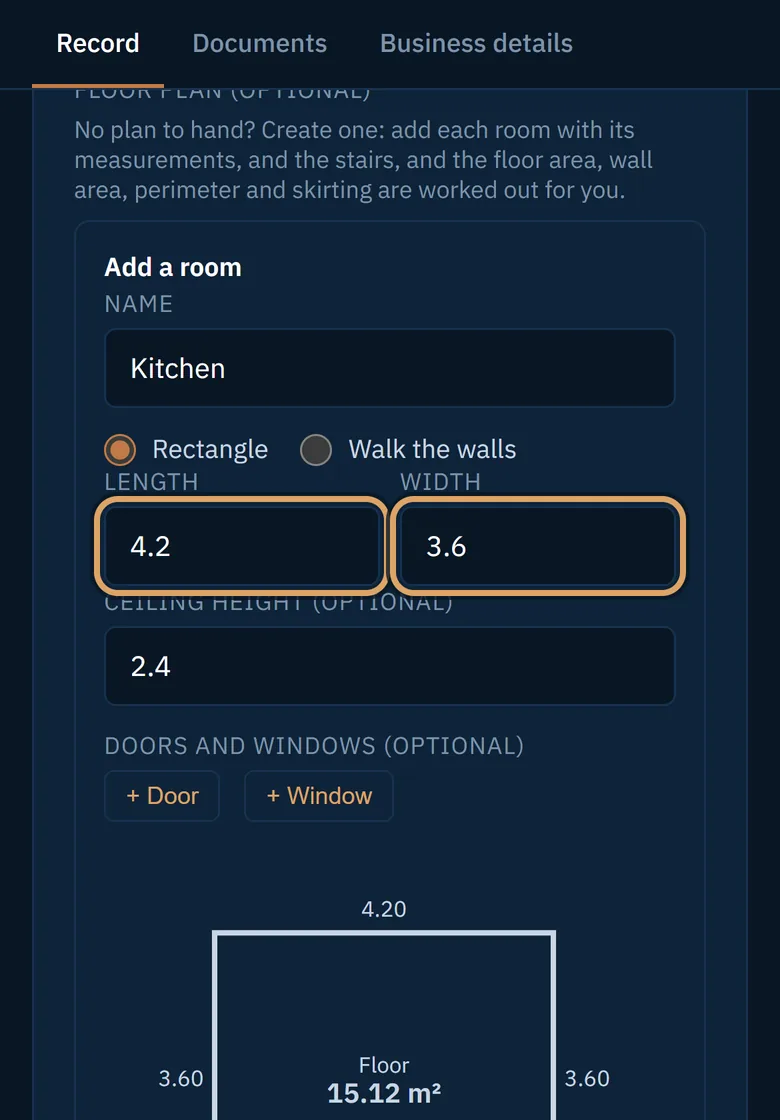
Tap + Create a floor plan, name the room and enter its length and width. Ceiling height is optional.
-
Add doors and windows
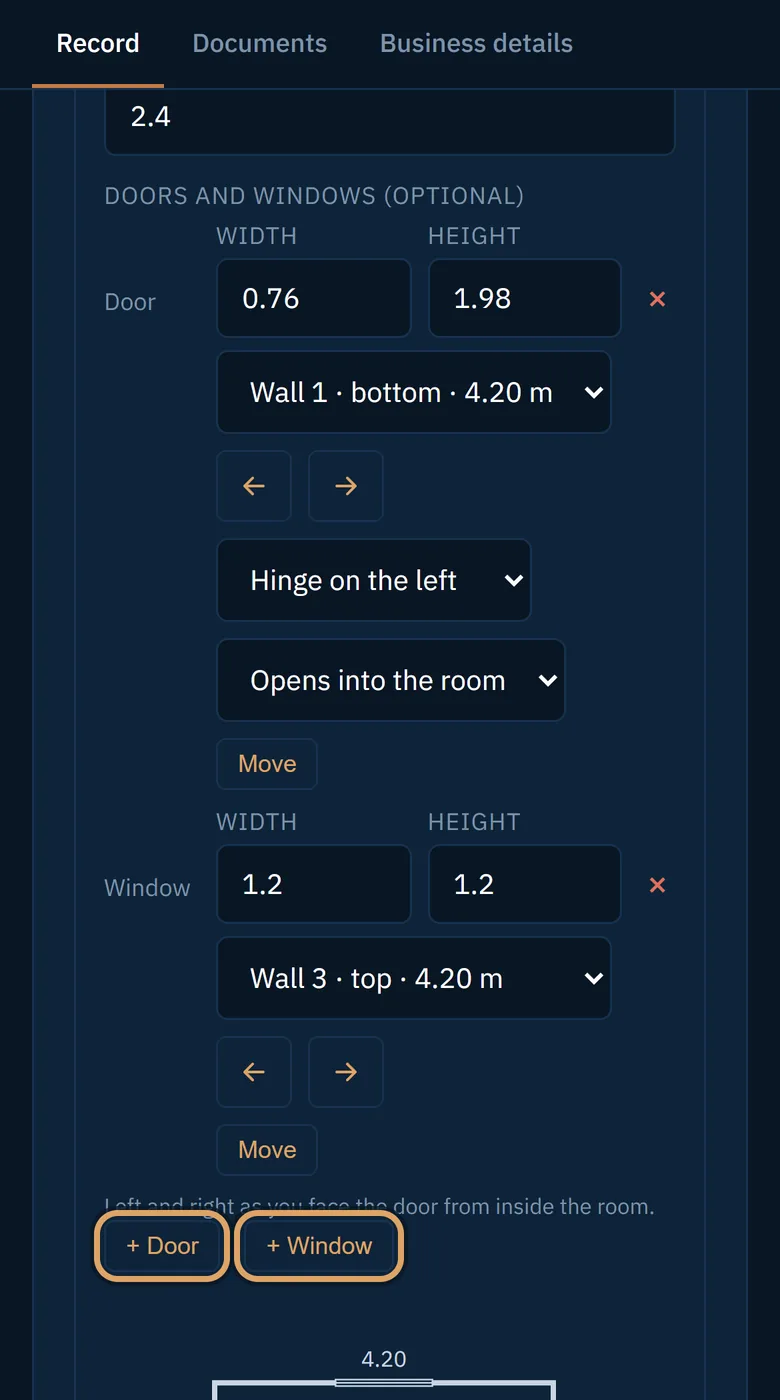
Tap + Door or + Window. Each one is put on a wall for you. Move lets you place it where it really is.
-
Save the room
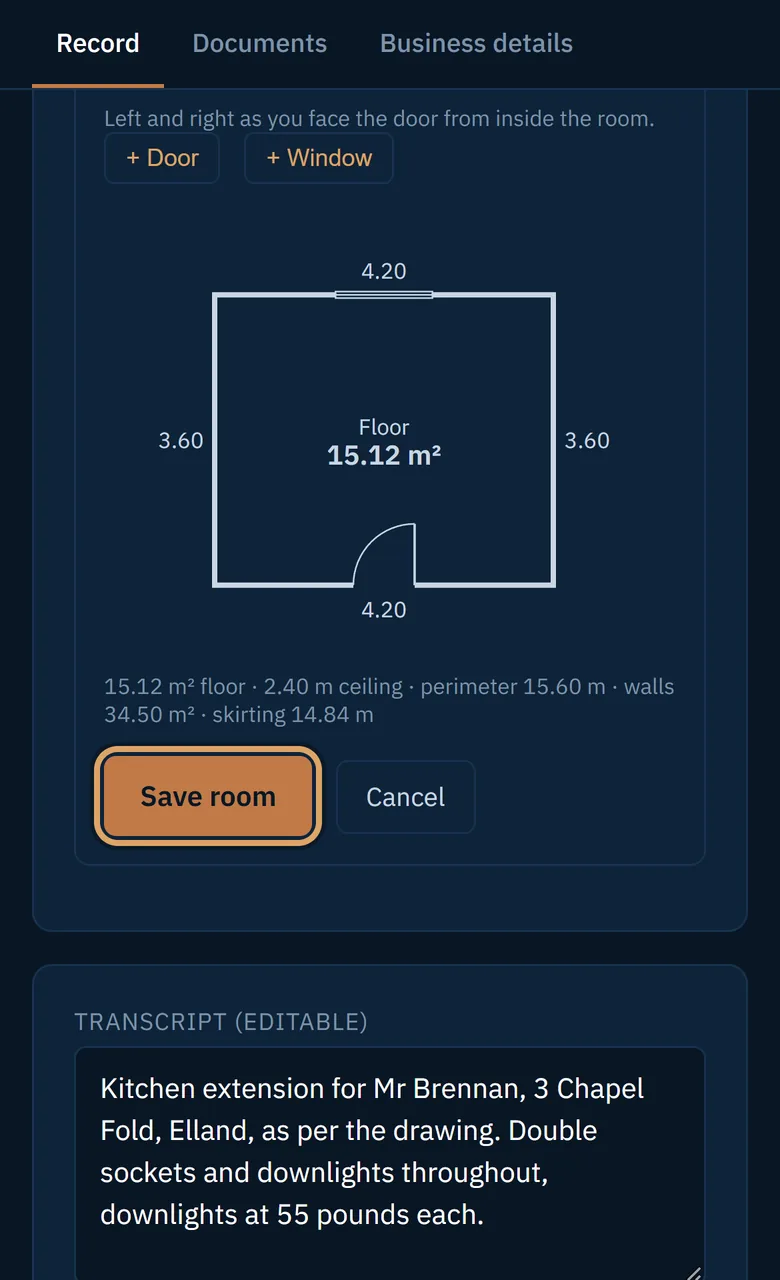
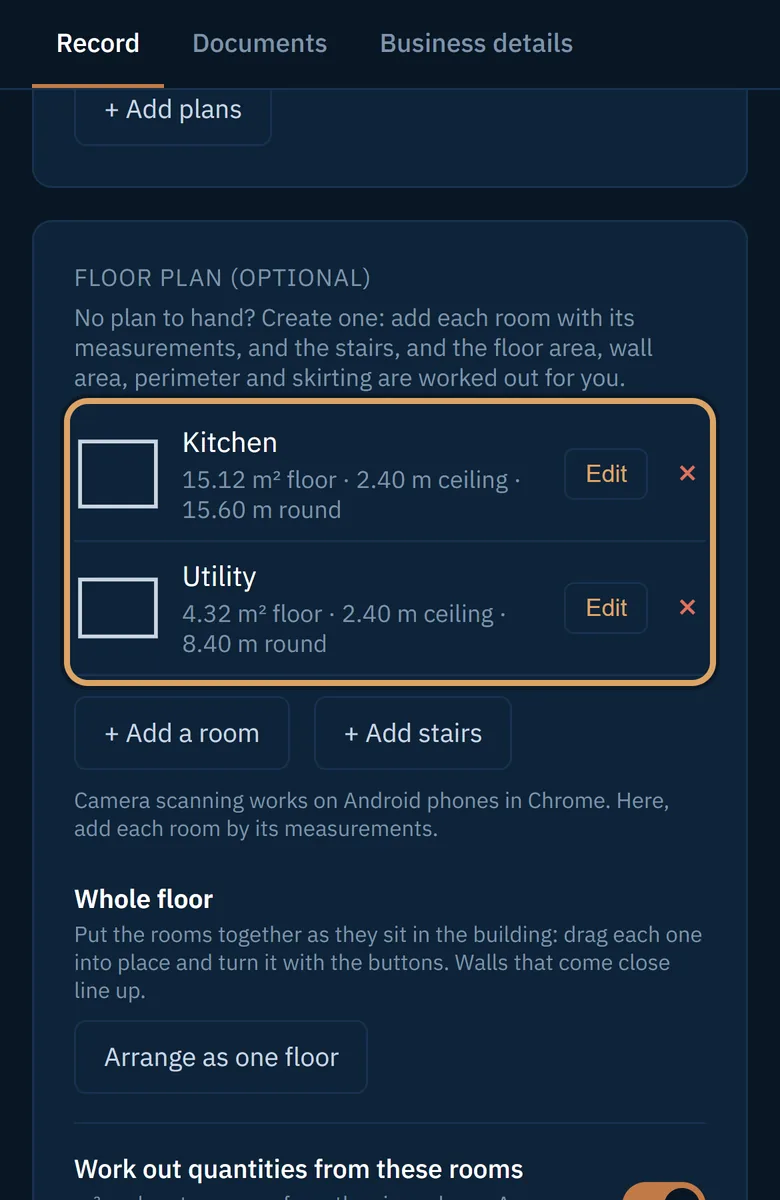
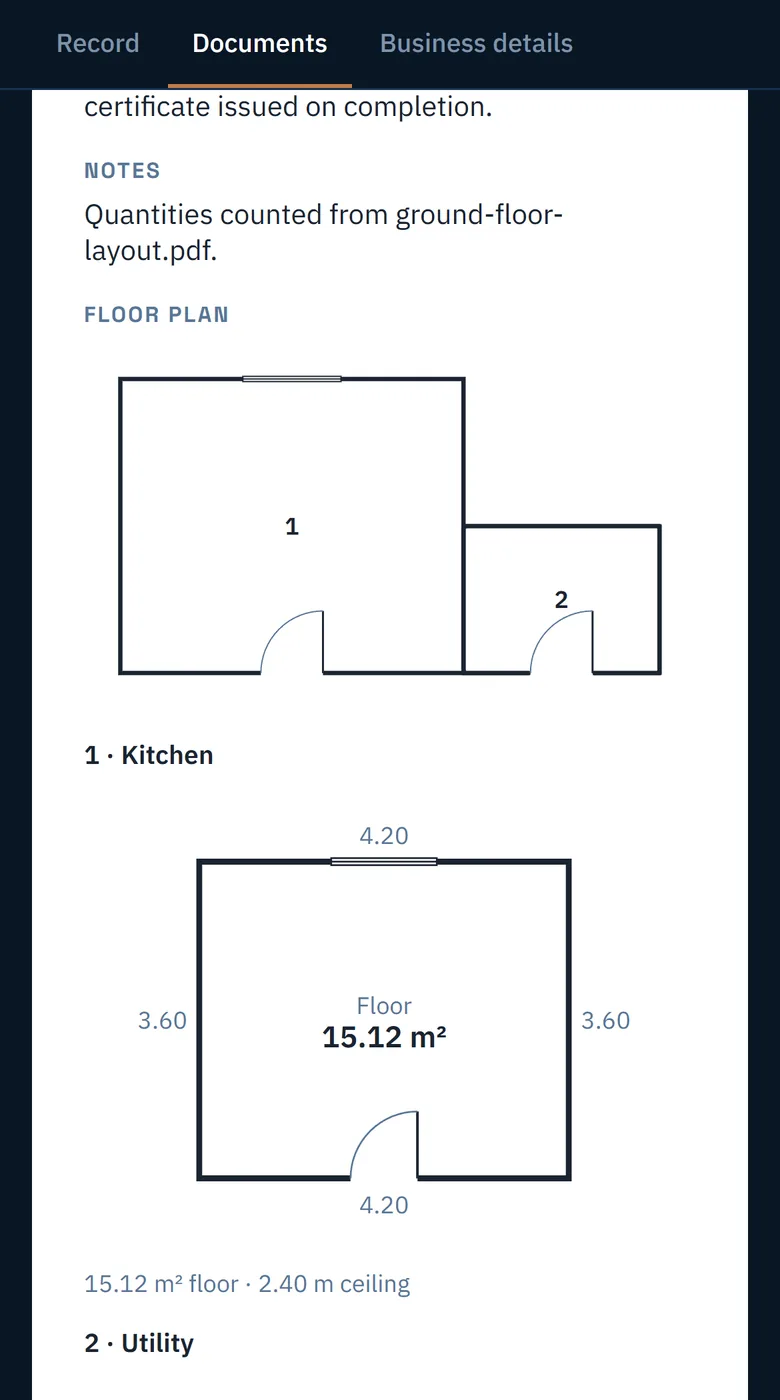
The drawing shows the sizes and the floor area. Tap Save room. Floor area, wall area, perimeter and skirting are worked out for you.
-
Put the rooms together
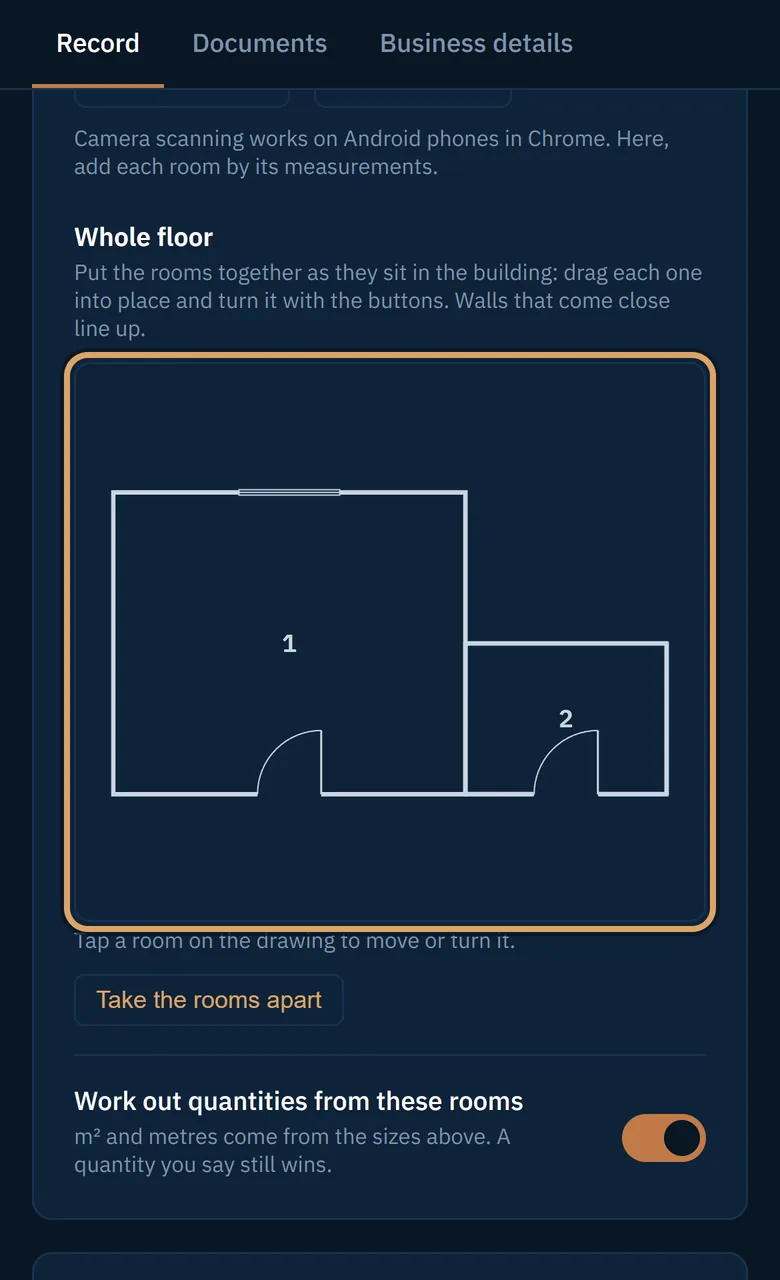
With two or more rooms, tap Arrange as one floor, then drag each room into place.
-
Use the measurements
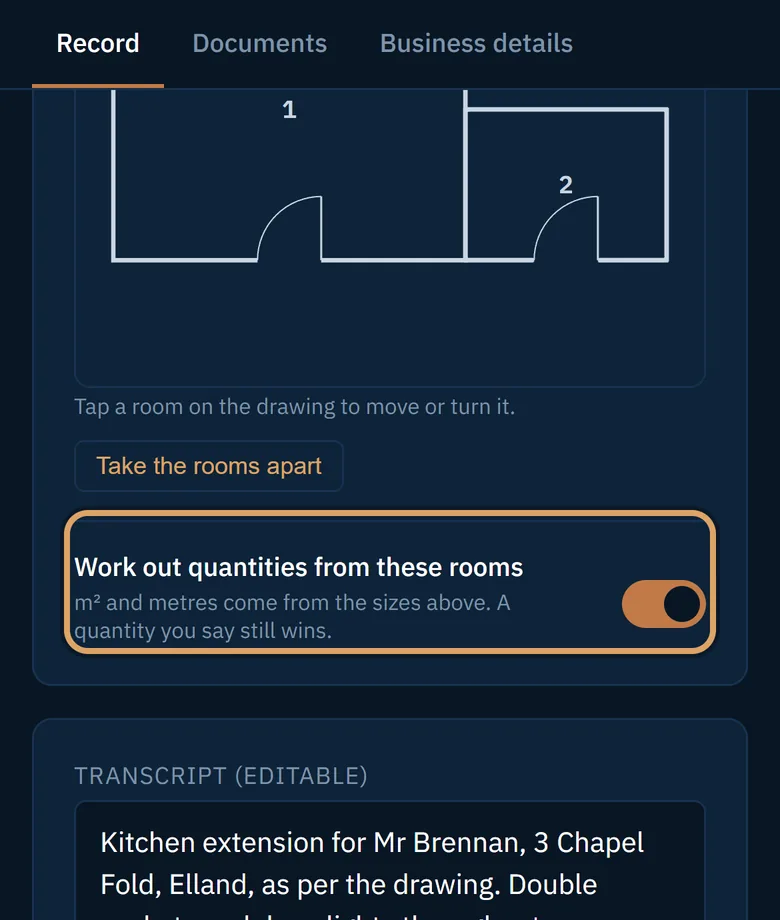
Leave Work out quantities from these rooms switched on, and the AI uses the areas and lengths for quantities such as flooring or skirting. A quantity you say still wins.
-
Show the plan to the customer, if you want
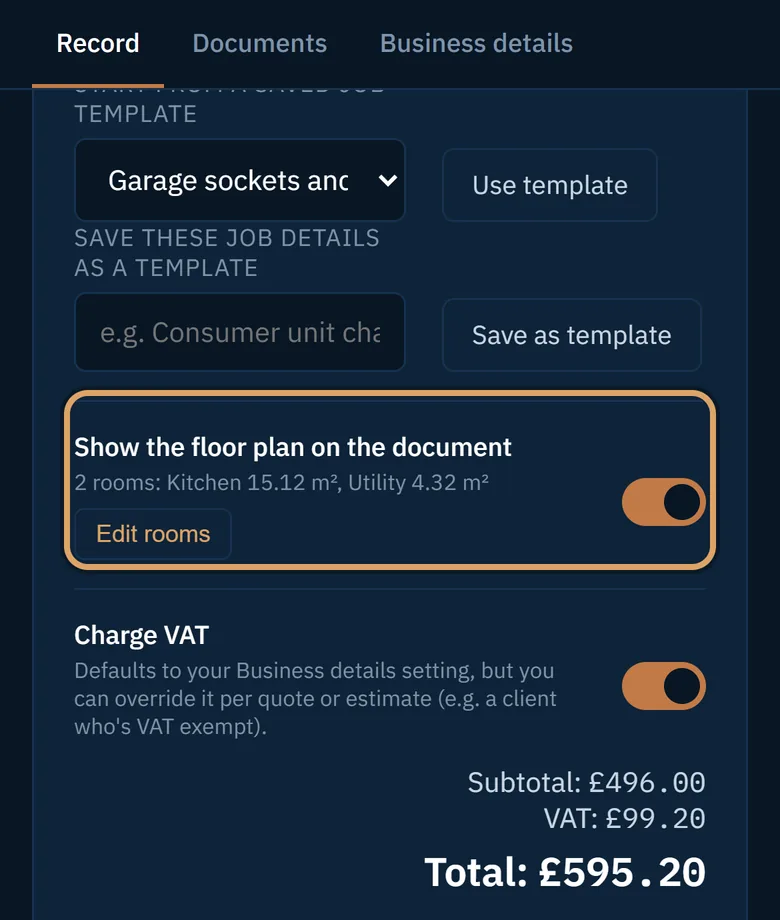
On Job details, switch on Show the floor plan on the document. It stays off unless you choose.
-
Keep floor plans on their own
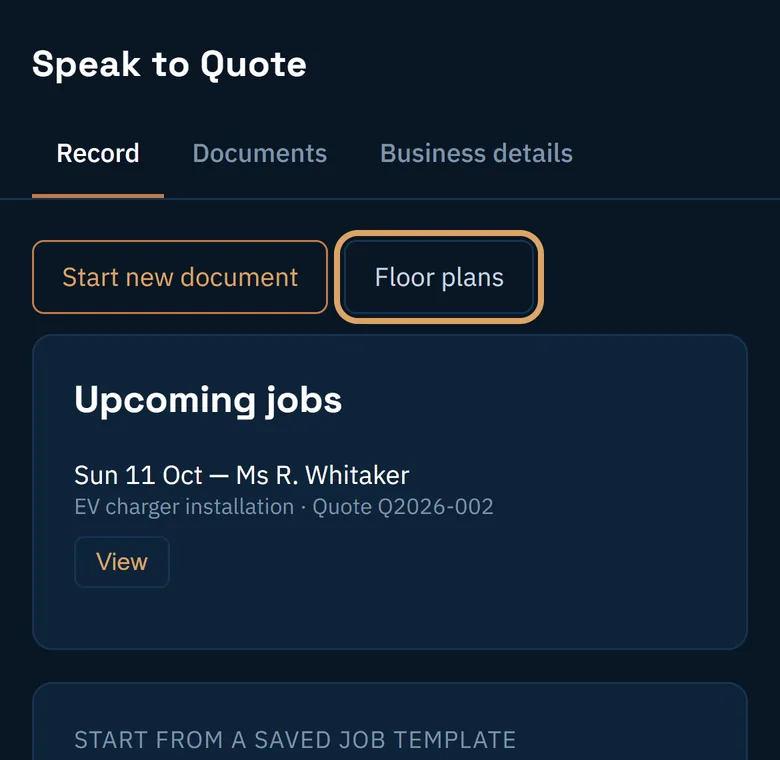
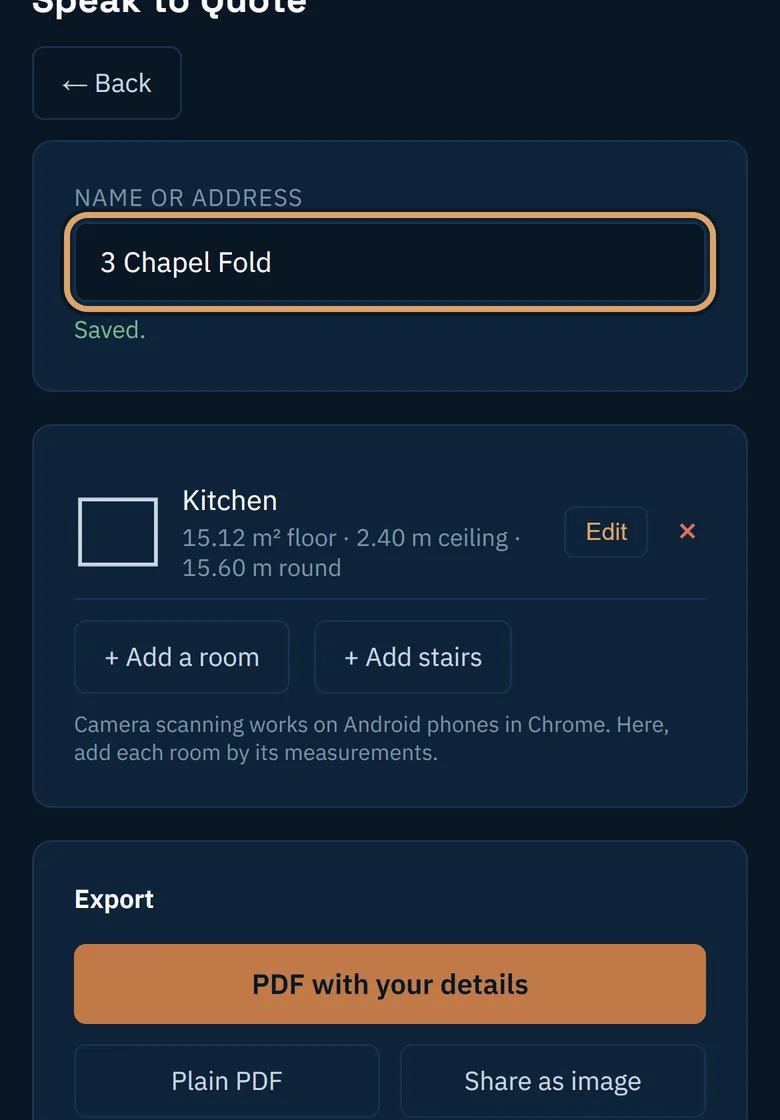
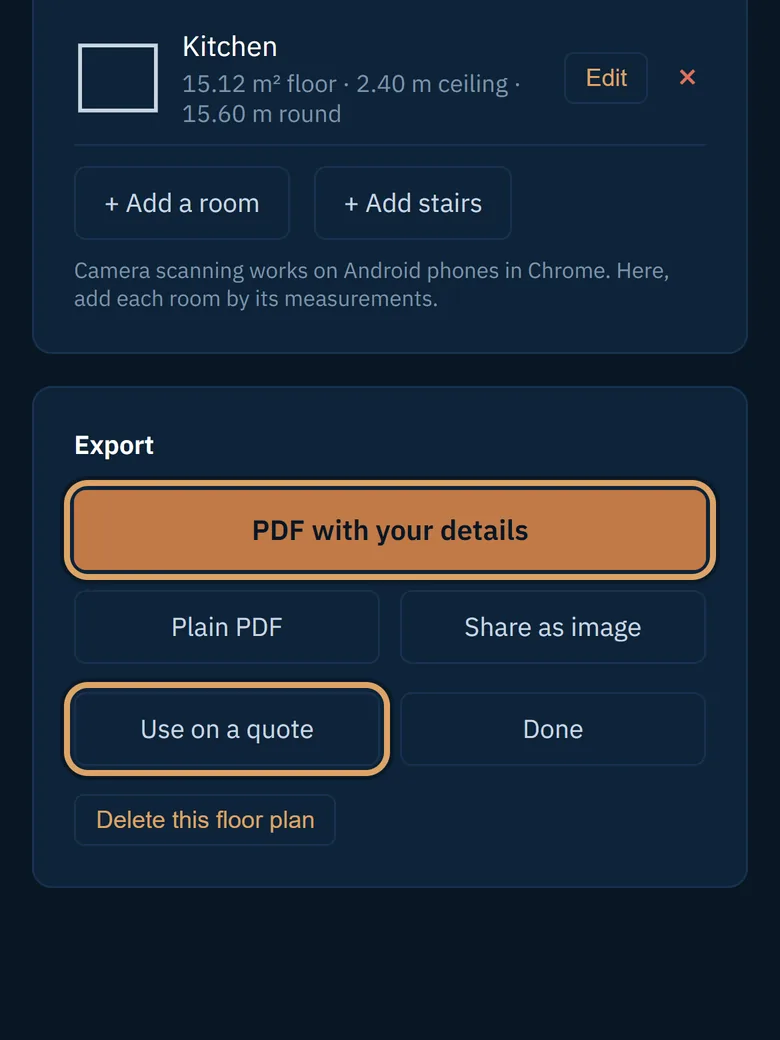
The Floor plans button on the Record tab keeps plans that are not tied to a quote. Name one, export it as a PDF or a picture, or use it on a quote later.
-
Scan a room with the camera
On an Android phone in Chrome, + Scan with camera measures a room as you point at each corner. Treat the result as close, not exact, and check it against your tape.
Good to know
- The app can show you round
- A new account gets a short tour that points at each step of a first quote. To take it again, go to Business details, then Account, and tap Take the tour on the Help and support card.
- You can type instead of talking
- Everything the mic does, the keyboard does too. Type the job into the Transcript box, or straight into Job details.
- Speak your own language
- Under Business details, choose a Dictation language. You speak in it, and your quotes still come out in English.
- Put the app on your home screen
- Under Business details, then Account, look for “Put it on your home screen”. It appears when your phone can do it, and the app then opens full screen like any other.
- Print it or save a PDF
- Every quote, estimate and invoice has Print and Save as PDF buttons under it.
- Nothing is lost if you stop halfway
- An unfinished job is kept on your phone. When you come back, the app offers to restore it.
- Light or dark
- The app follows your phone’s setting. To change it, go to Business details, then Account, then Appearance.